Setup Guide
4 simple, but very important steps to complete your website setup!
If you are missing any of these key steps, you will see "Setup Guide" in the navigation bar.
The average account can be setup in less than 20 minutes!
1. Complete Website Information
Ignite will use the website information provided in all of its engagements. You should ensure that you have complete and accurate information regarding the Business name, address, and phone number as well as design information like website primary color & logos.
2. Setup Lead & Conversion Notifications
As visitors convert through the Ignite engagements, the platform needs a way to notify team members at the business of the conversions. We support multiple lead formats and can quickly build new ones if the one you need isn't listed.
Set up Leads and Notifications - This is where you'll enter the client's CRM address as the fallback address. As long as it's a CRM address and not a personal email you can leave the format as ADF. If it's a personal or traditional work email address you'll want to set the lead format to "Text"
3. Create Offers
Offers are one of the primary forms of content that the platform uses to drive engagement. Most of the engagement tactics cannot run without offers.
You will need to create at least 1 offer for this step to be completed.
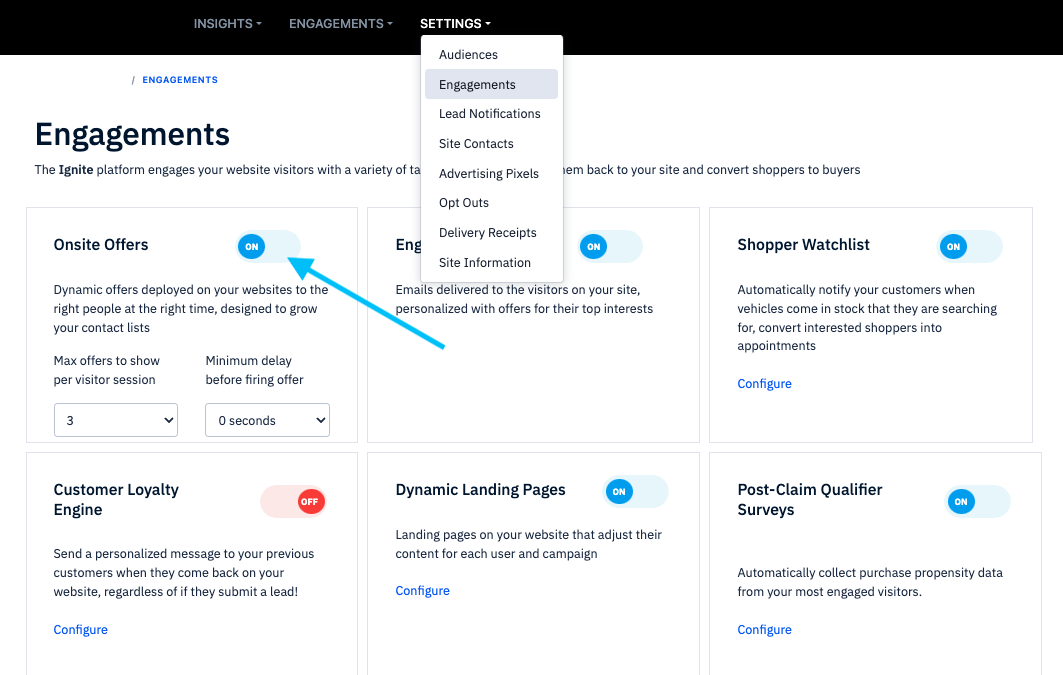
4. Enable Website Engagements
You can enable and disable the different engagement tactics you would like to use on your website. Engagements can be enabled or disabled under Settings > Engagements.
BEST PRACTICE: The platform will perform best with all tactics enabled! At a minimum you should enable the onsite offers & engagement email features.


