Managing Multiple Store Locations
This article explains how to manage multiple store locations within the Ignite platform. You’ll learn how to add and import new store locations, edit existing ones, and configure lead notification settings to ensure leads are routed correctly.
Watch this video tutorial to see the full process in action:
Note that having multiple store locations will impact how your leads are routed. Check out How Does Lead Routing Work for a better understanding of how leads are routed.
Step-by-Step Instructions
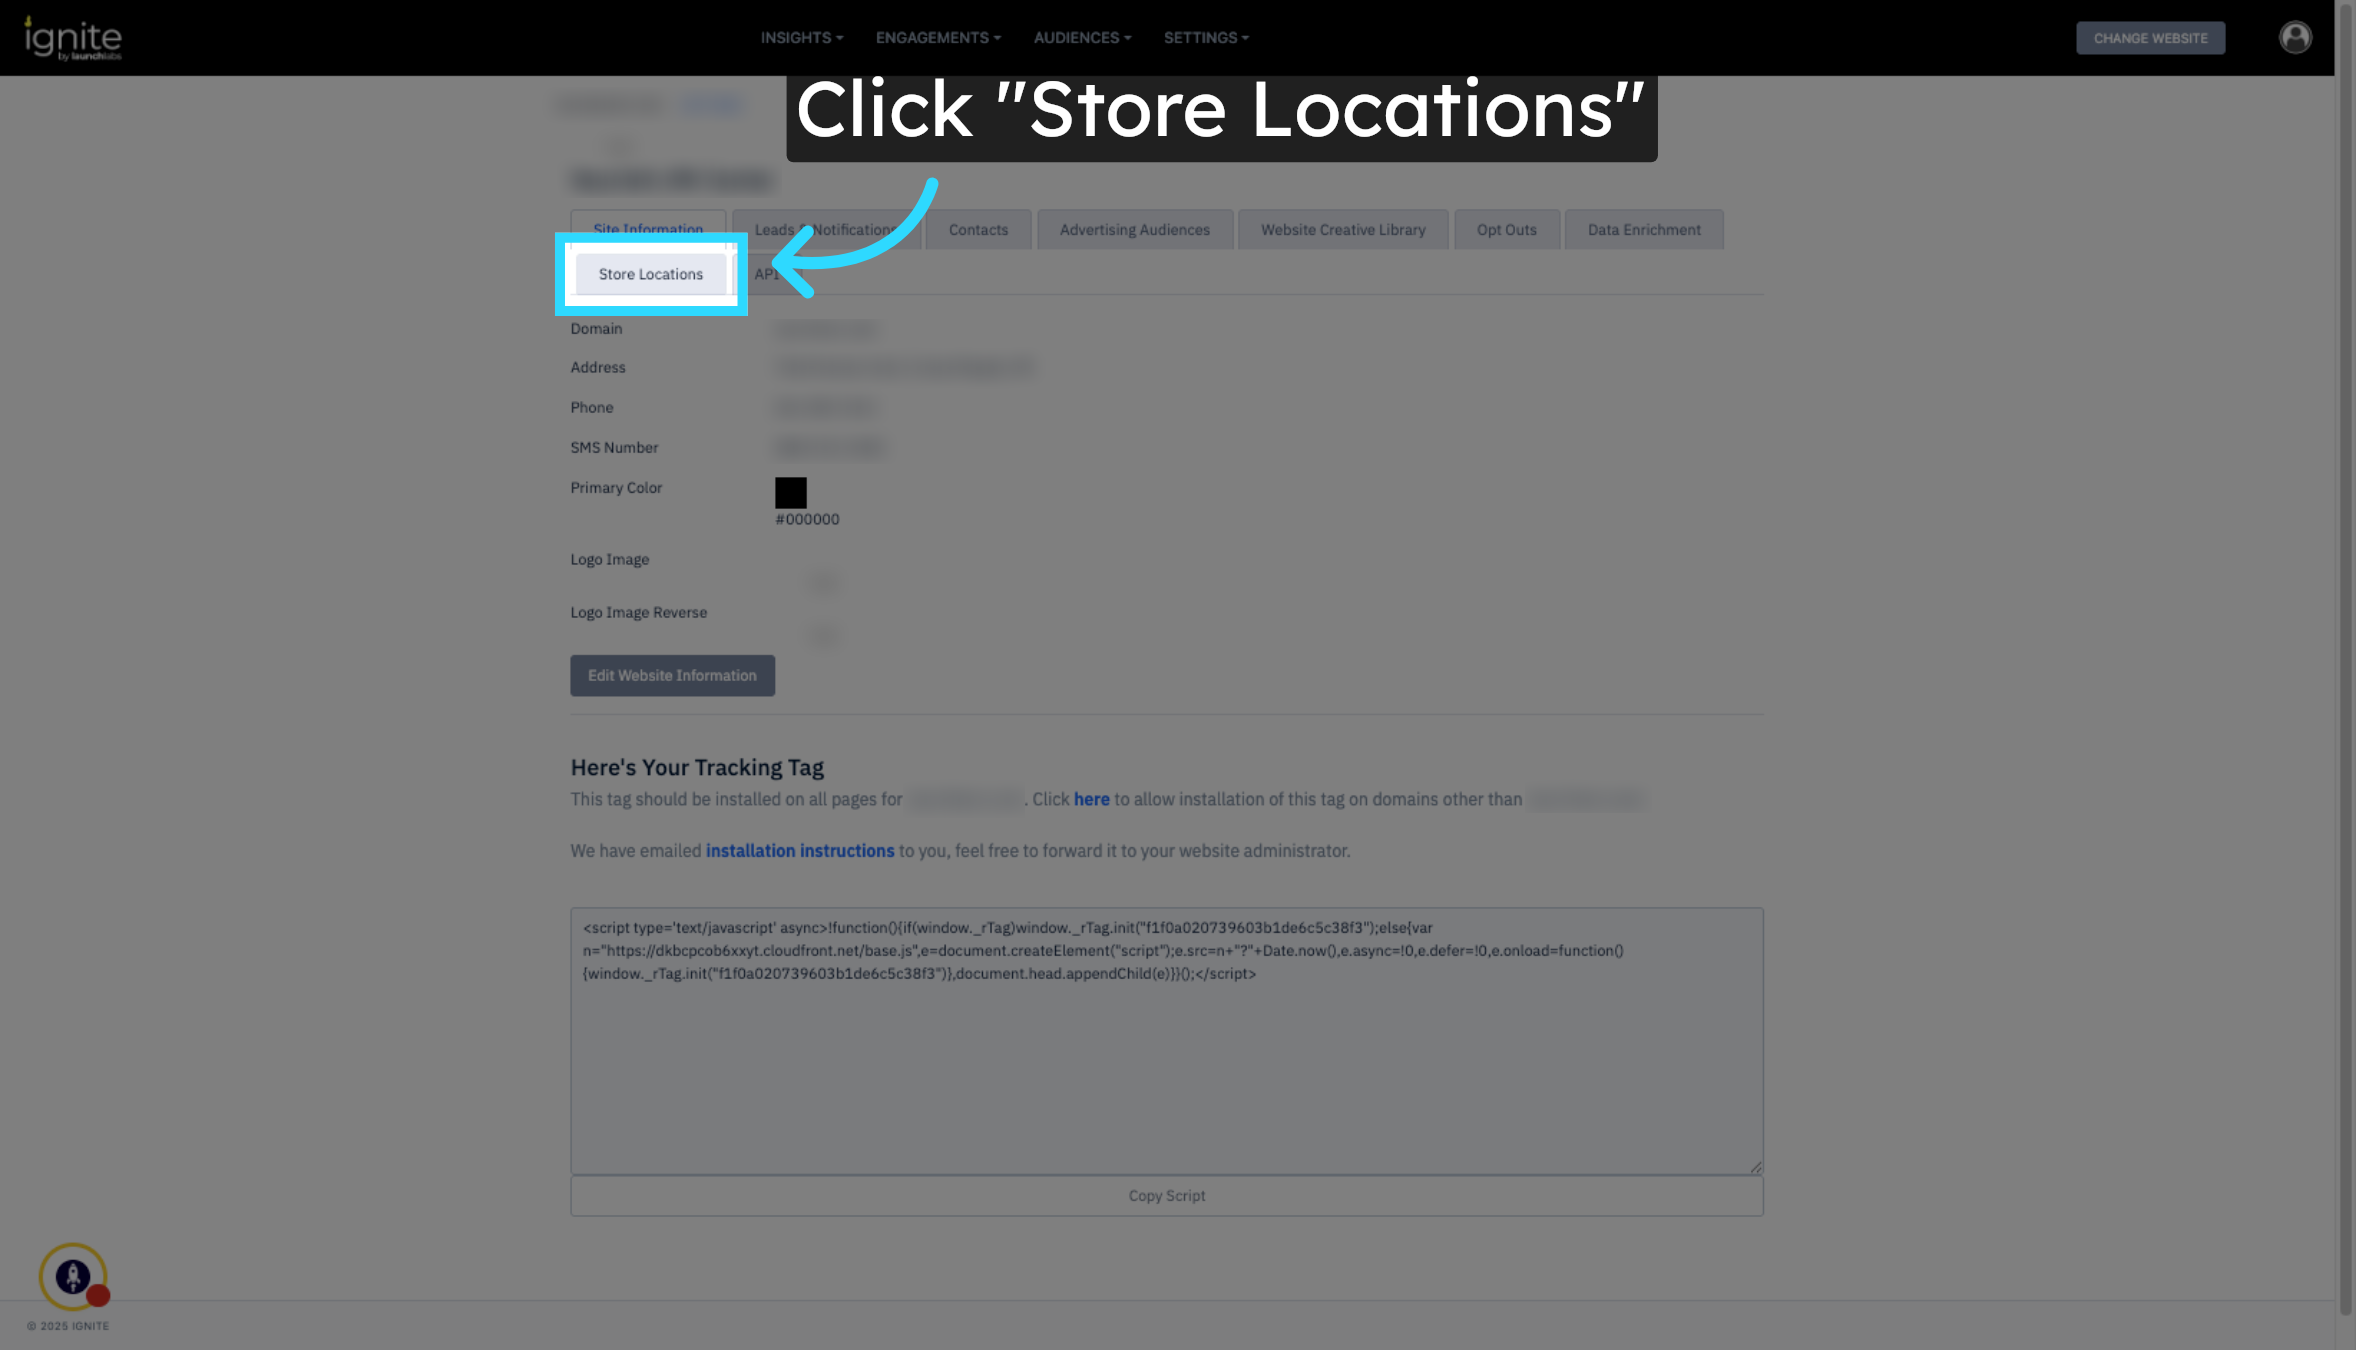
1. Access Store Locations
On the Site Information page, click the Store Locations tab from the main navigation. This page displays all locations that have been added manually or imported into your account.
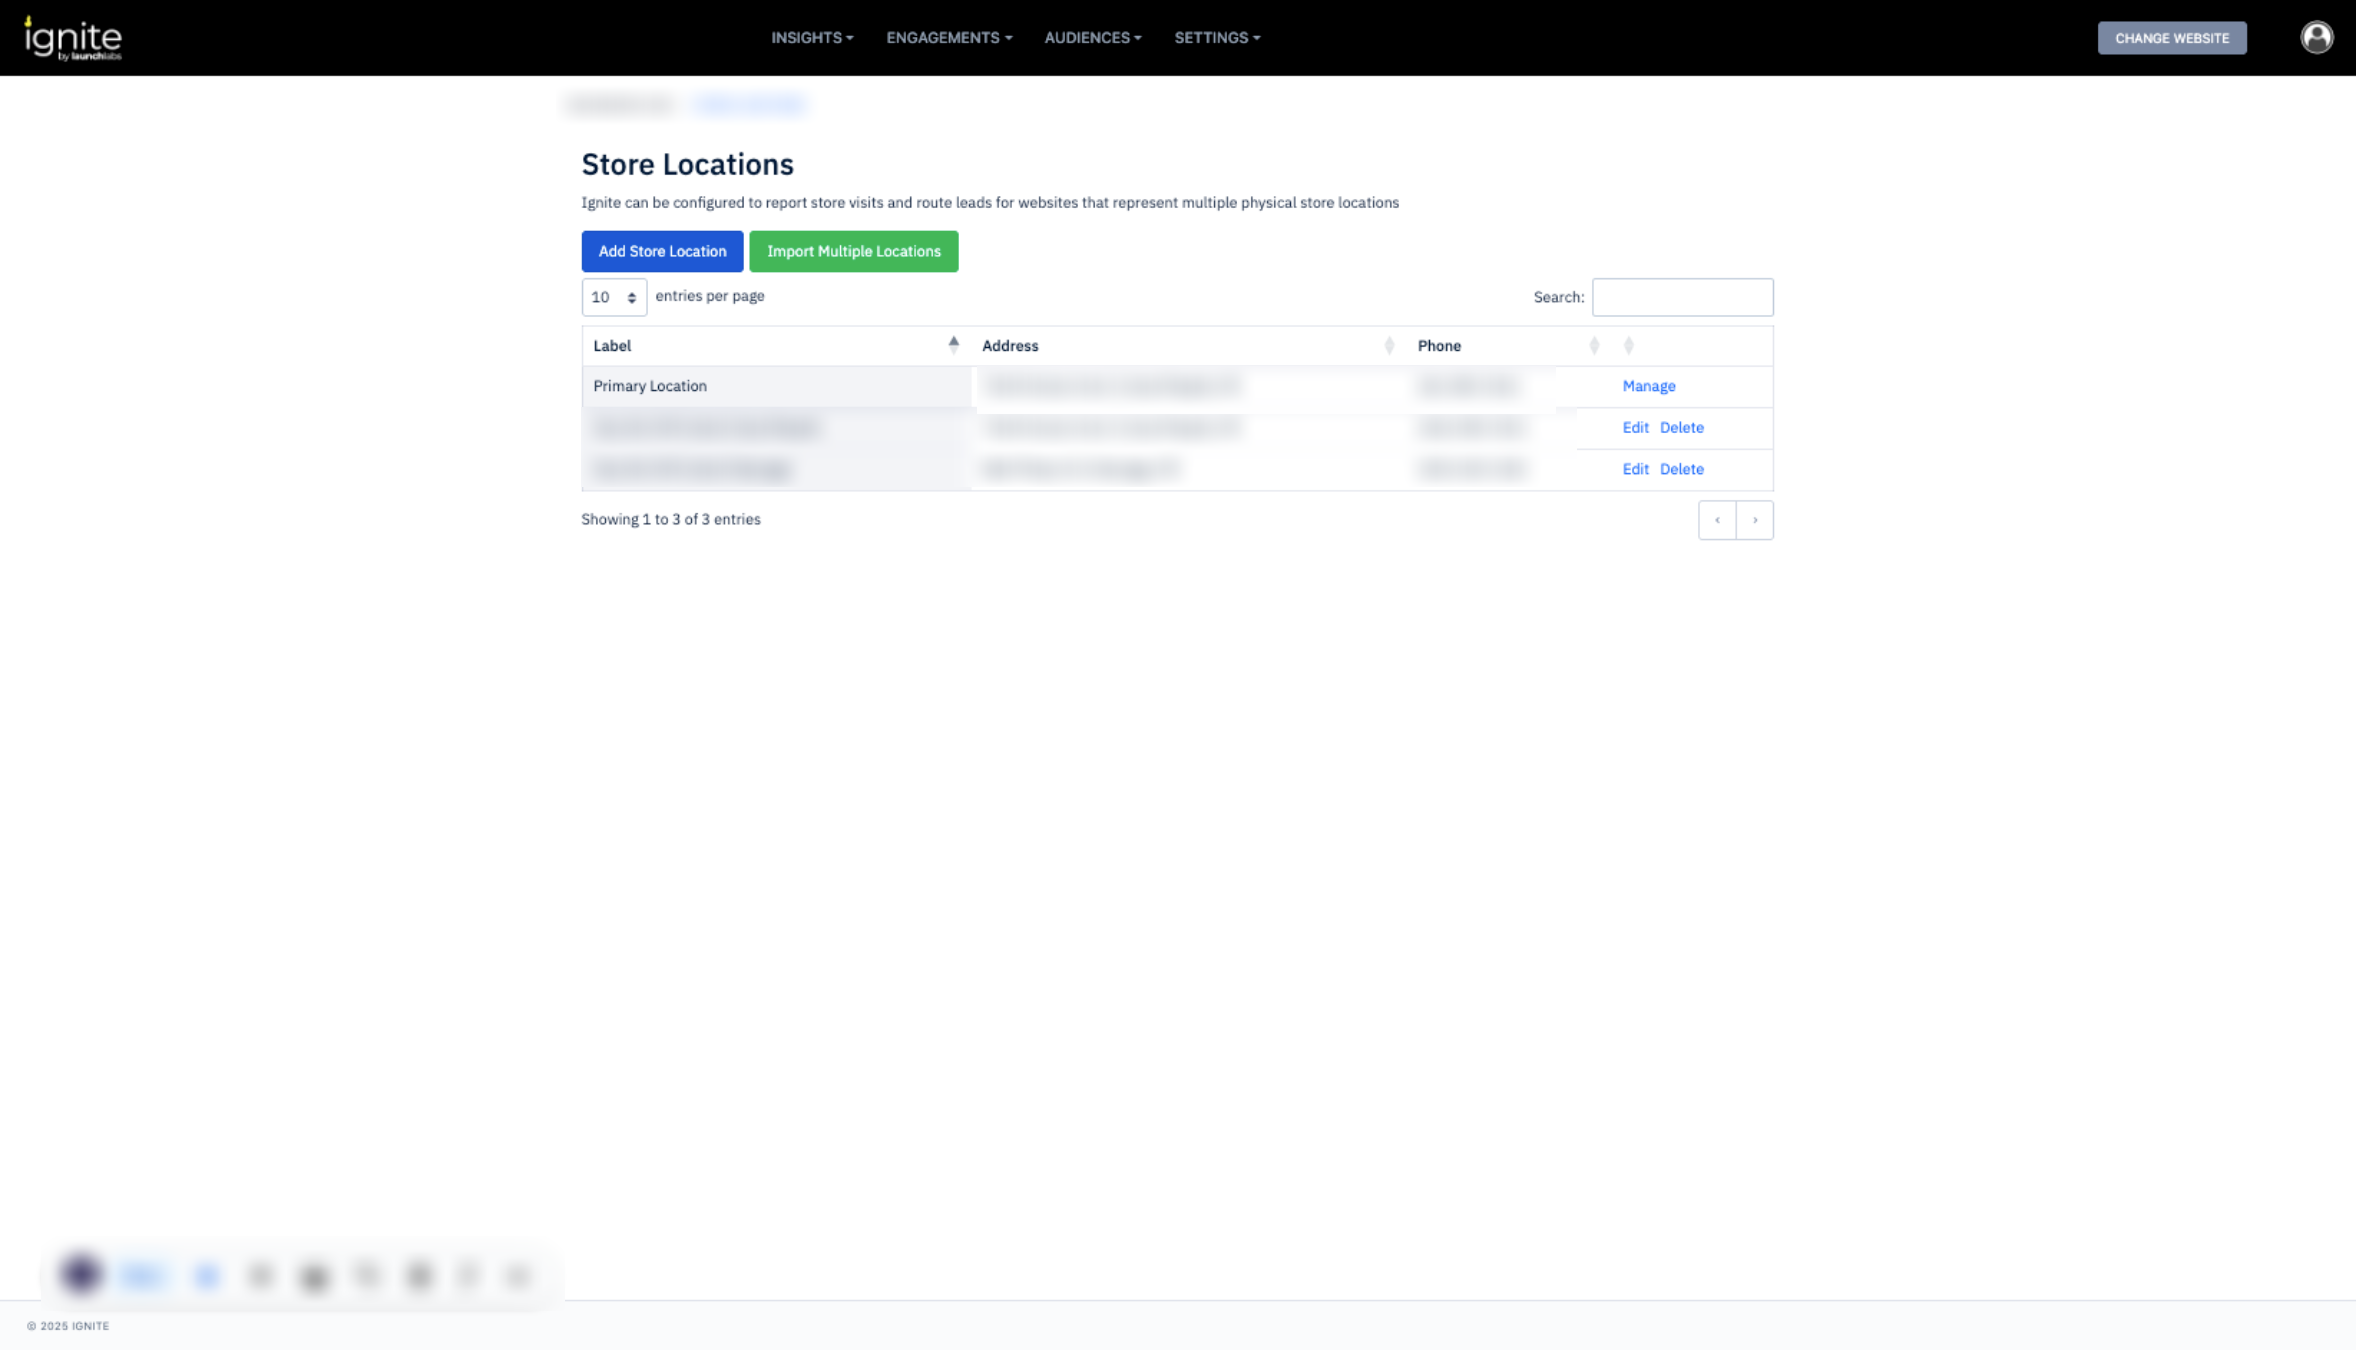
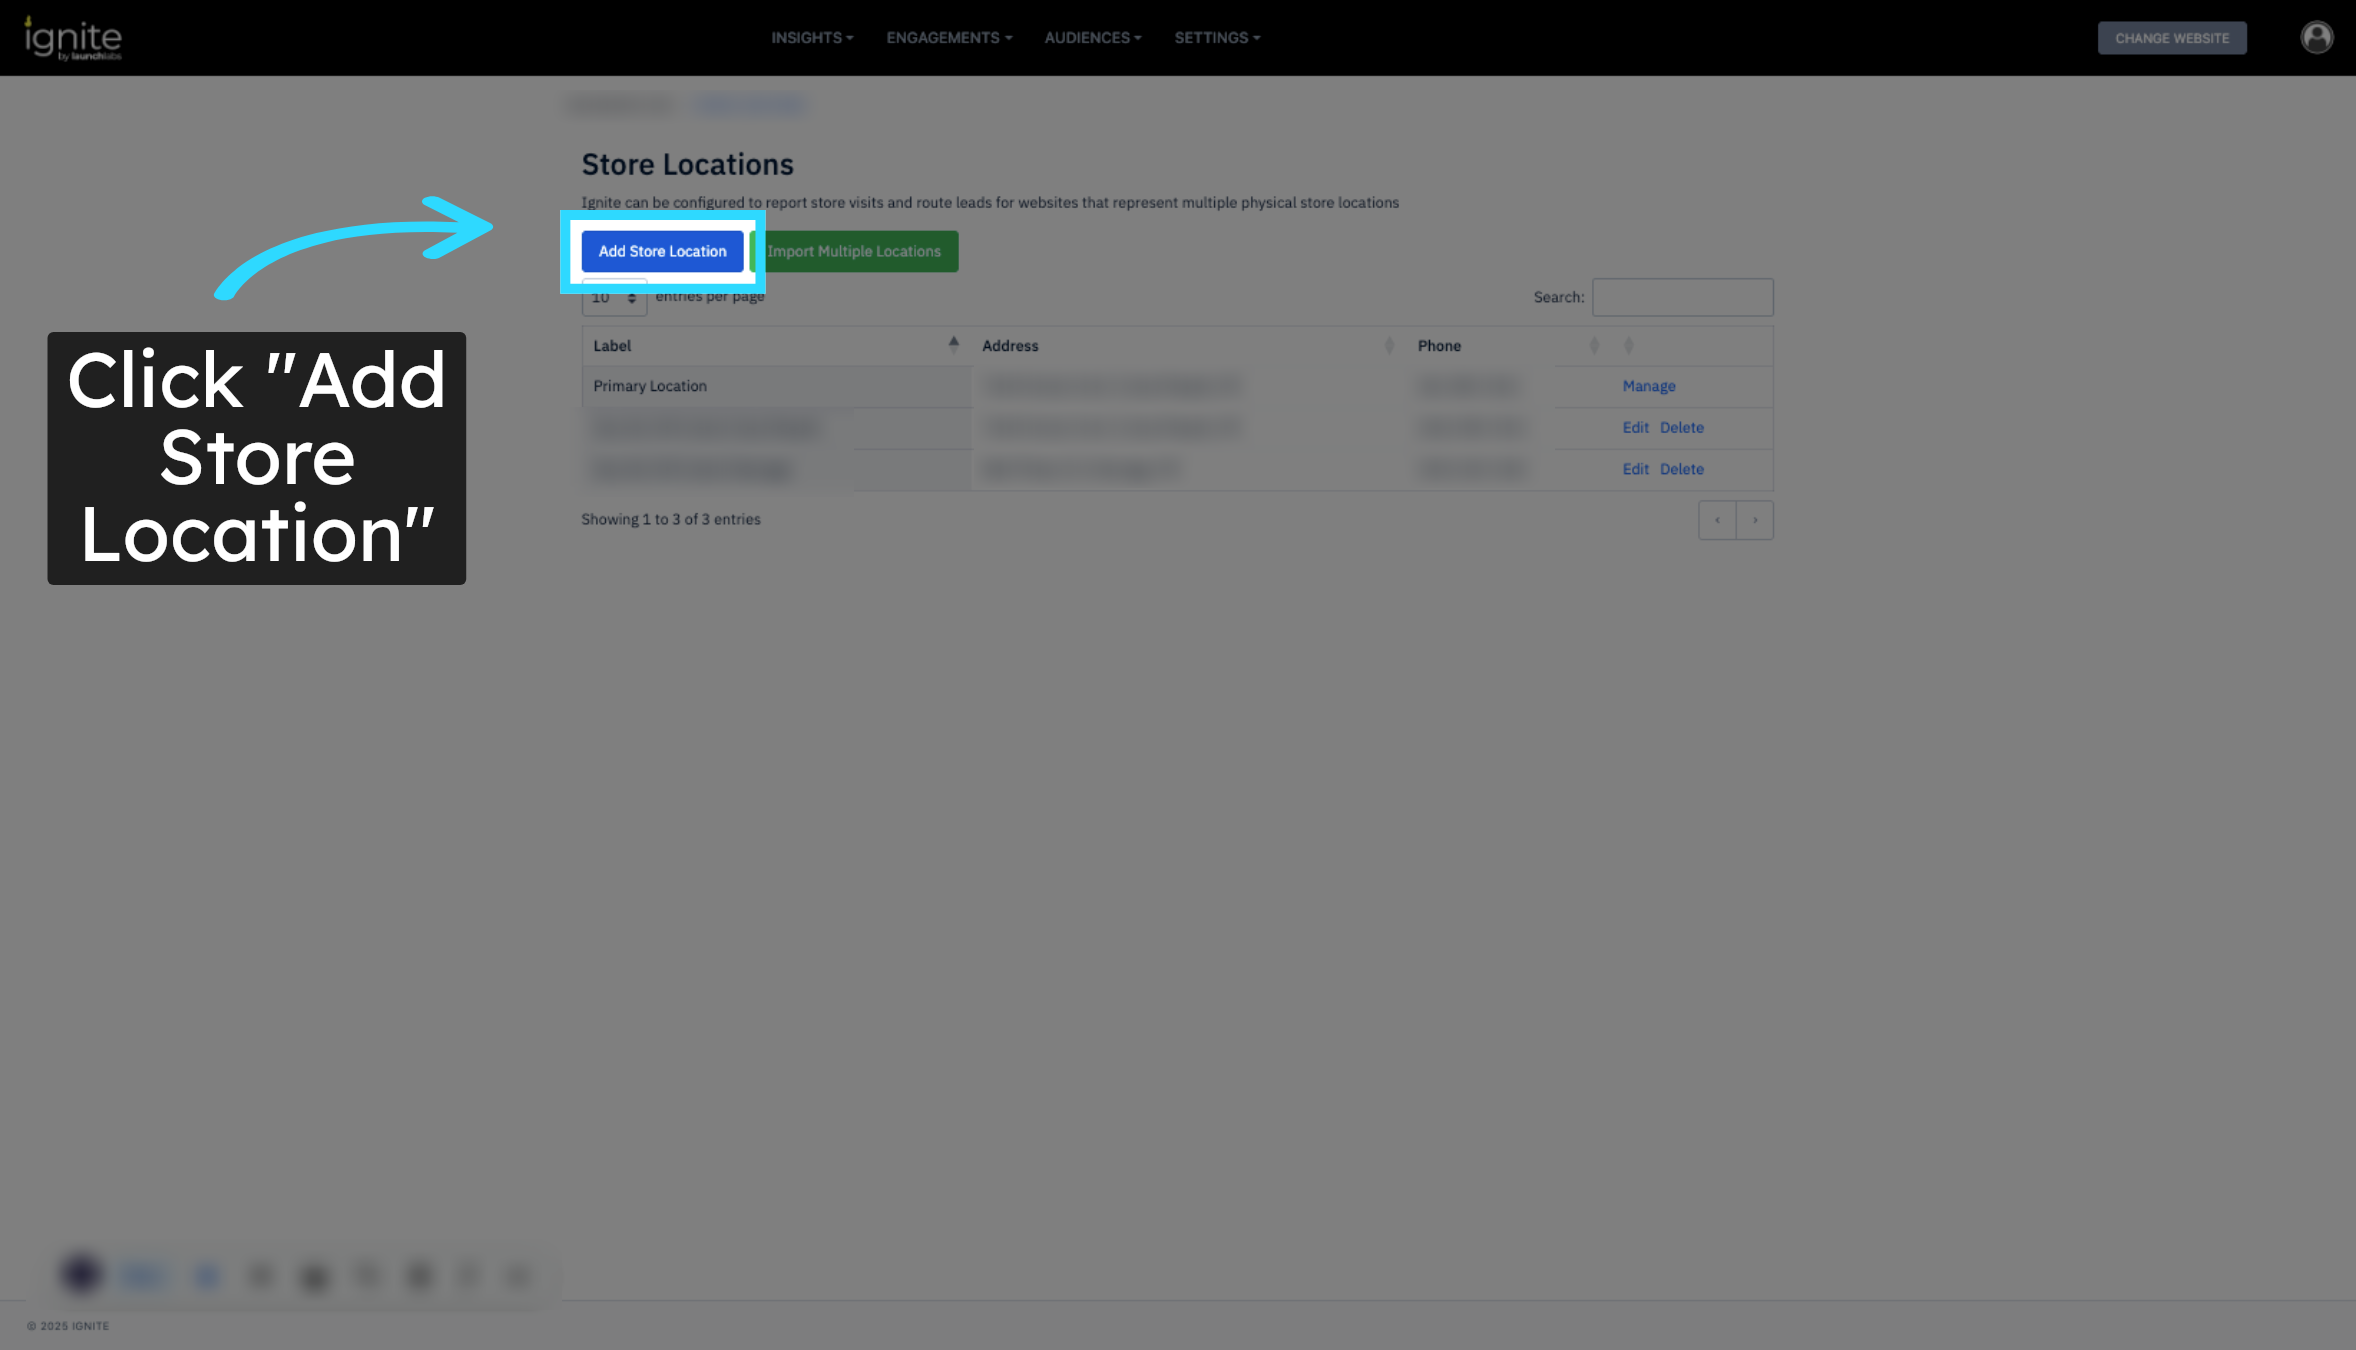
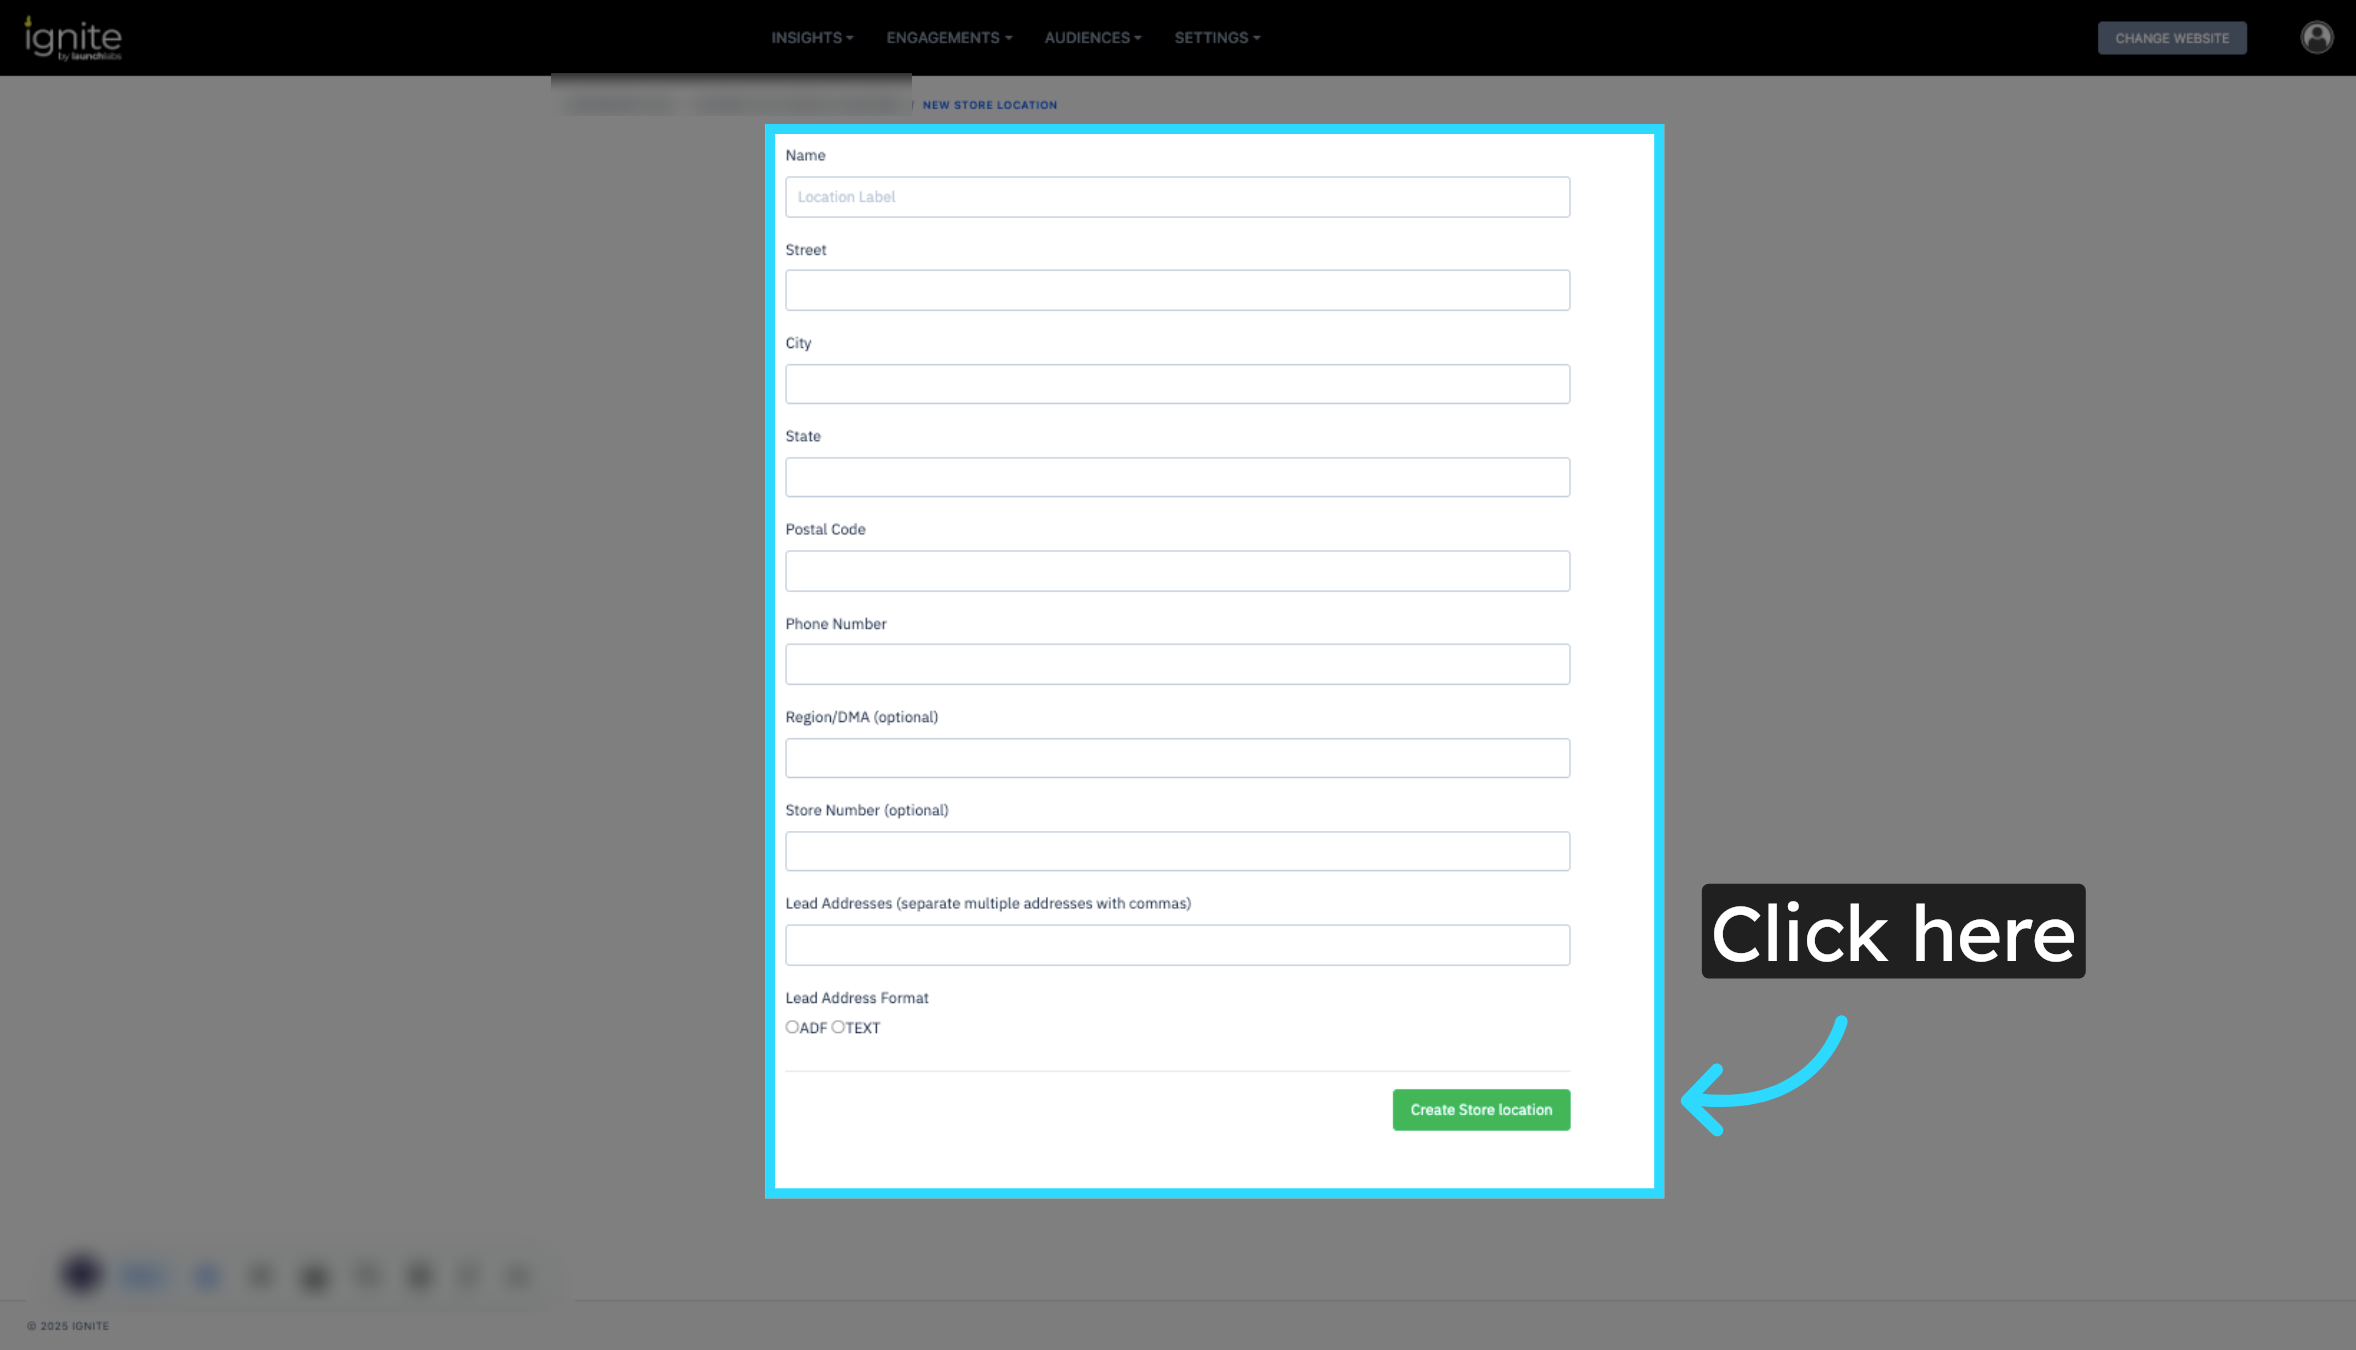
2. Add a New Store Location
Click Add Store Location to create a new location. Enter all required information, such as the store name, address, and contact details. Once complete, click Create Store Location to save the new entry.
3. Import Multiple Locations
If you need to add several store locations at once, click Import Multiple Locations. This option allows you to upload a file containing multiple store records, streamlining the setup process for large organizations.

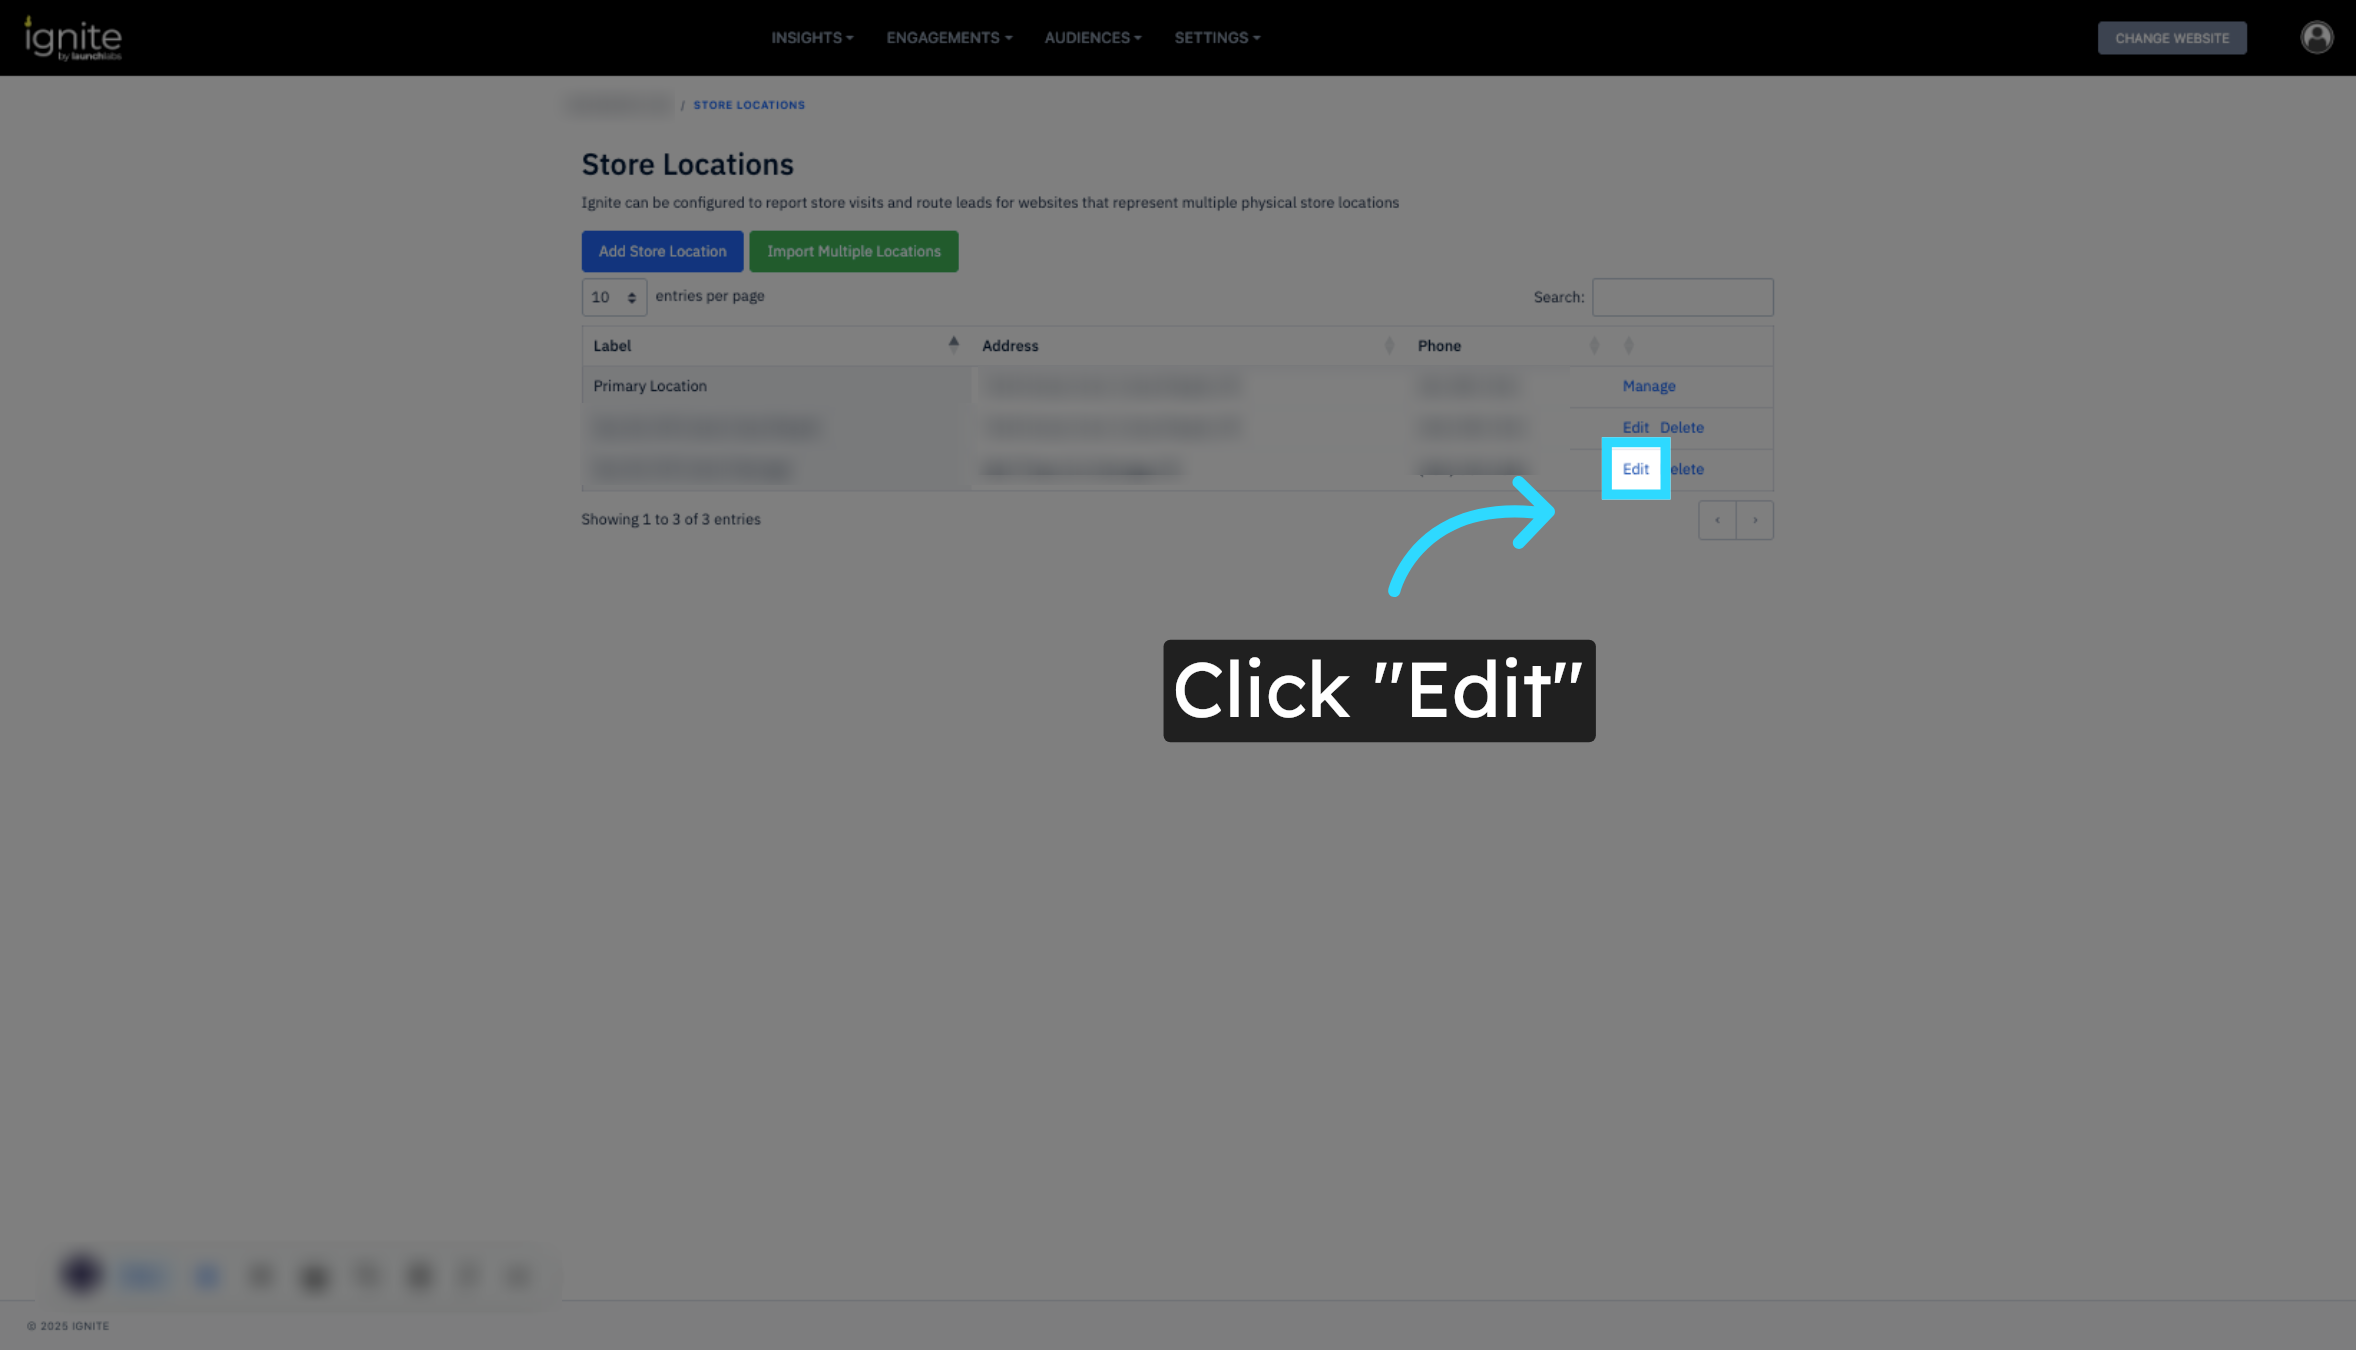
4. Edit Existing Store Locations
To make updates to an existing store, click Edit next to the location name. Here, you can adjust details such as the store’s address, contact information, or other attributes.
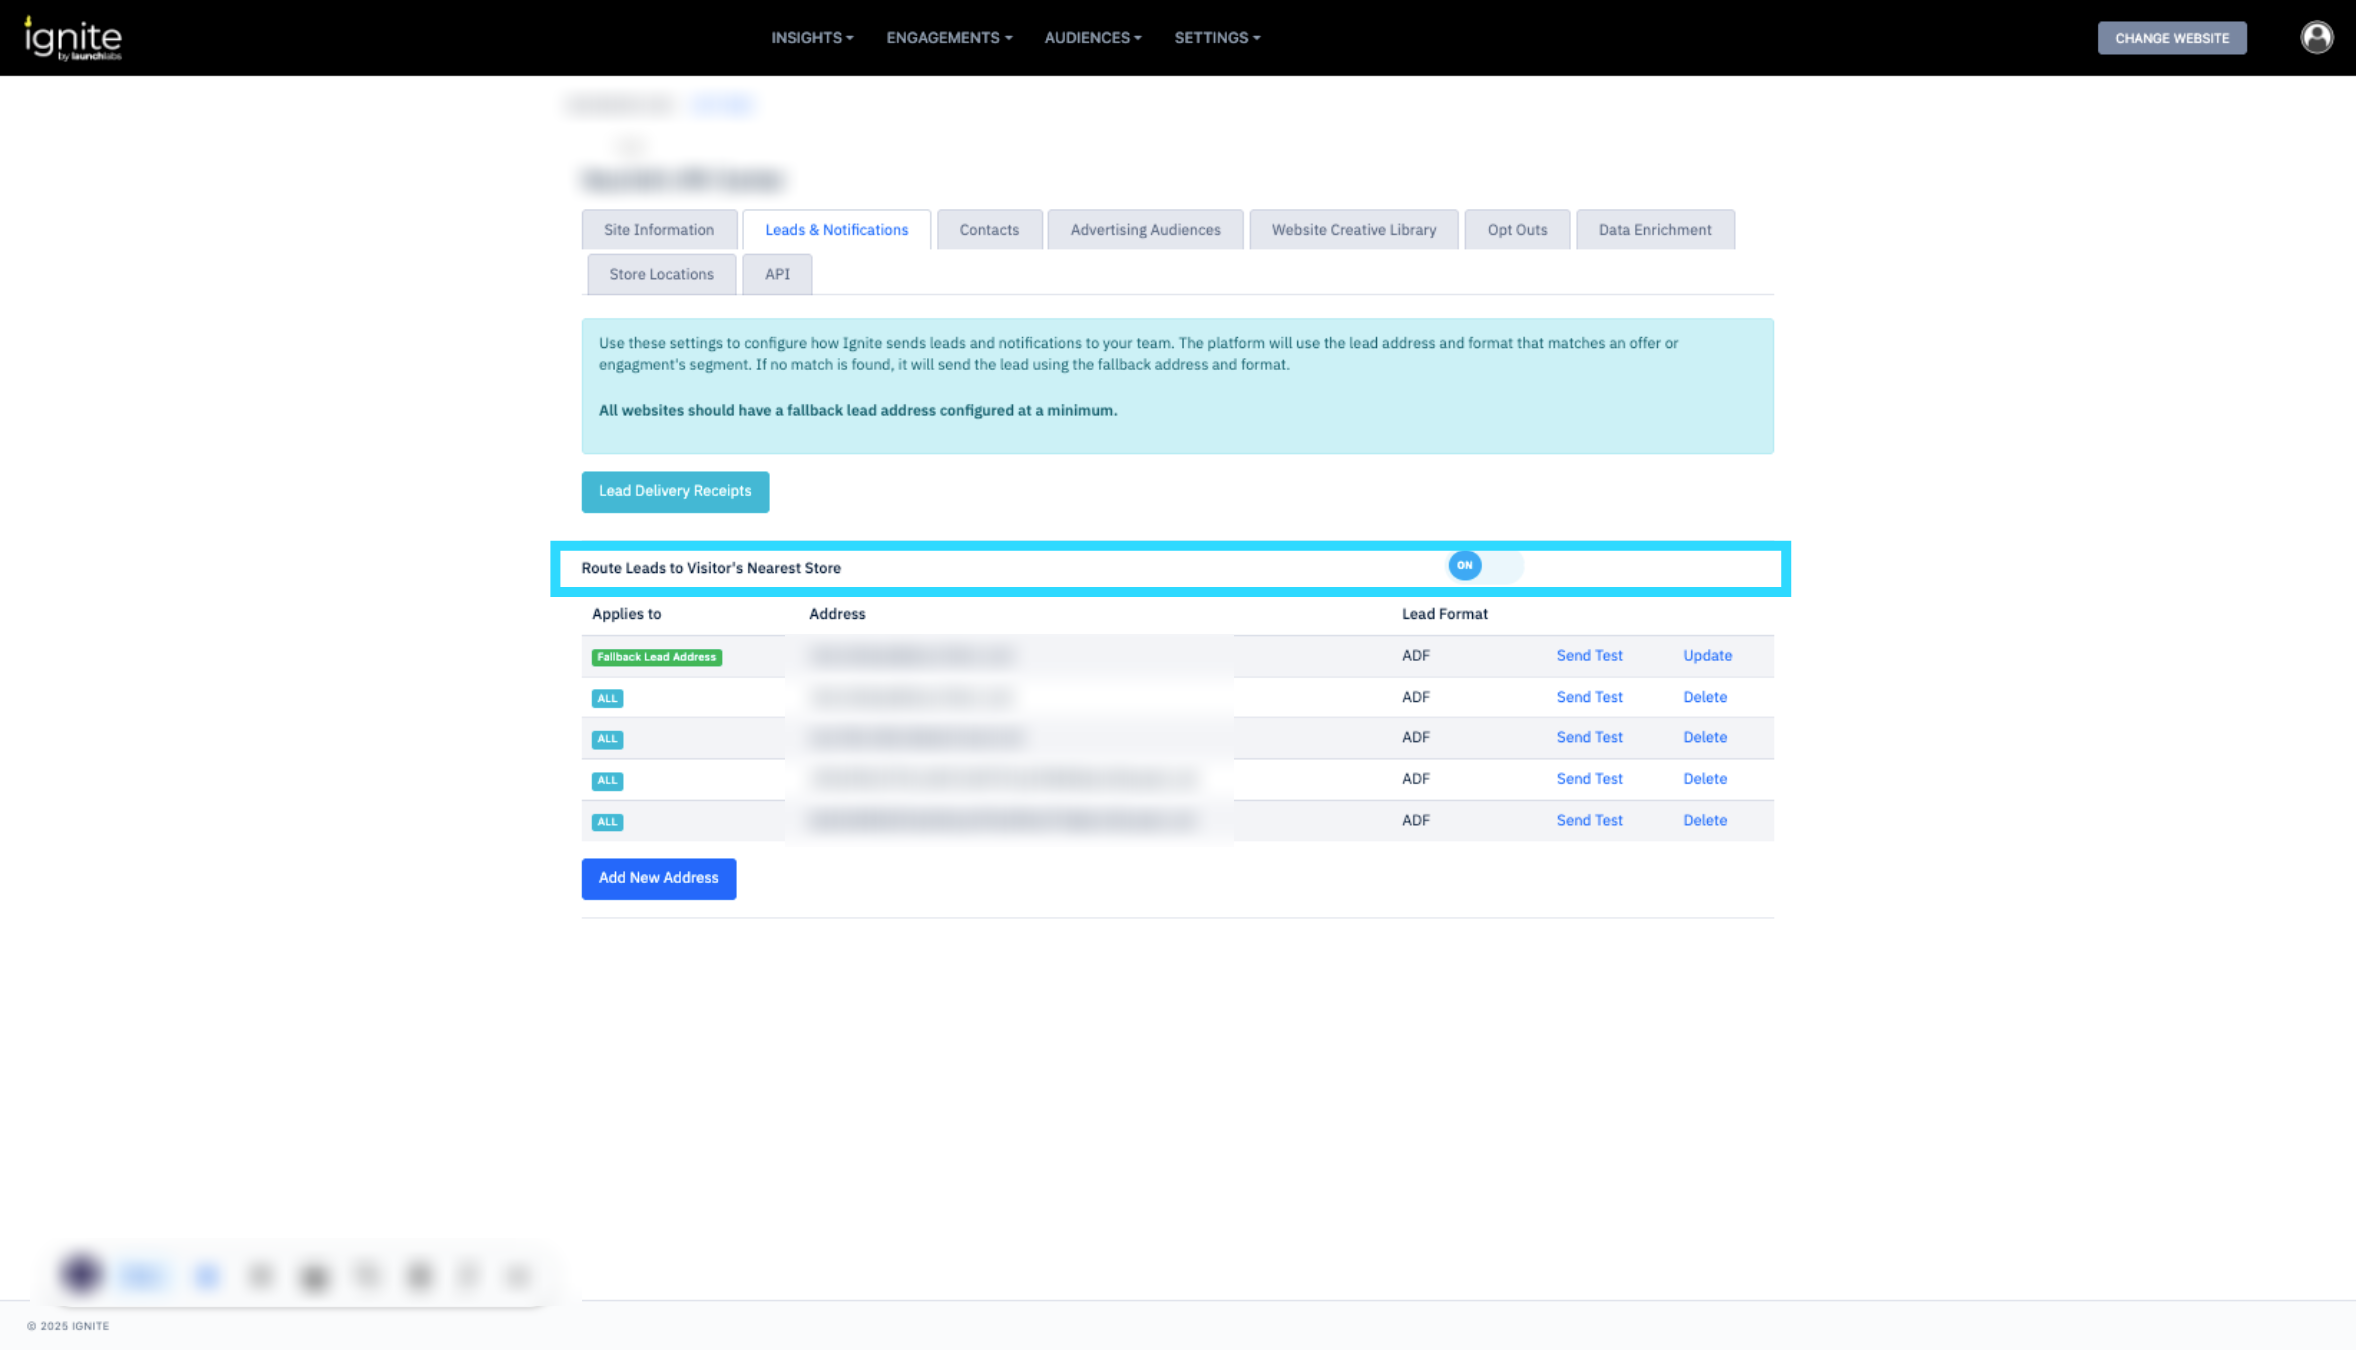
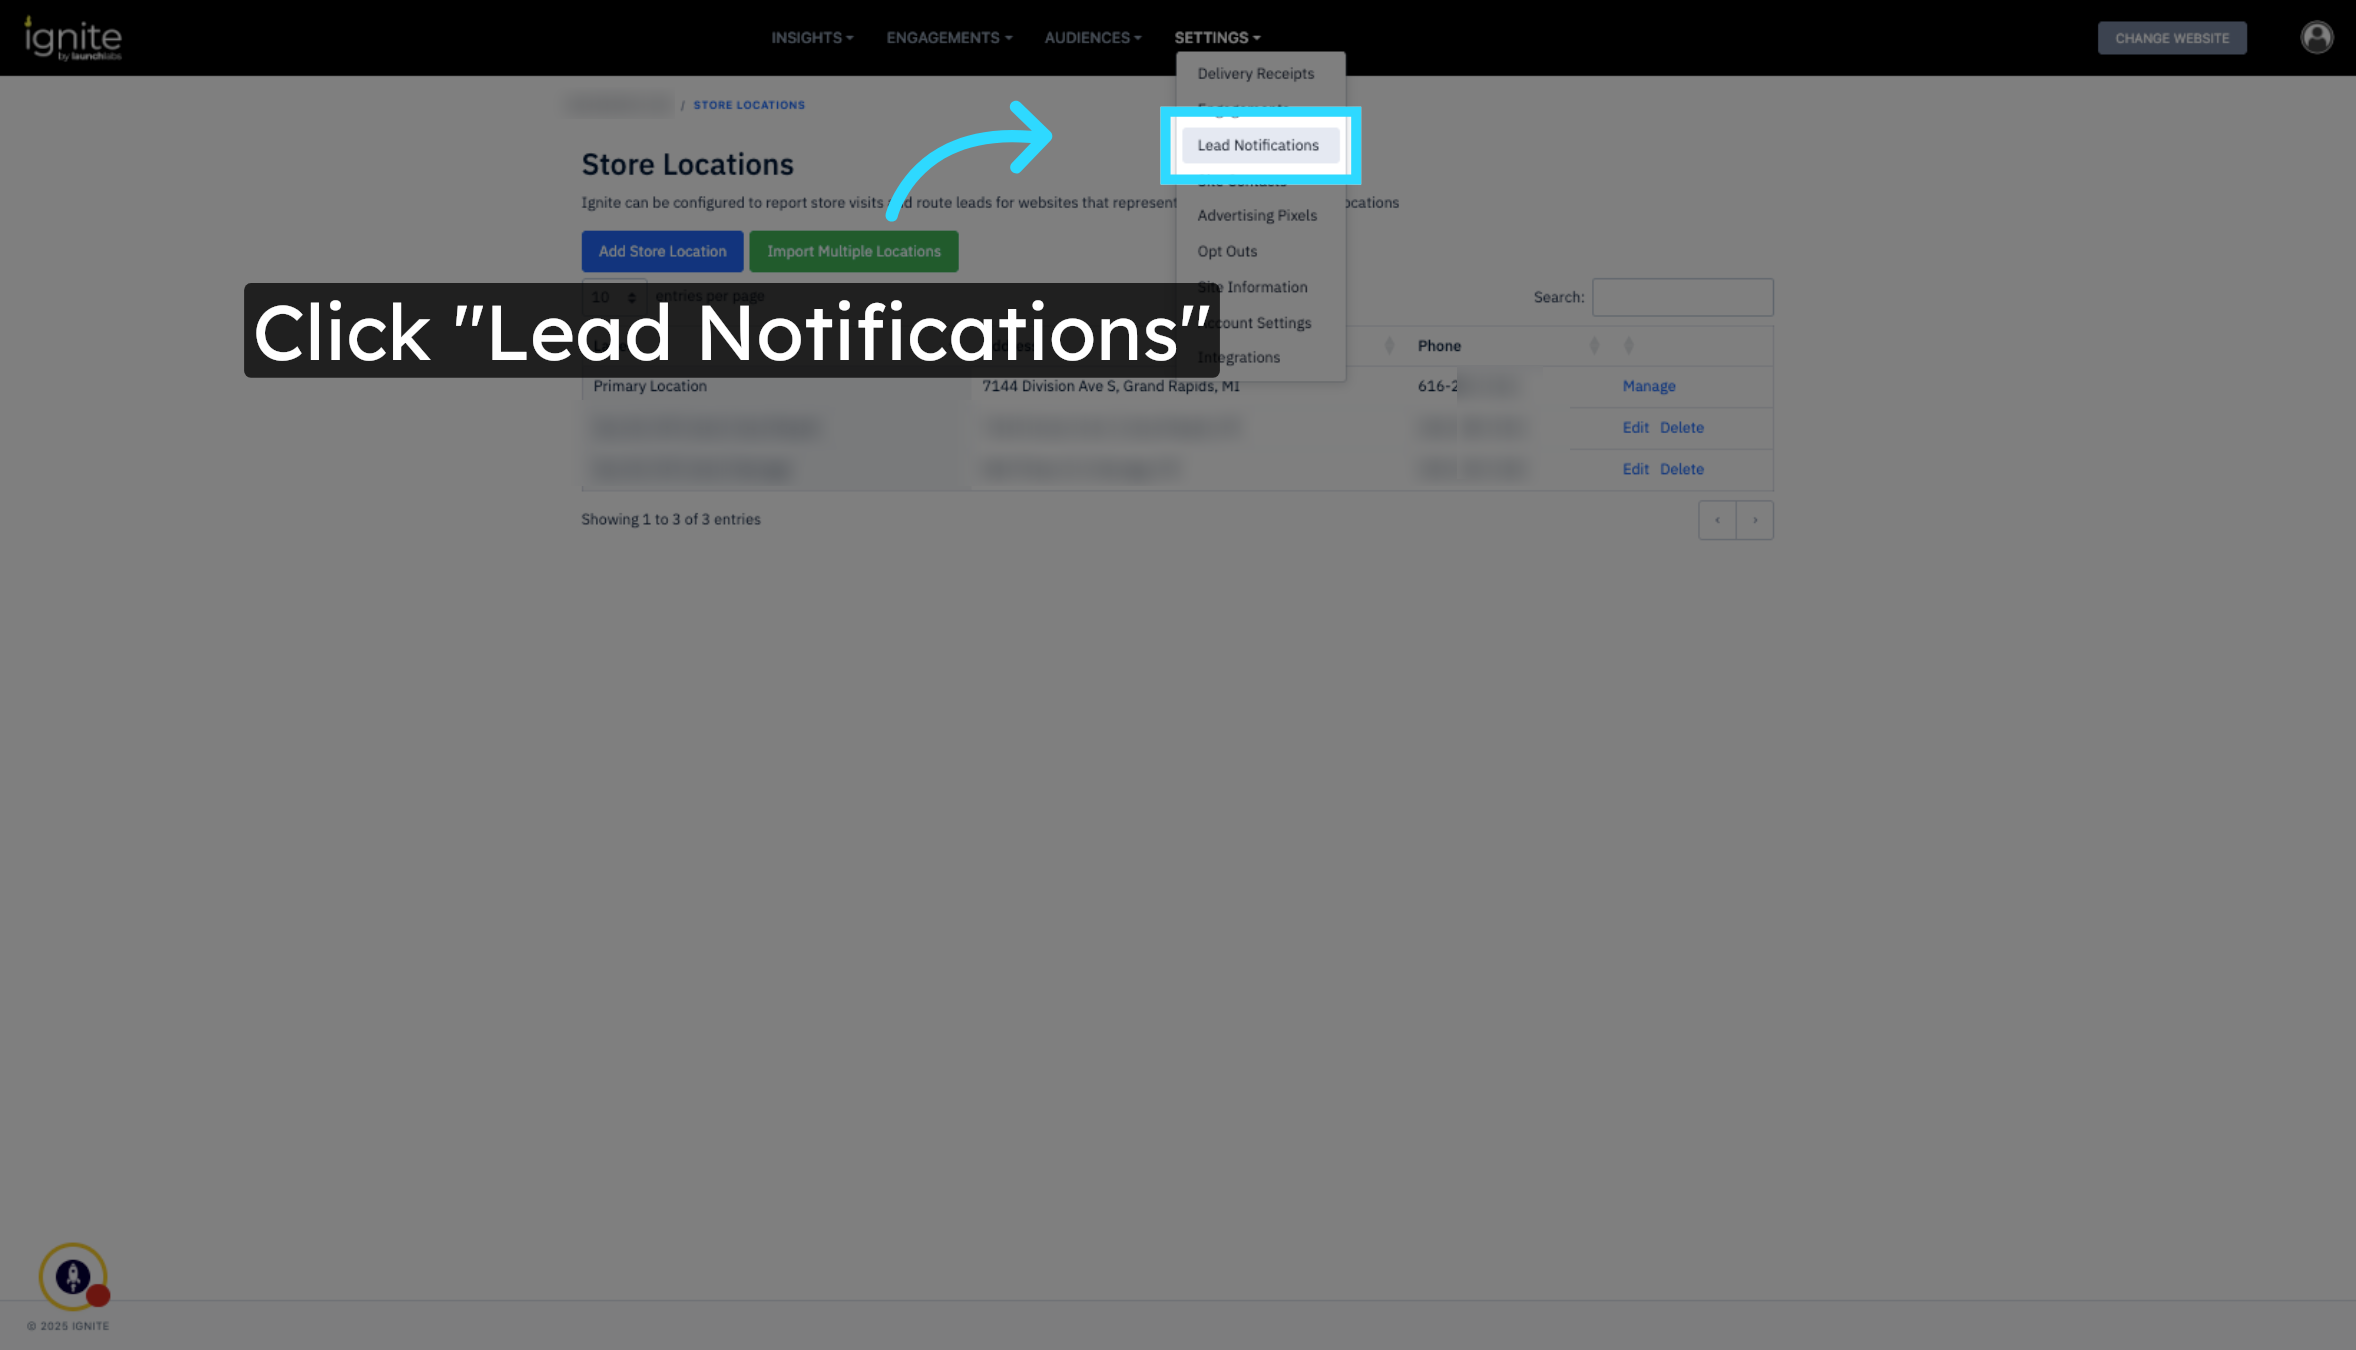
5. Configure Lead Notifications
Click Lead Notifications to manage how leads are distributed between store locations. This section ensures each location receives the correct lead alerts and that no leads are missed.
6. Enable Lead Routing by Proximity
If your business has multiple physical locations, toggle on Route Leads to Visitor’s Nearest Store. This feature automatically directs leads to the closest store location based on the visitor’s geographic data, improving efficiency and response times.