How to Upload Sales to the Sales Attribution Report
This article explains how to prepare and upload your sales data into the platform's Sales Attribution Report so it can be properly attributed and analyzed.
Watch this video tutorial to see the full process in action:
👉 Before following this guide, make sure you have your sales data prepared in CSV, XLSX, or XLS format.
Step-by-Step Instructions
Follow these steps to upload and validate sales data in the Sales Attribution Report. Screenshots from the video should be included for each major step.
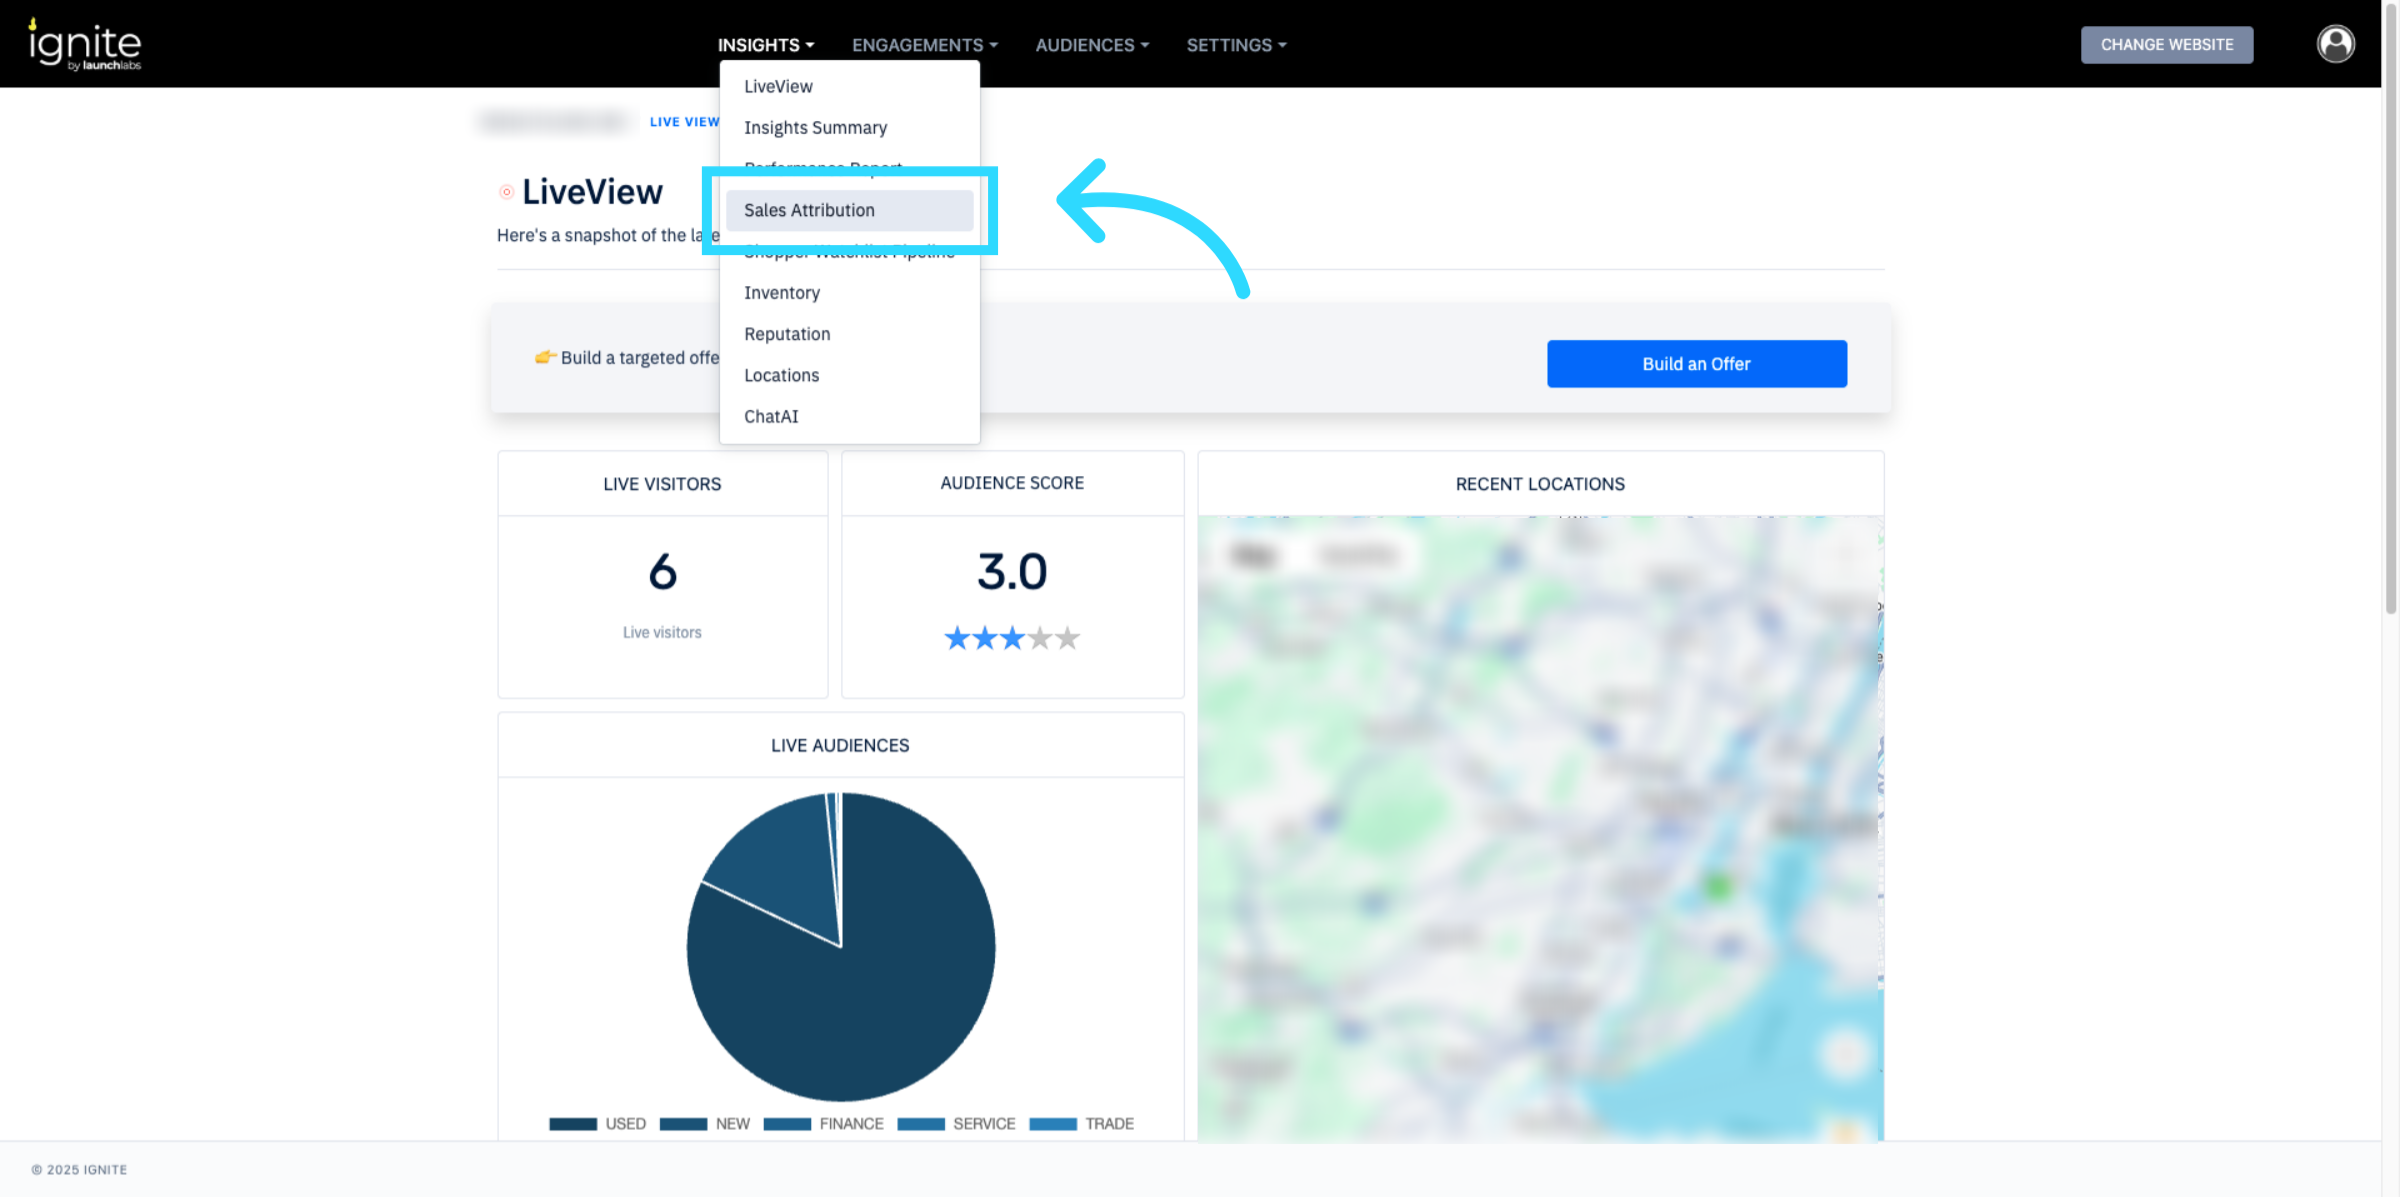
1. Open Sales Attribution
Go to the platform. From the top navigation, click Insights, then select Sales Attribution.
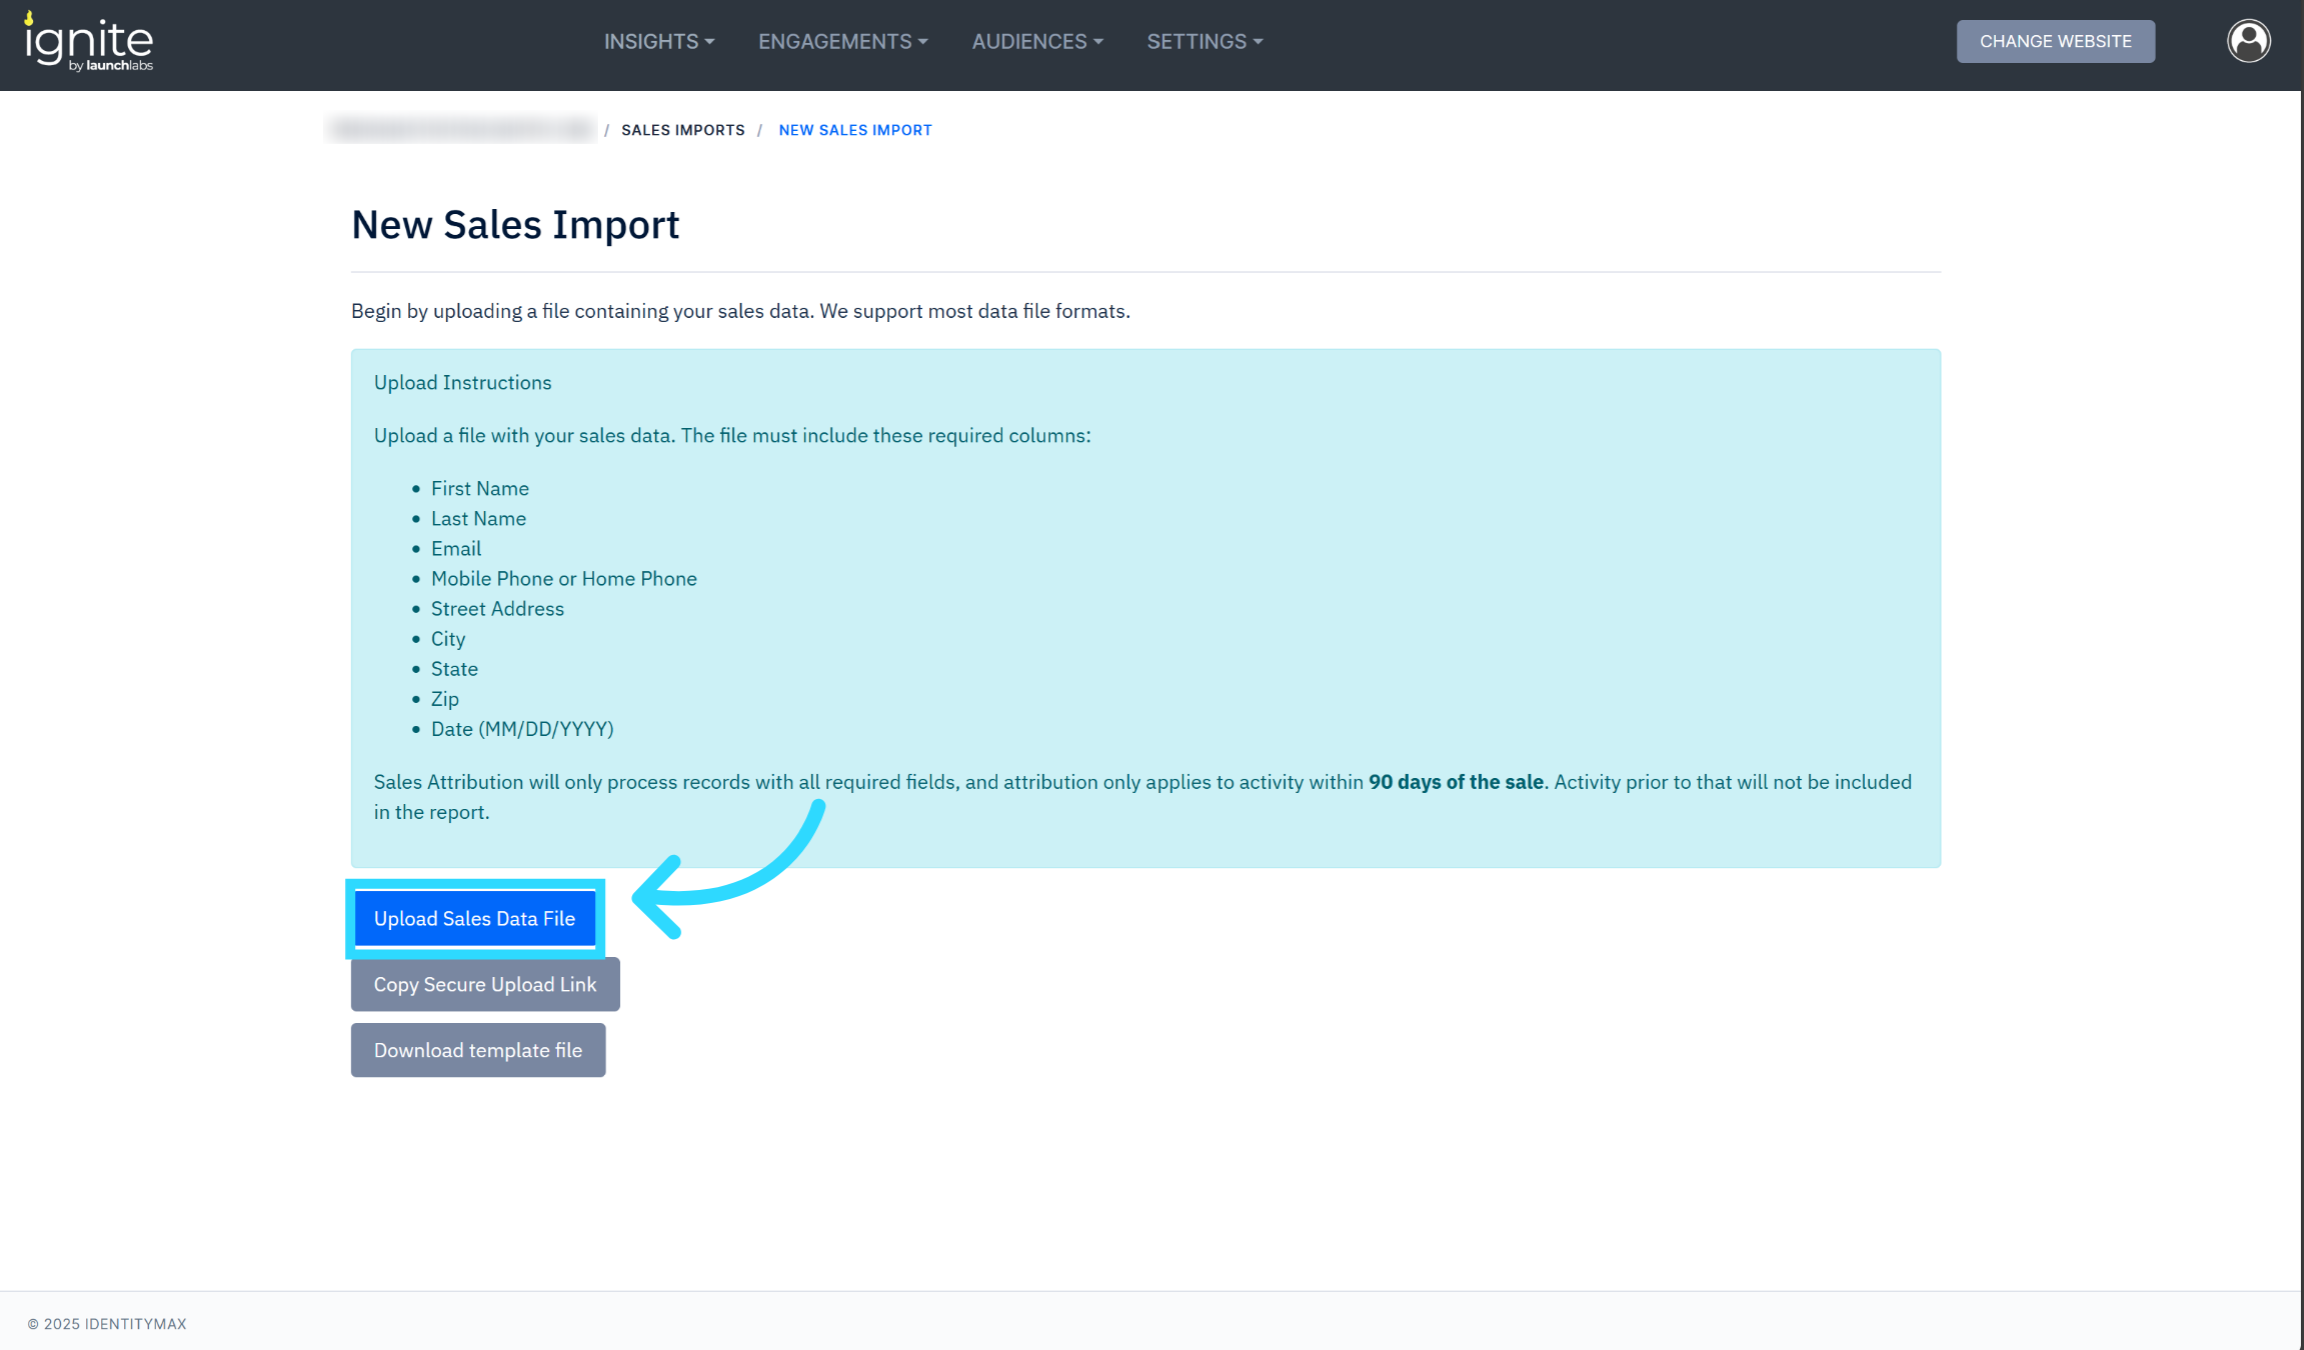
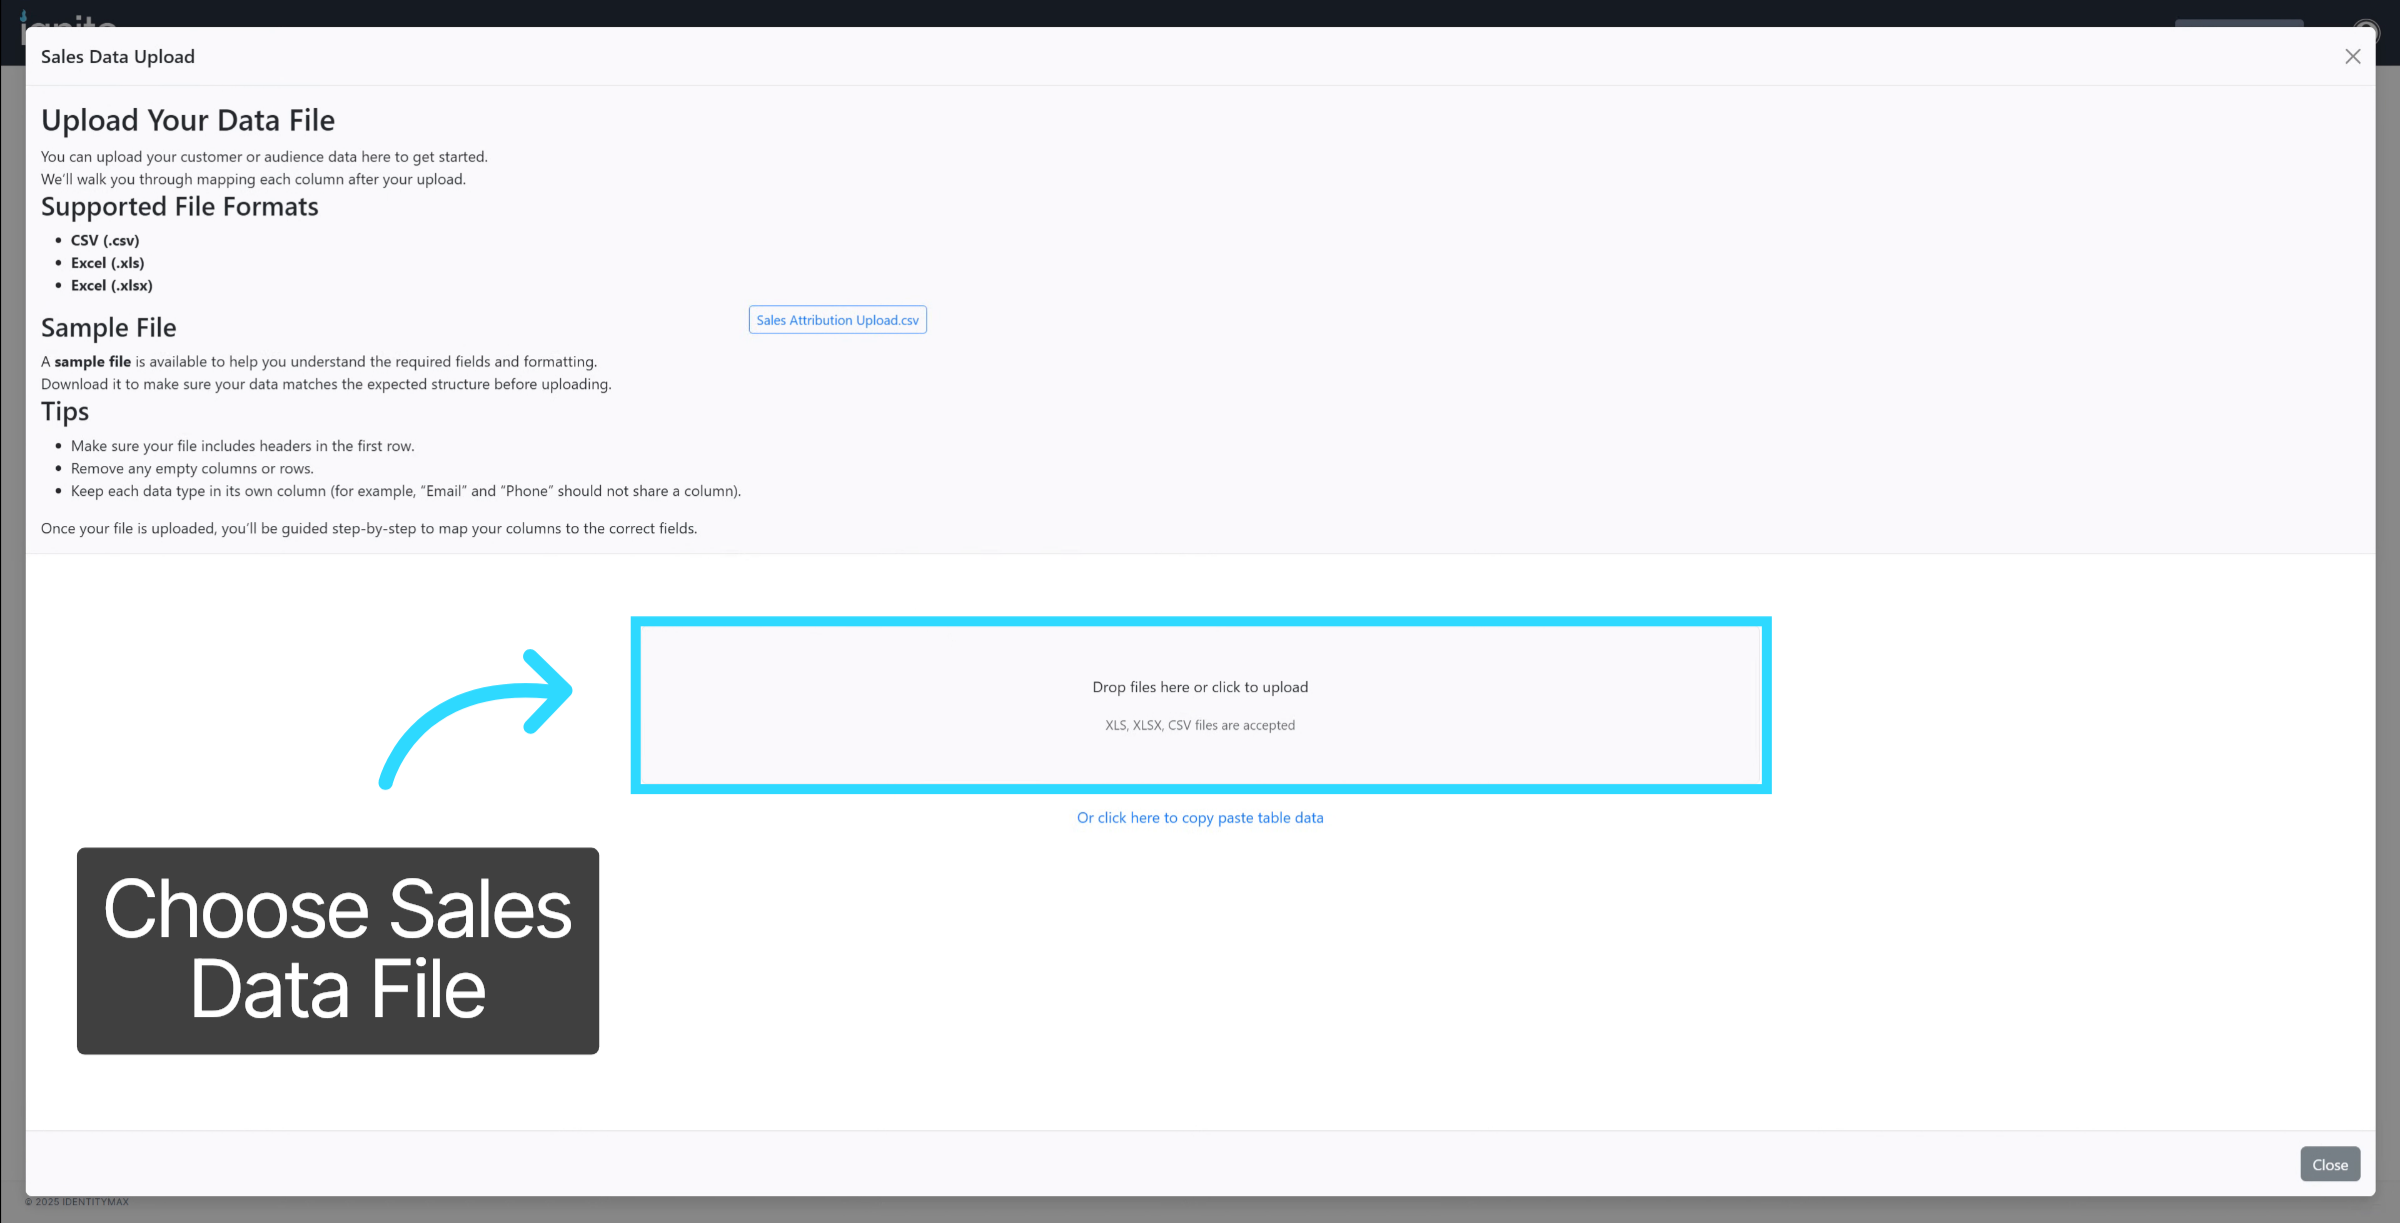
2. Start the Upload
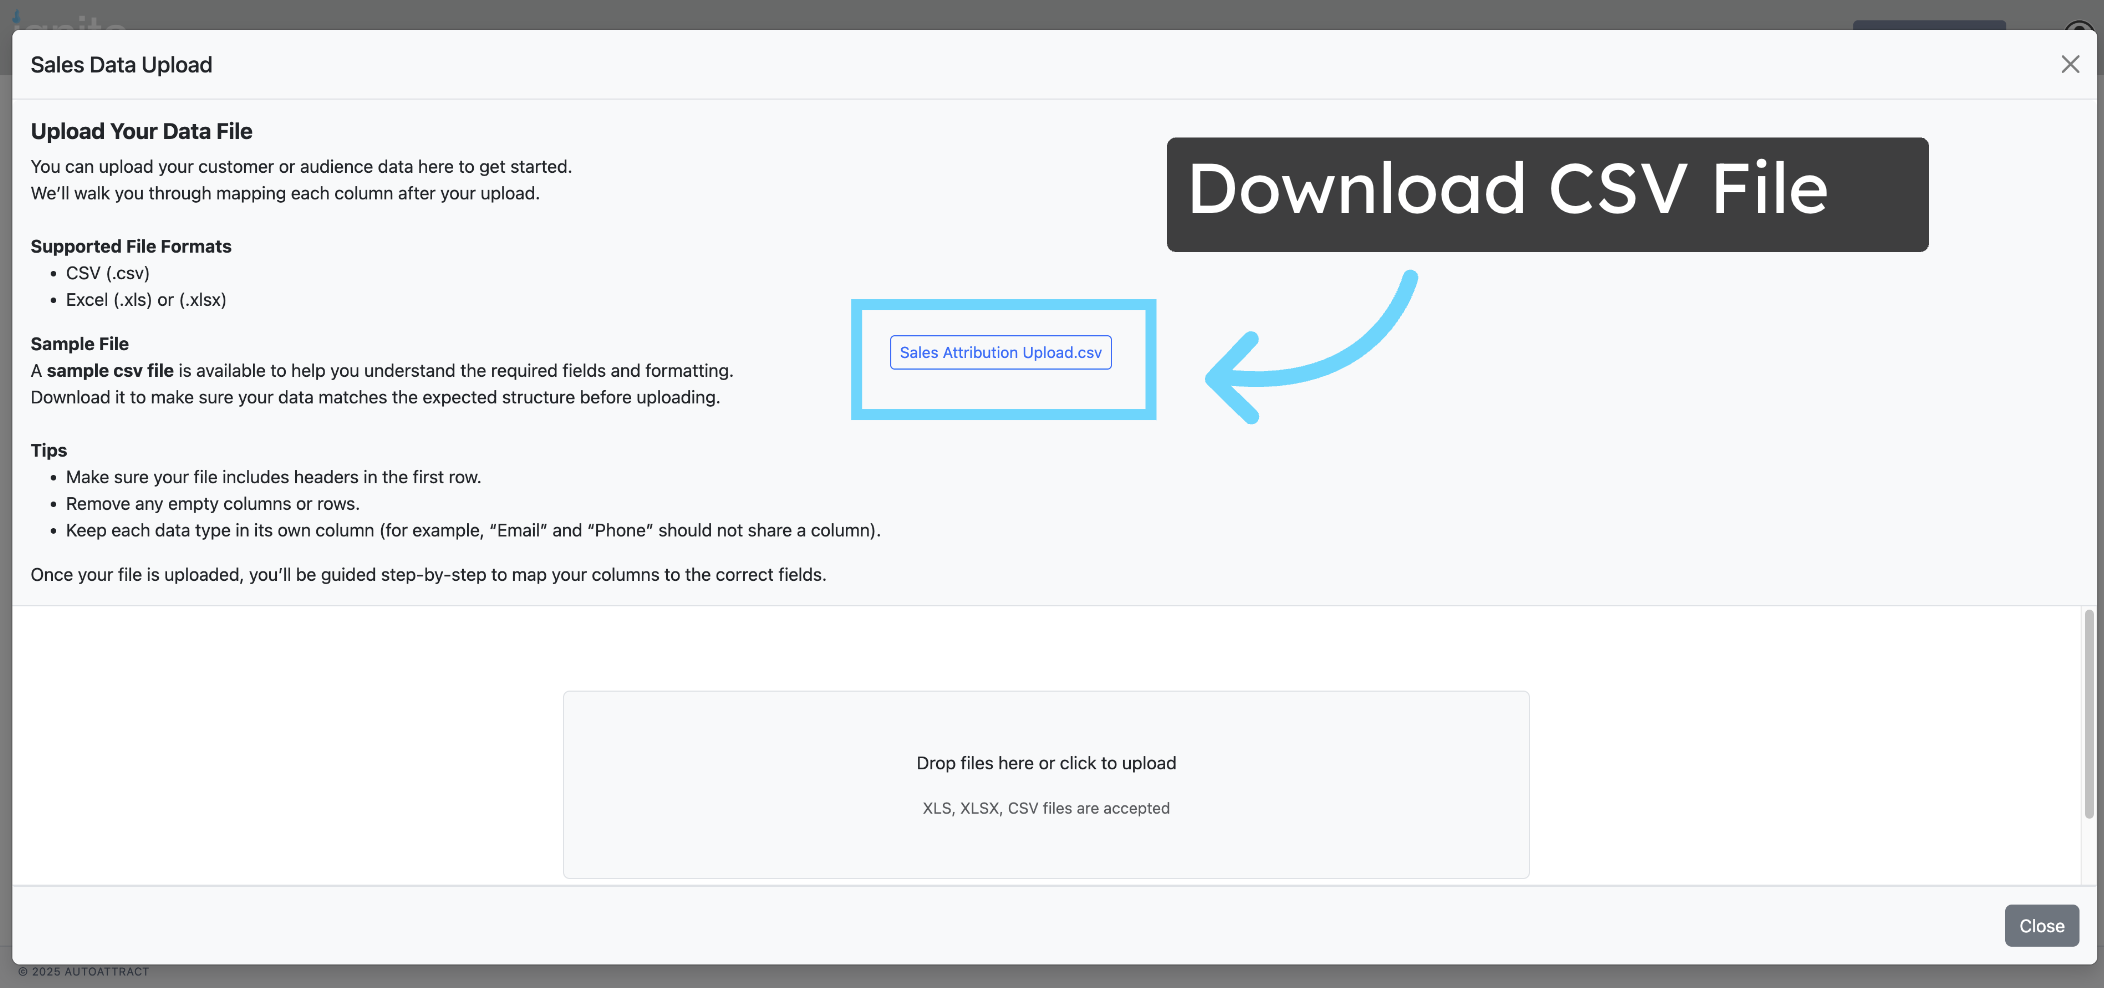
Click the HERE link to open the upload interface. Select Upload Sales Data File. Drag and drop your file into the upload area or click to browse. CSV, XLSX, and XLS formats are accepted. If preferred, you can also choose Copy/Paste Table Data to paste data directly.

3. Download CSV File
You can download the sales attribution CSV file from previously uploaded sales attribution reports.
4. Choose Sales Data File in Folder
Fill in the file path by selecting your sales data file from your computer to prepare it for upload.
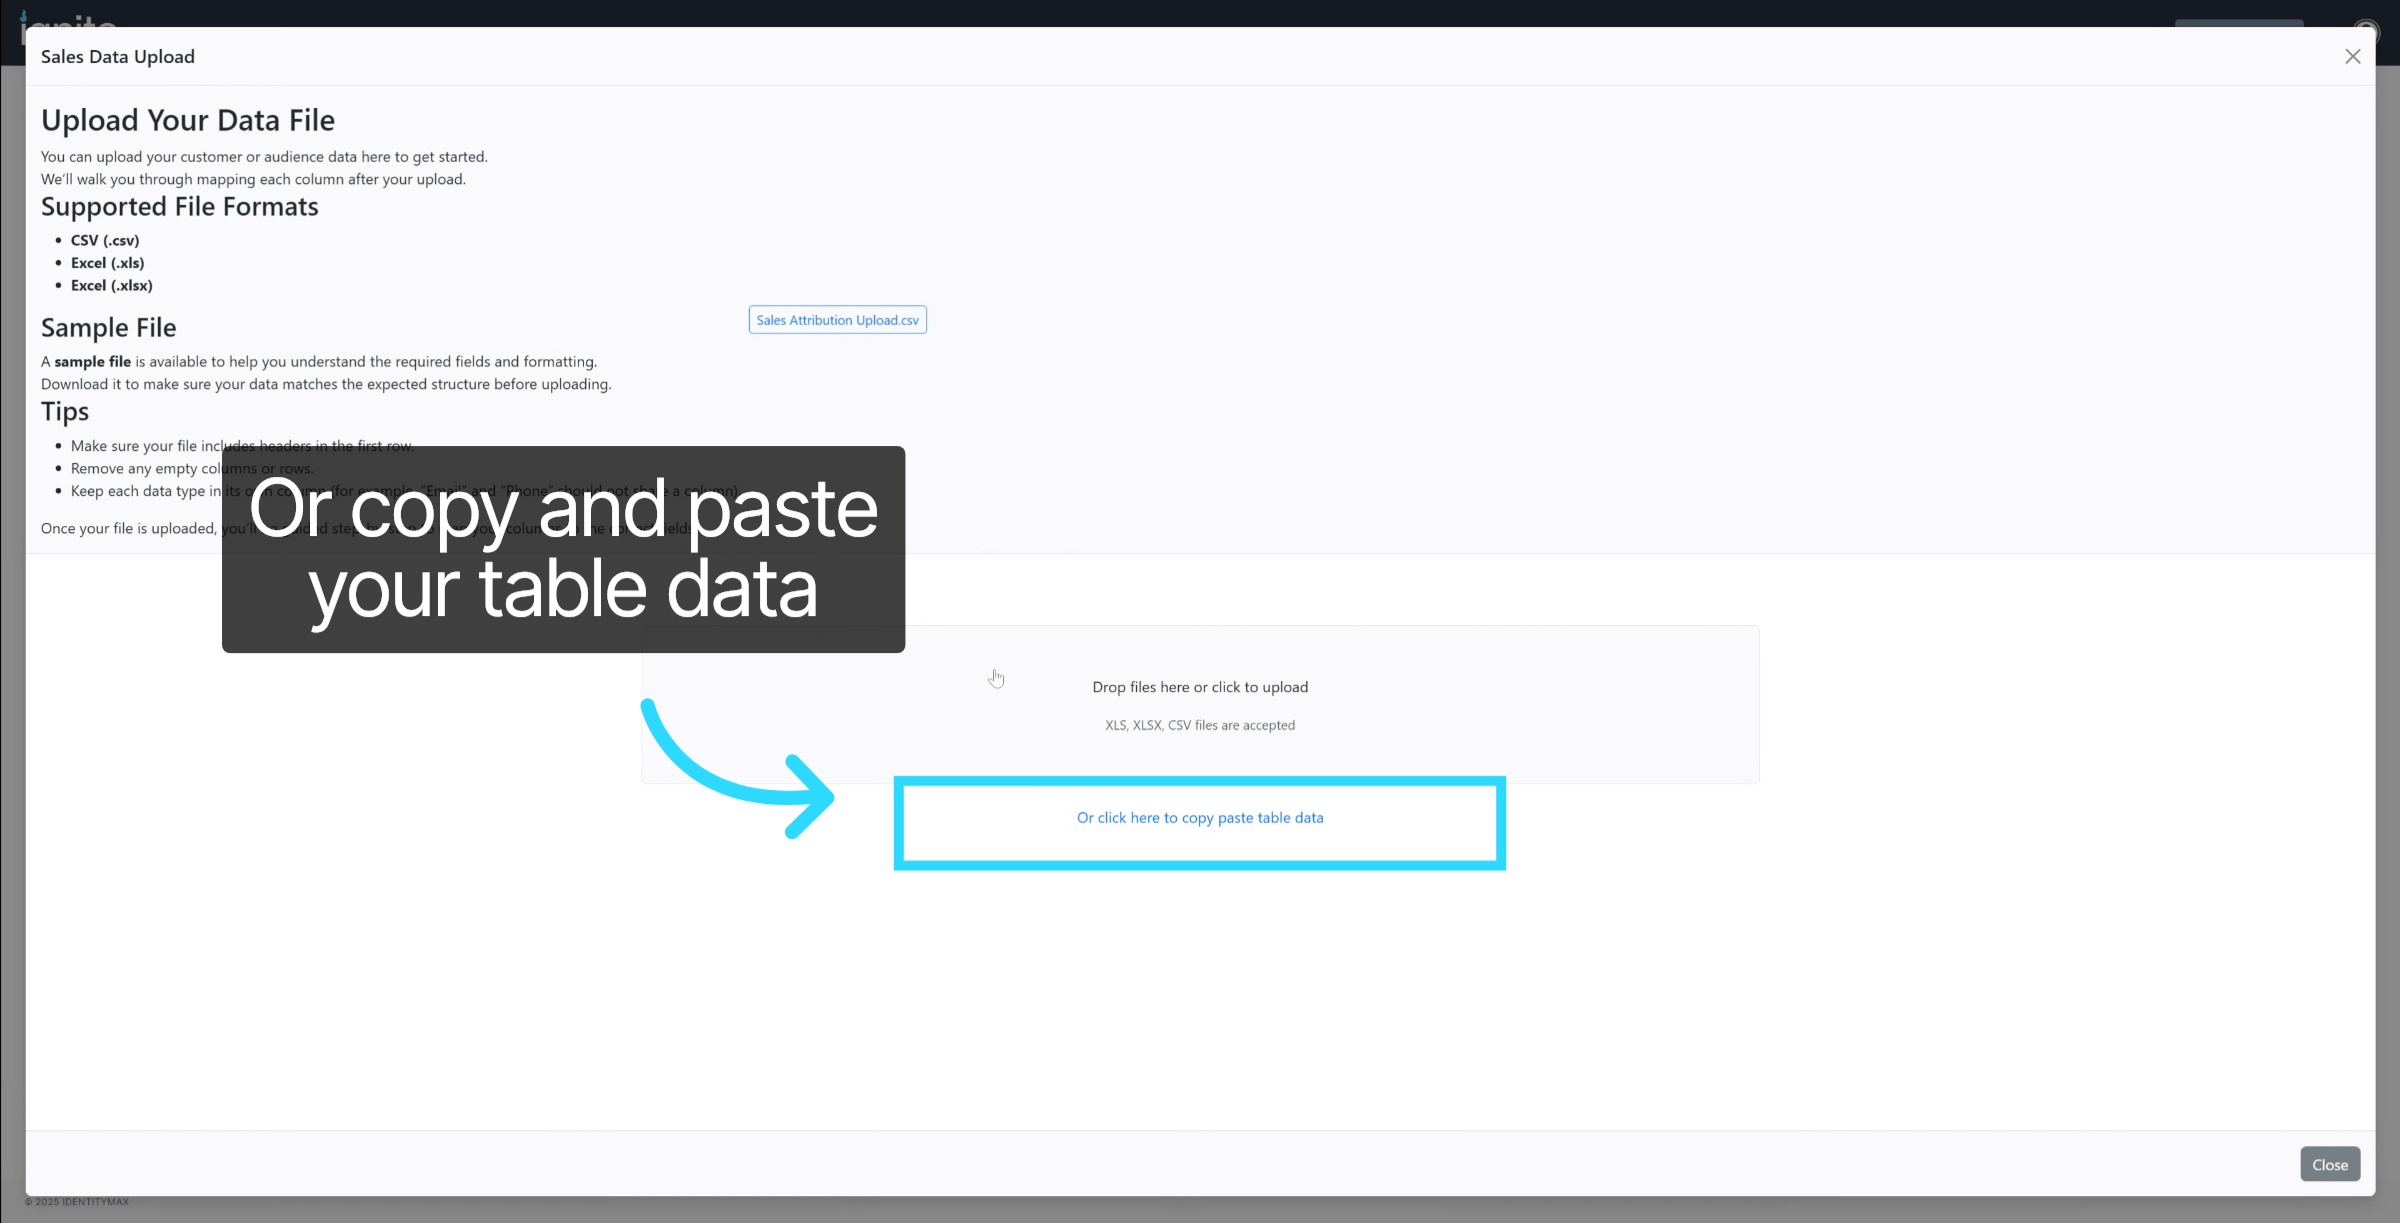
5. Optionally, Copy and Paste Your Data in Instead
Paste your sales data here to upload without selecting a file.
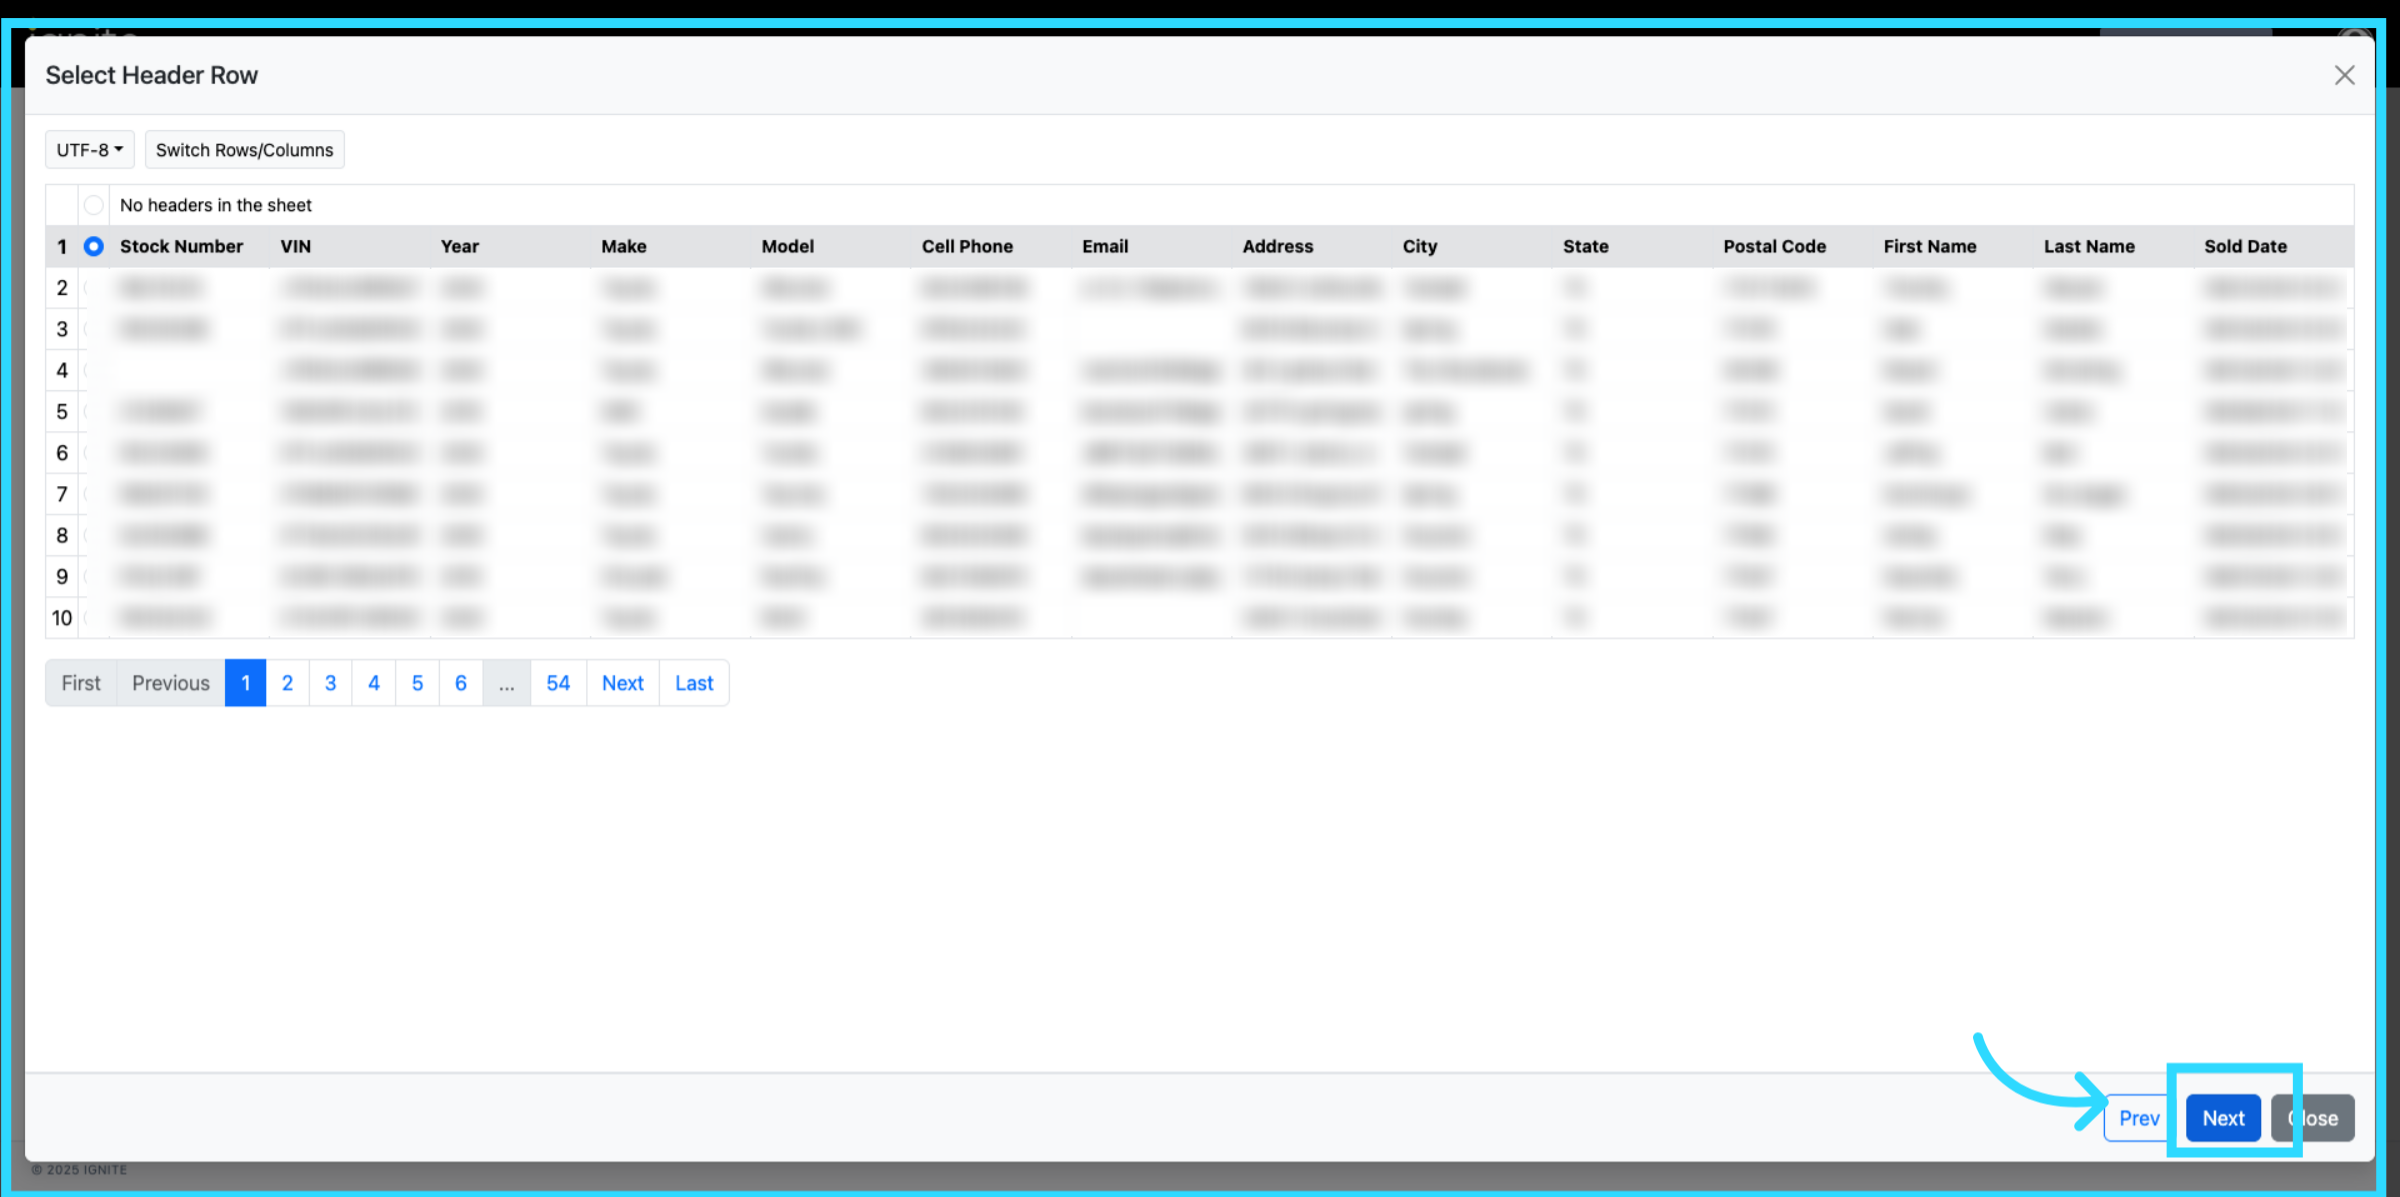
6. Review File Fields
After your file loads, review the mapped fields and click Next to continue.
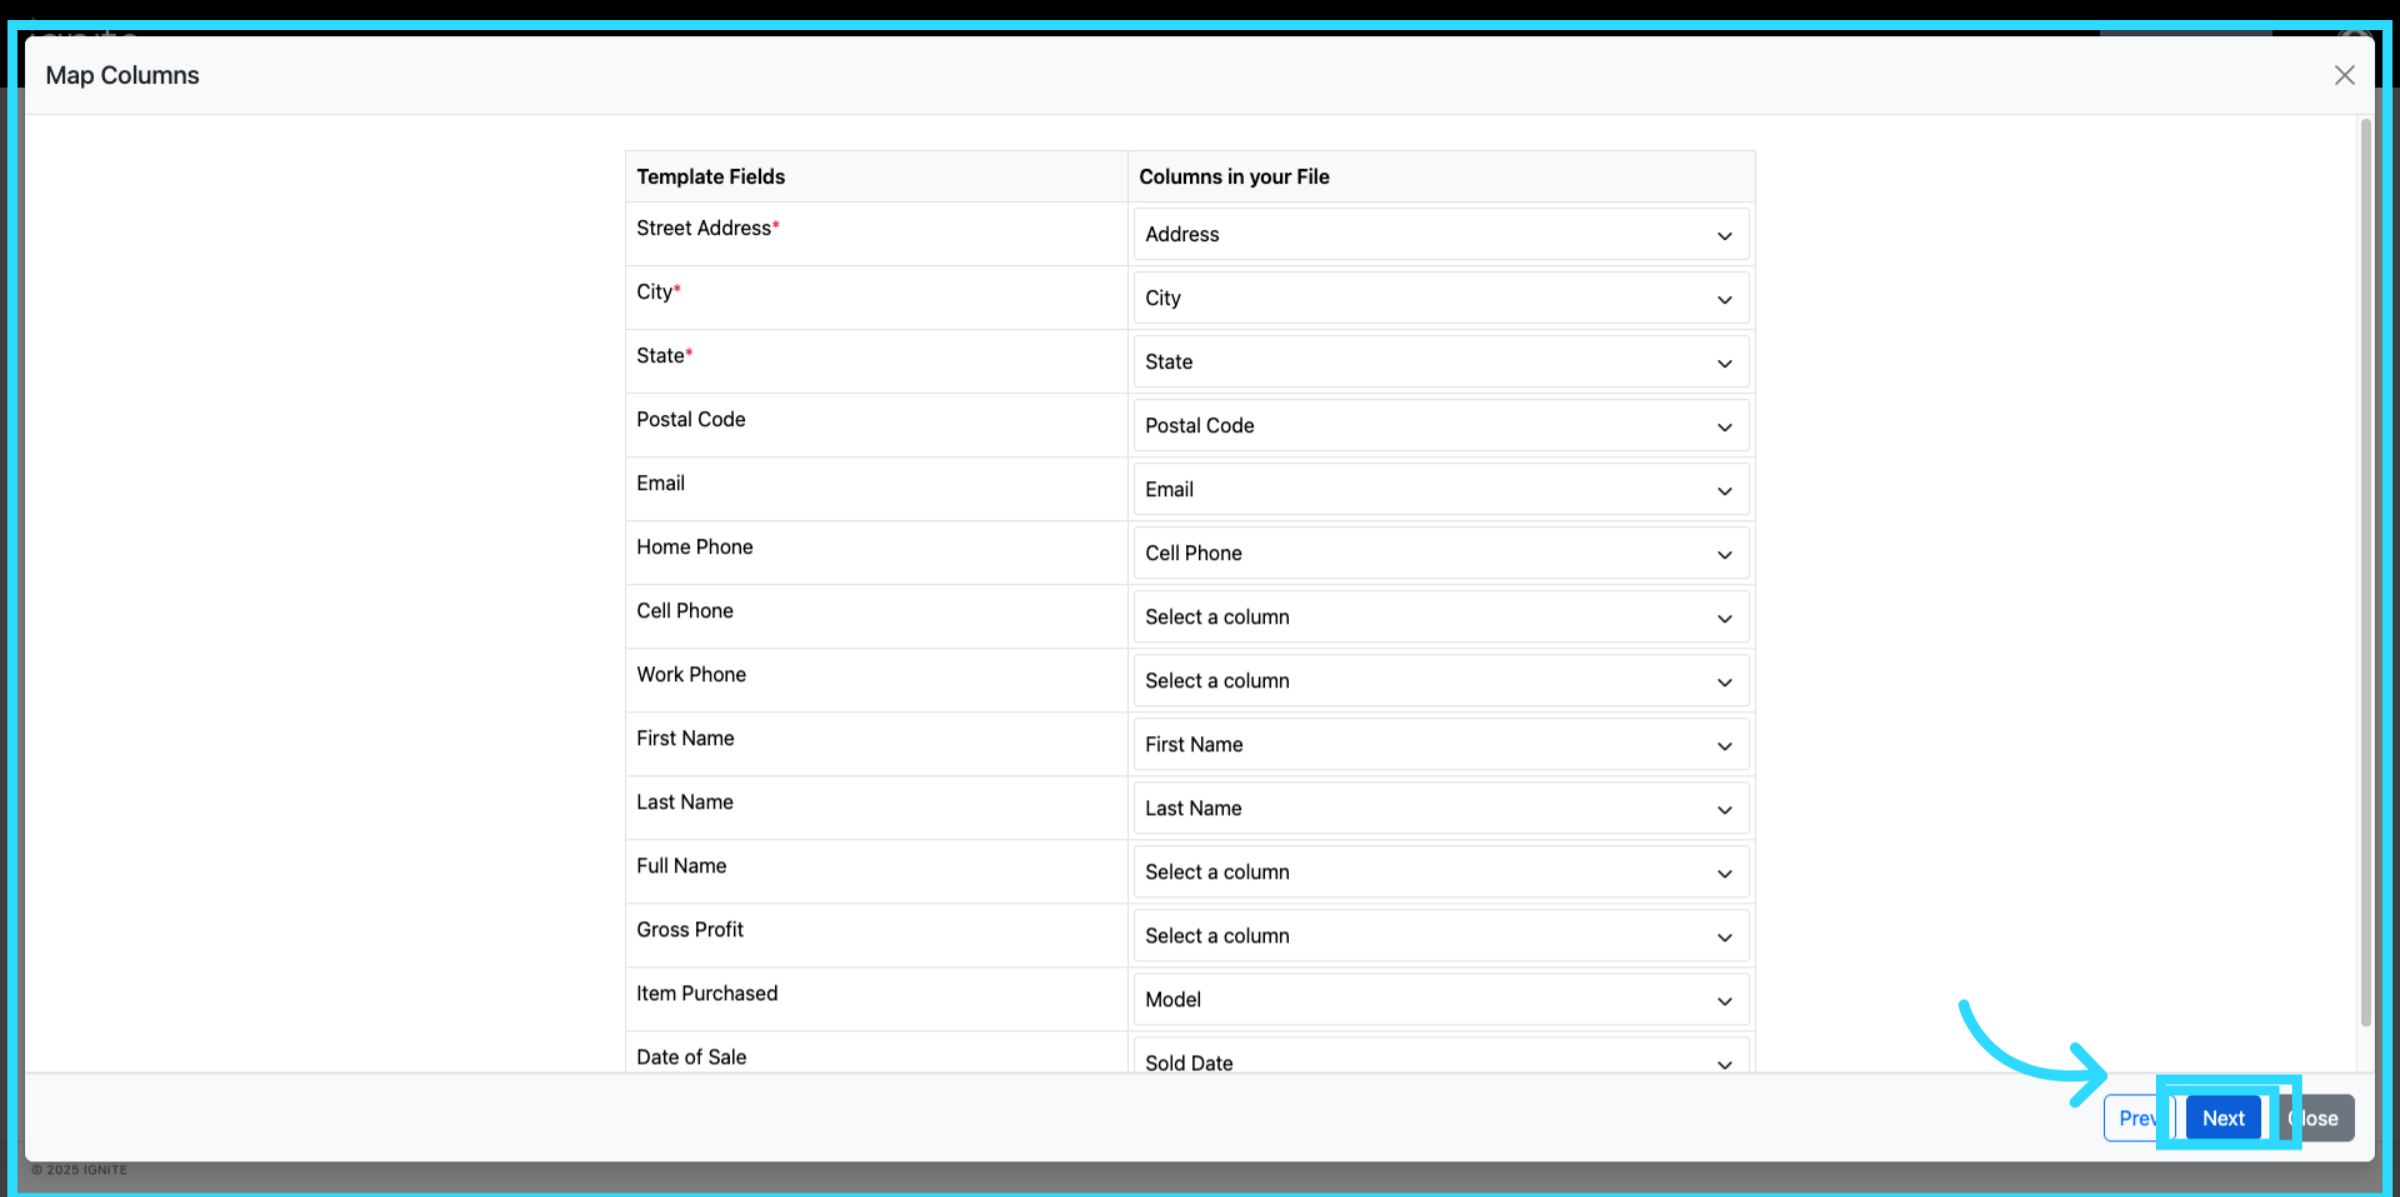
Before moving on, note that while both "Item purchased" and "Amount" are not required fields, they are recommended for the most accurate attribution data. If no data is added to these columns, no value is shown in the report.
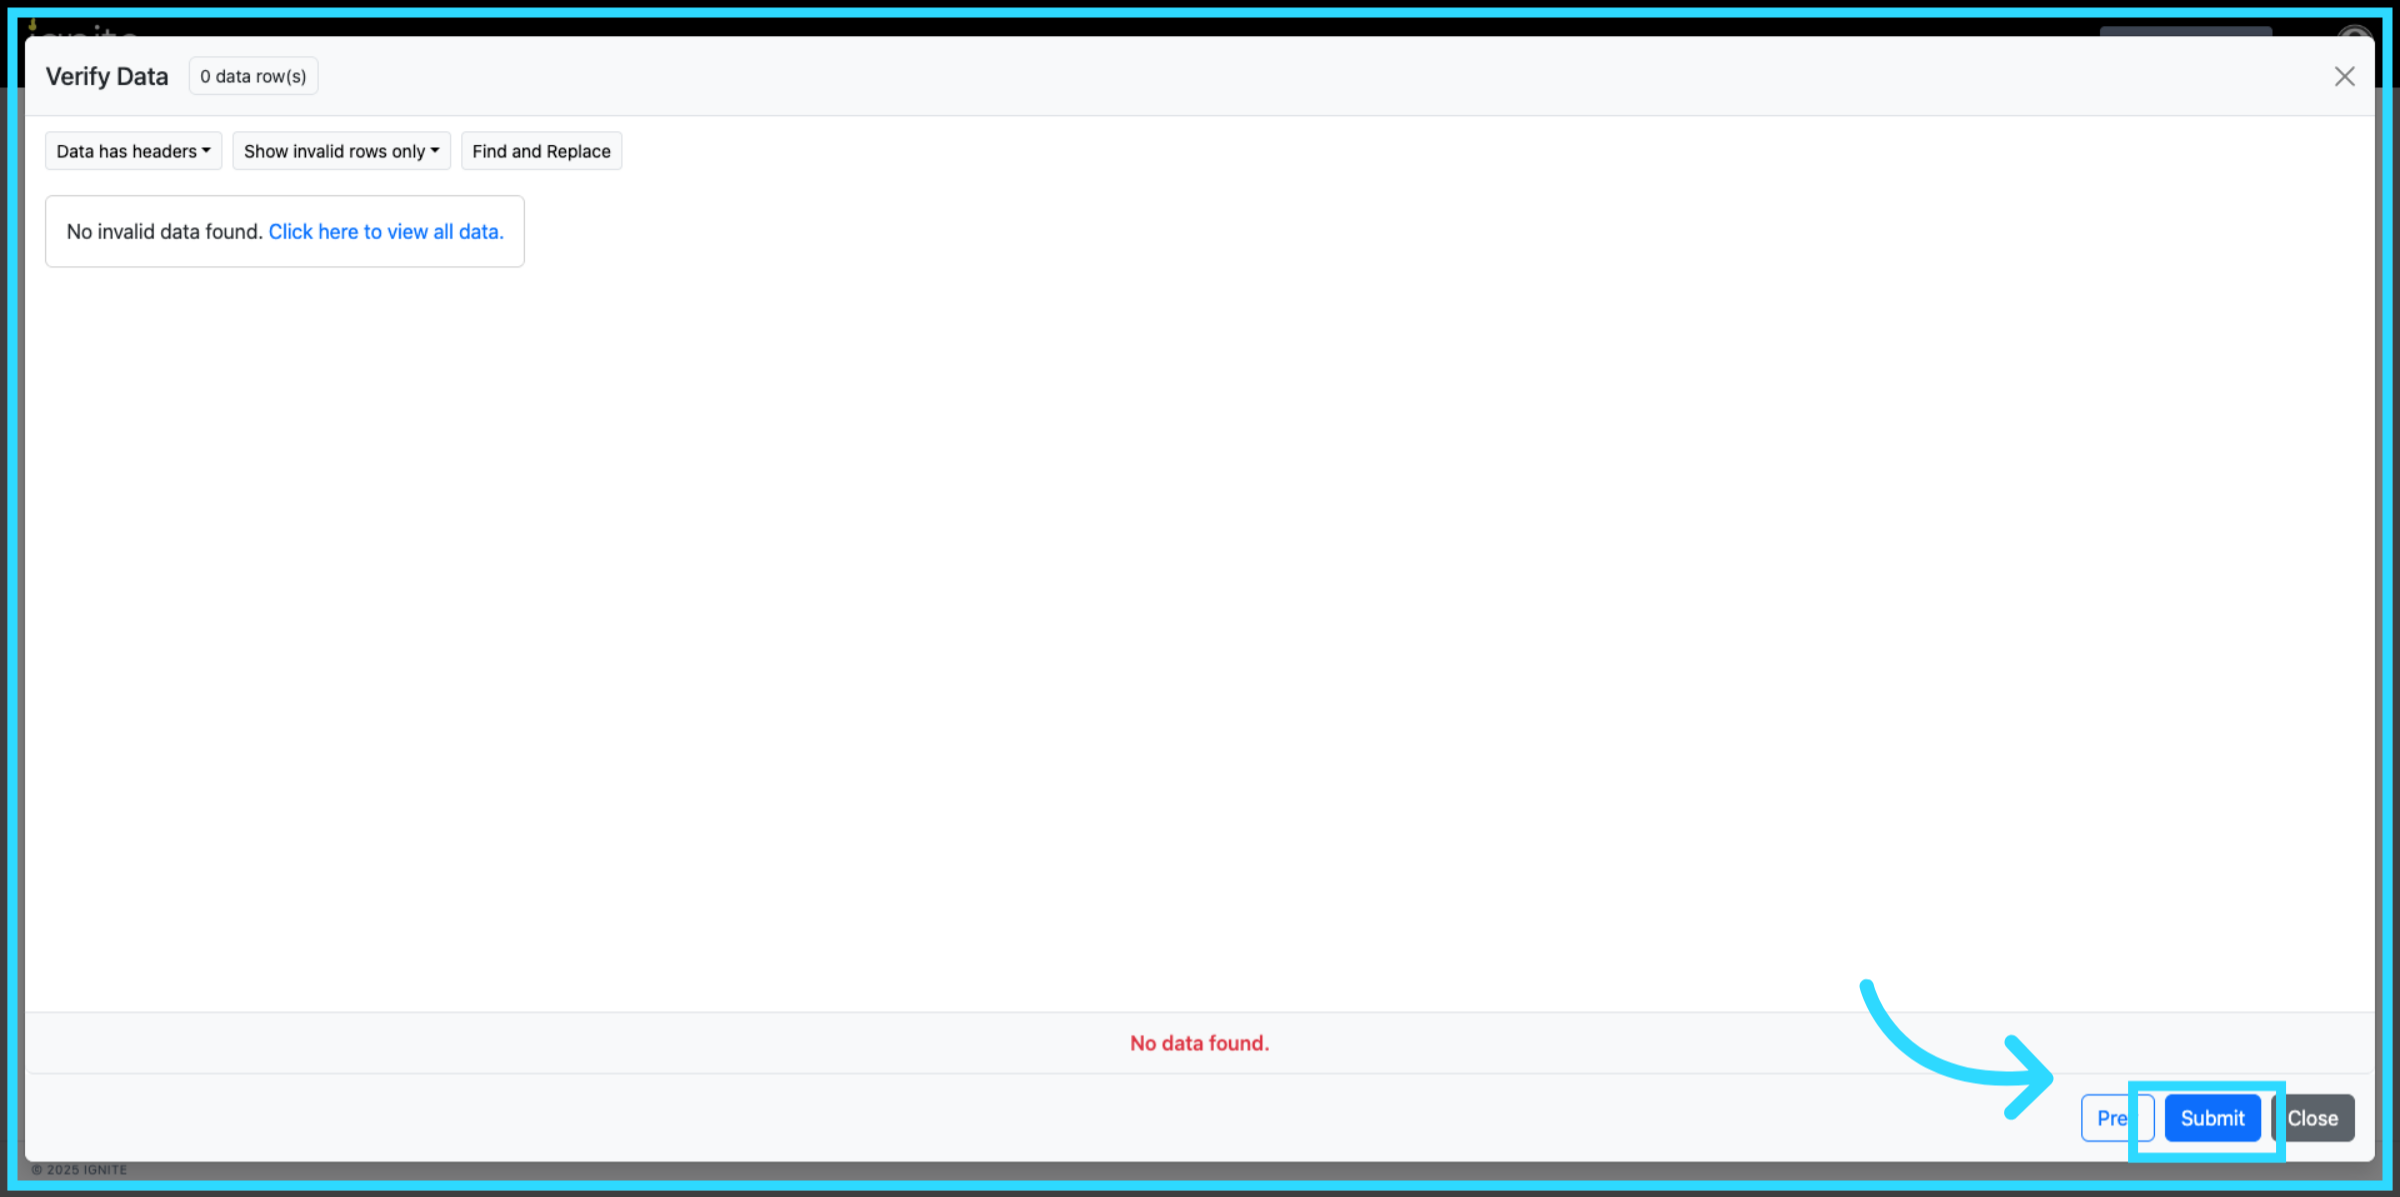
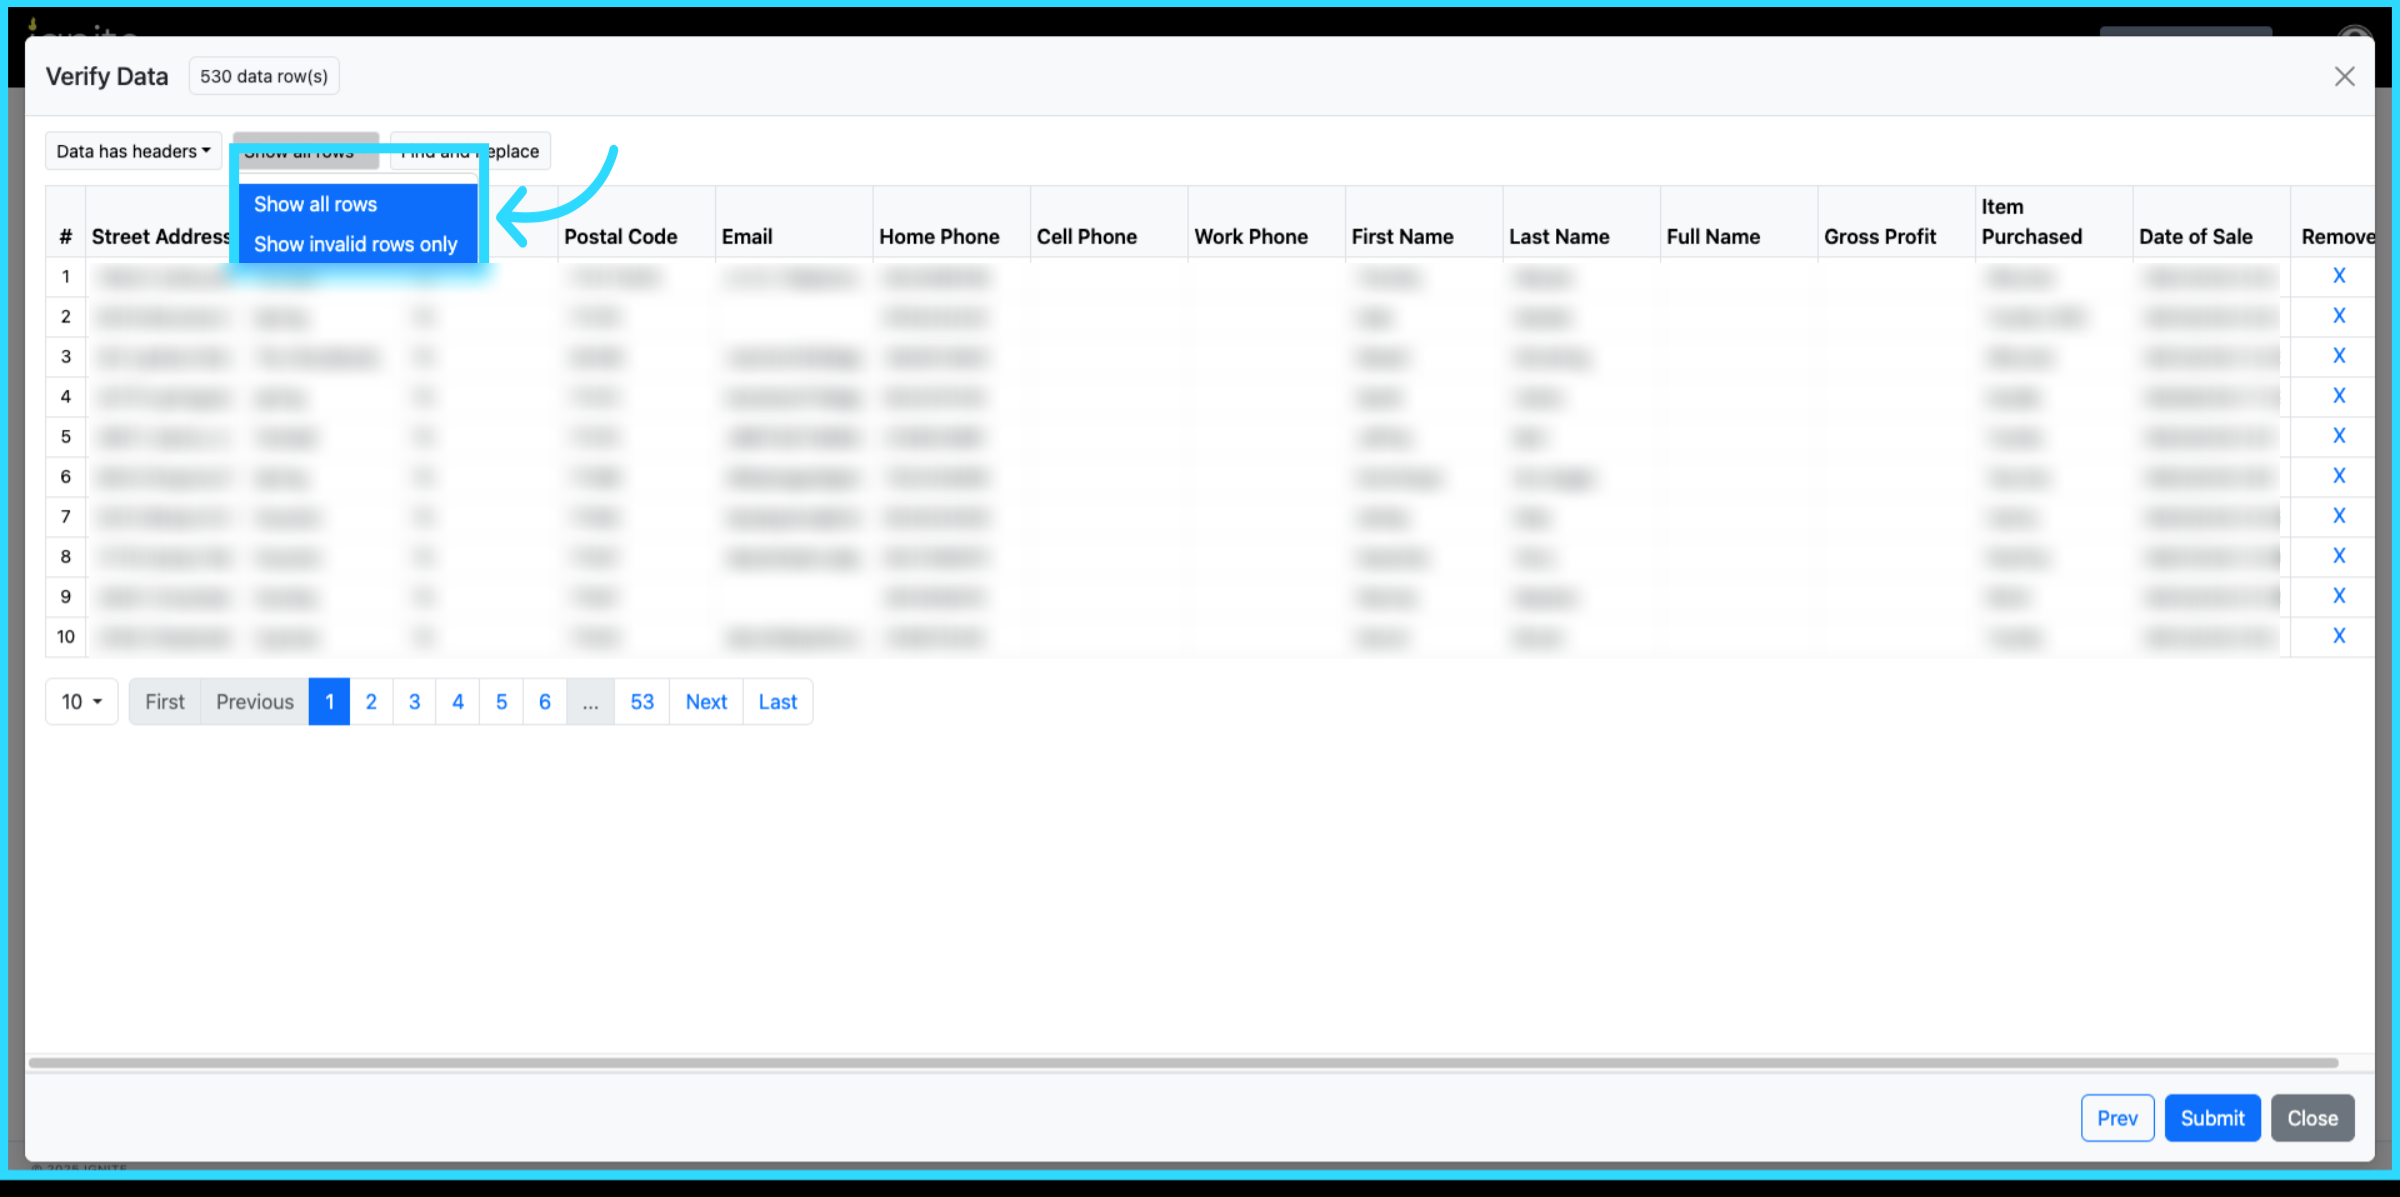
7. Validate Data
Click Next again to run validation. You can use the view options to check your dataset. Select Show All Rows to see the complete file or Show Invalid Rows Only to focus on records that need correction.
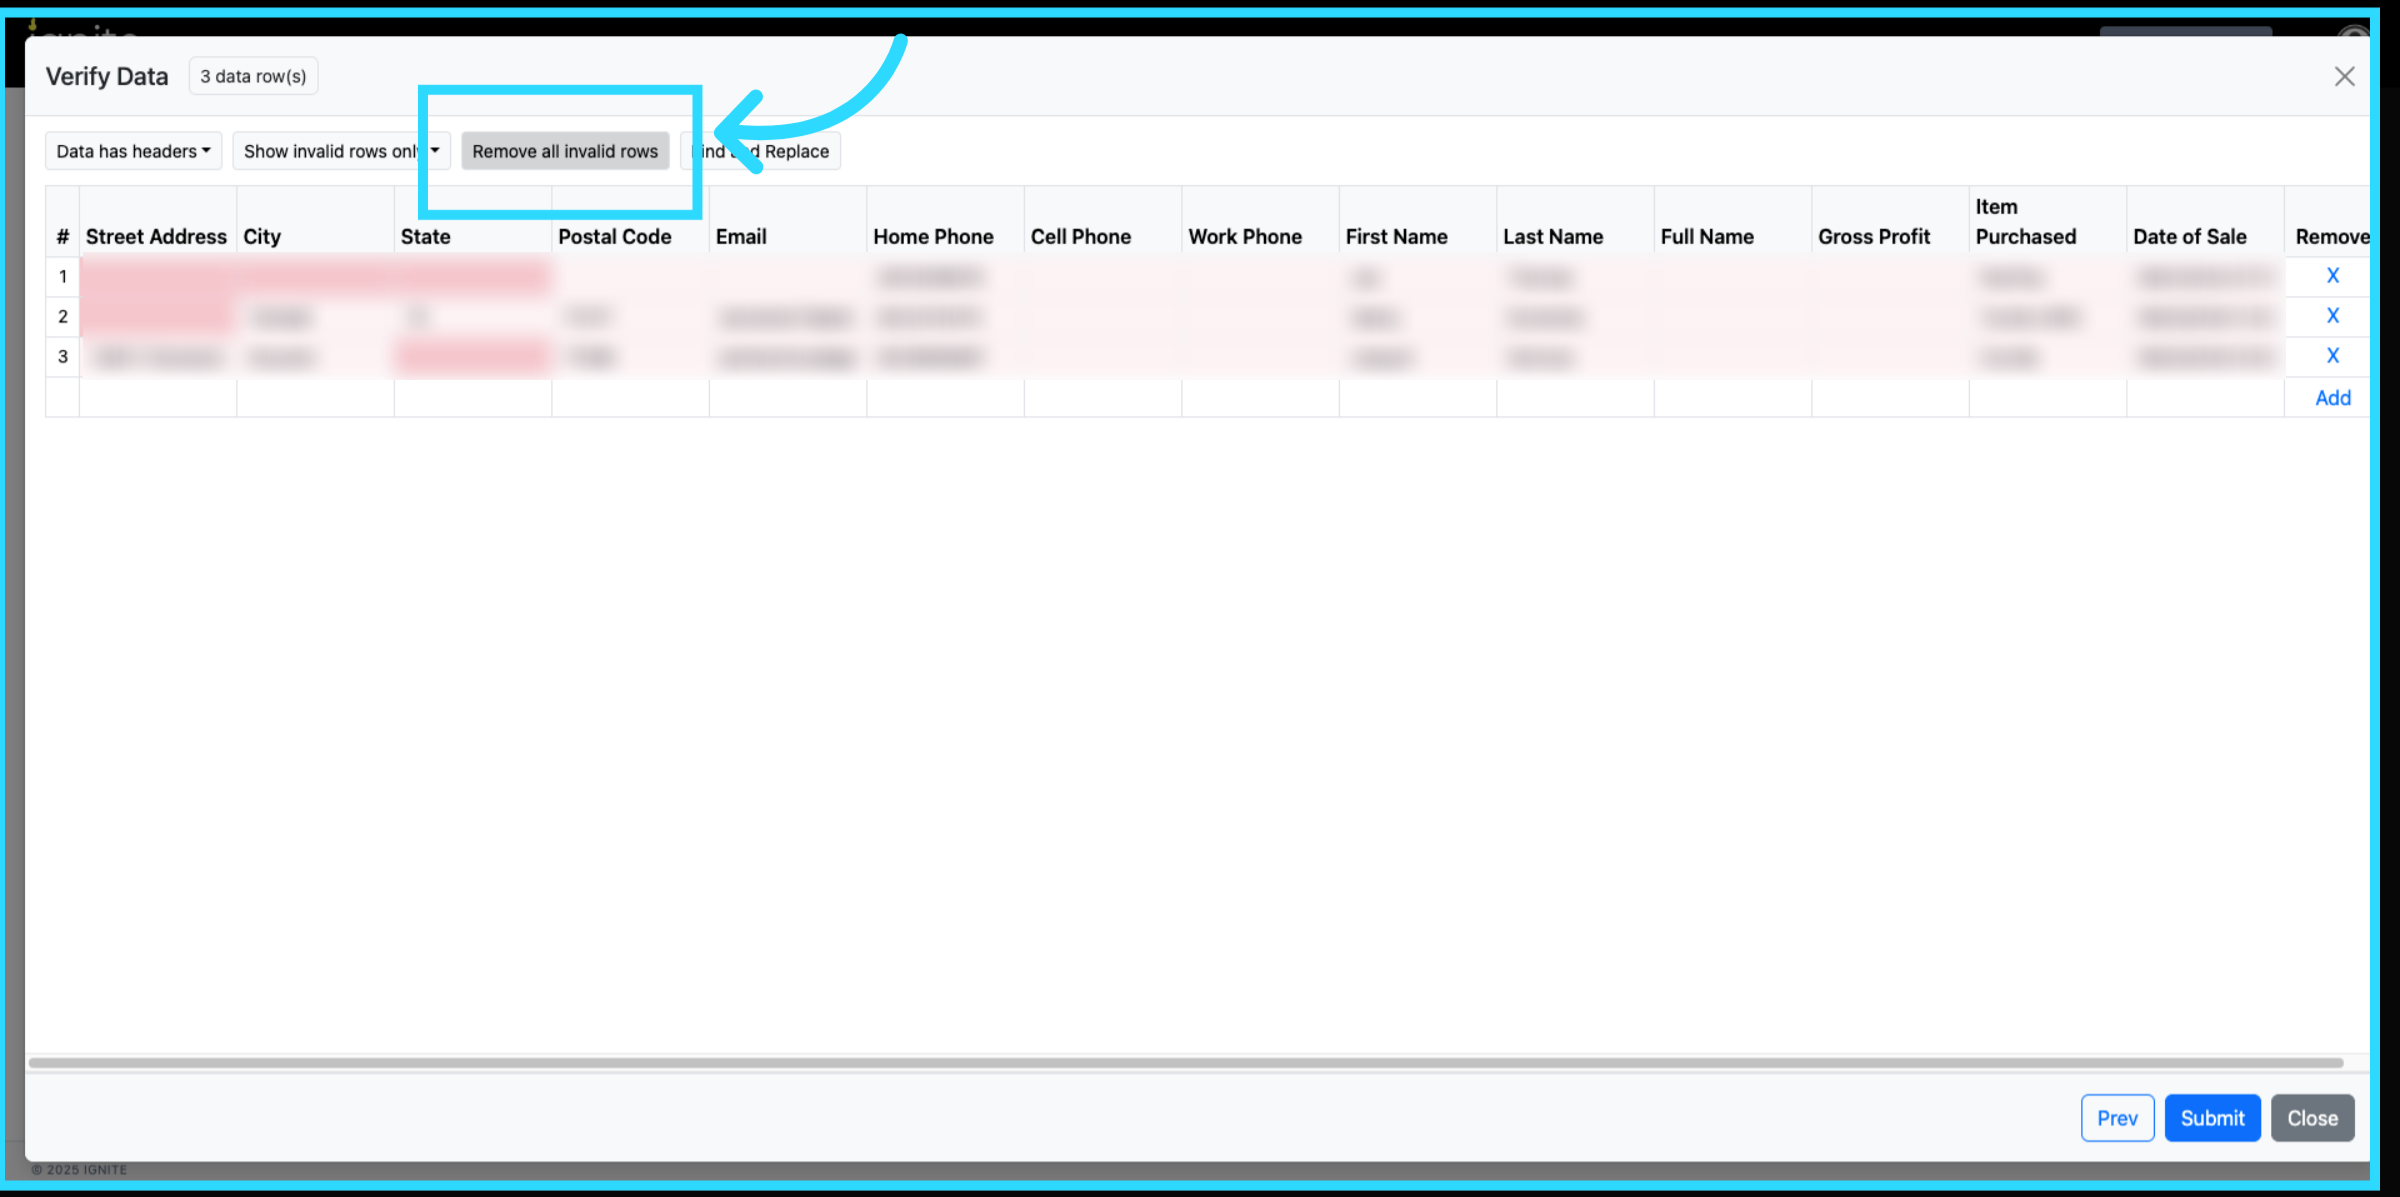
8. Clean Invalid Data
If invalid rows are found, click Remove All Invalid Rows and confirm by selecting Remove.
9. Submit the File
Click Submit to complete the upload. Your validated sales data will now appear in the Sales Attribution Report.