
How to Set Up Lead Notifications
This article explains how to configure lead notifications in Ignite so that your team receives timely alerts for new lead submissions.
Watch this video tutorial to see the full process in action:
Step-by-Step Instructions
Follow these steps to set up and test lead notification emails from your Ignite account.
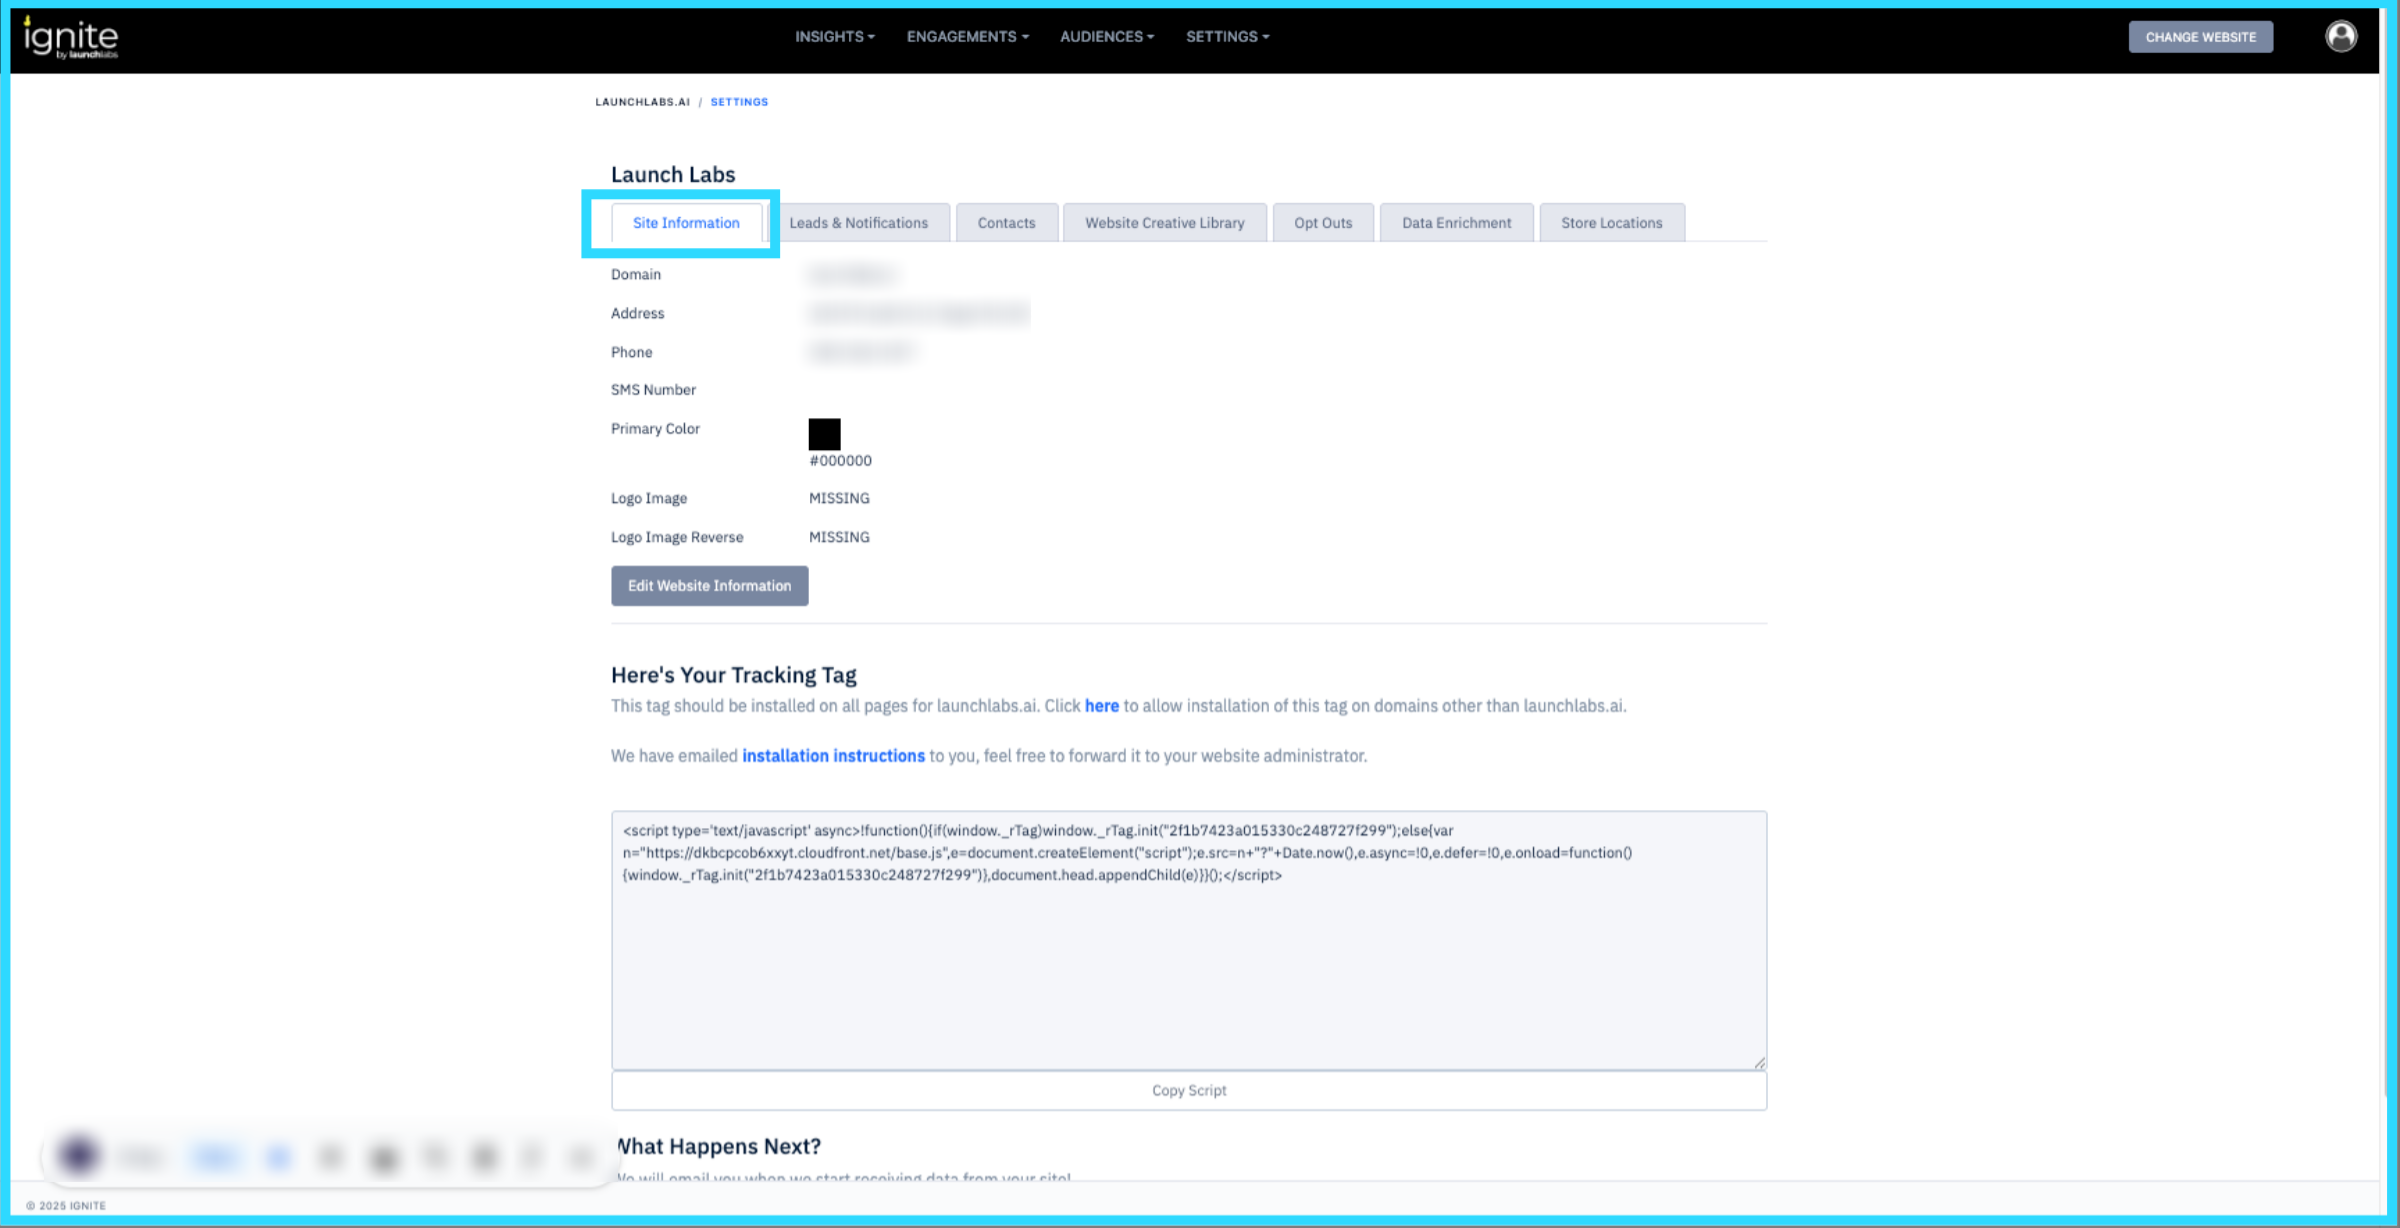
1. Go to Site Information
Log into your account, and from the main dashboard, navigate to the Site Information page. This is where you can manage your core site-level settings.
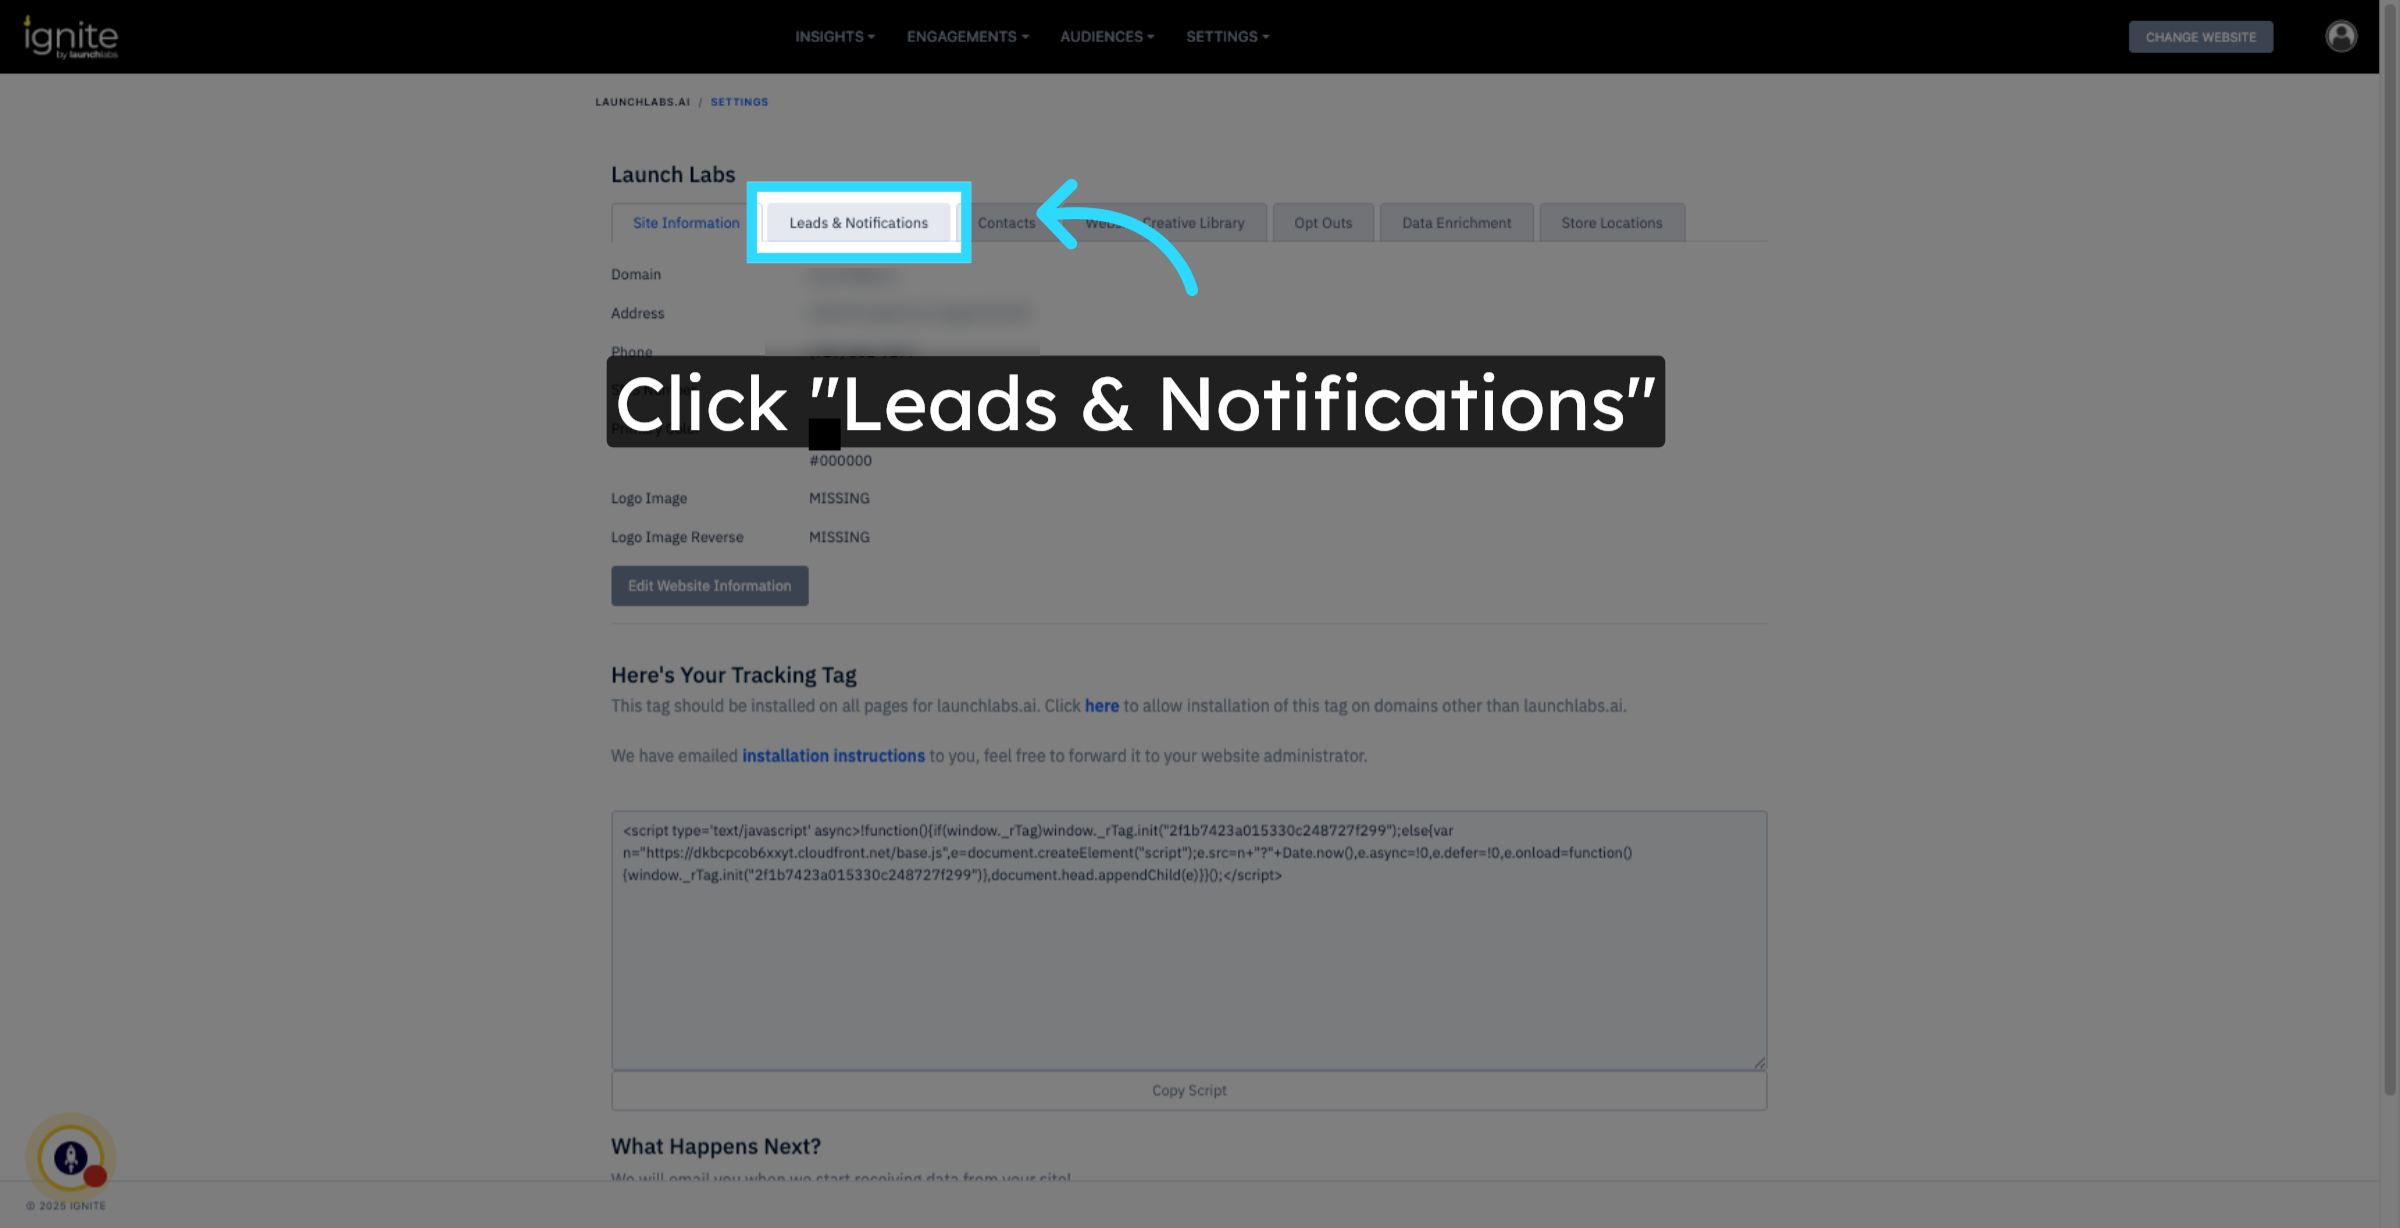
2. Open Leads & Notifications
Click the Leads & Notifications tab to open the section that manages how you receive alerts when a new lead is submitted.
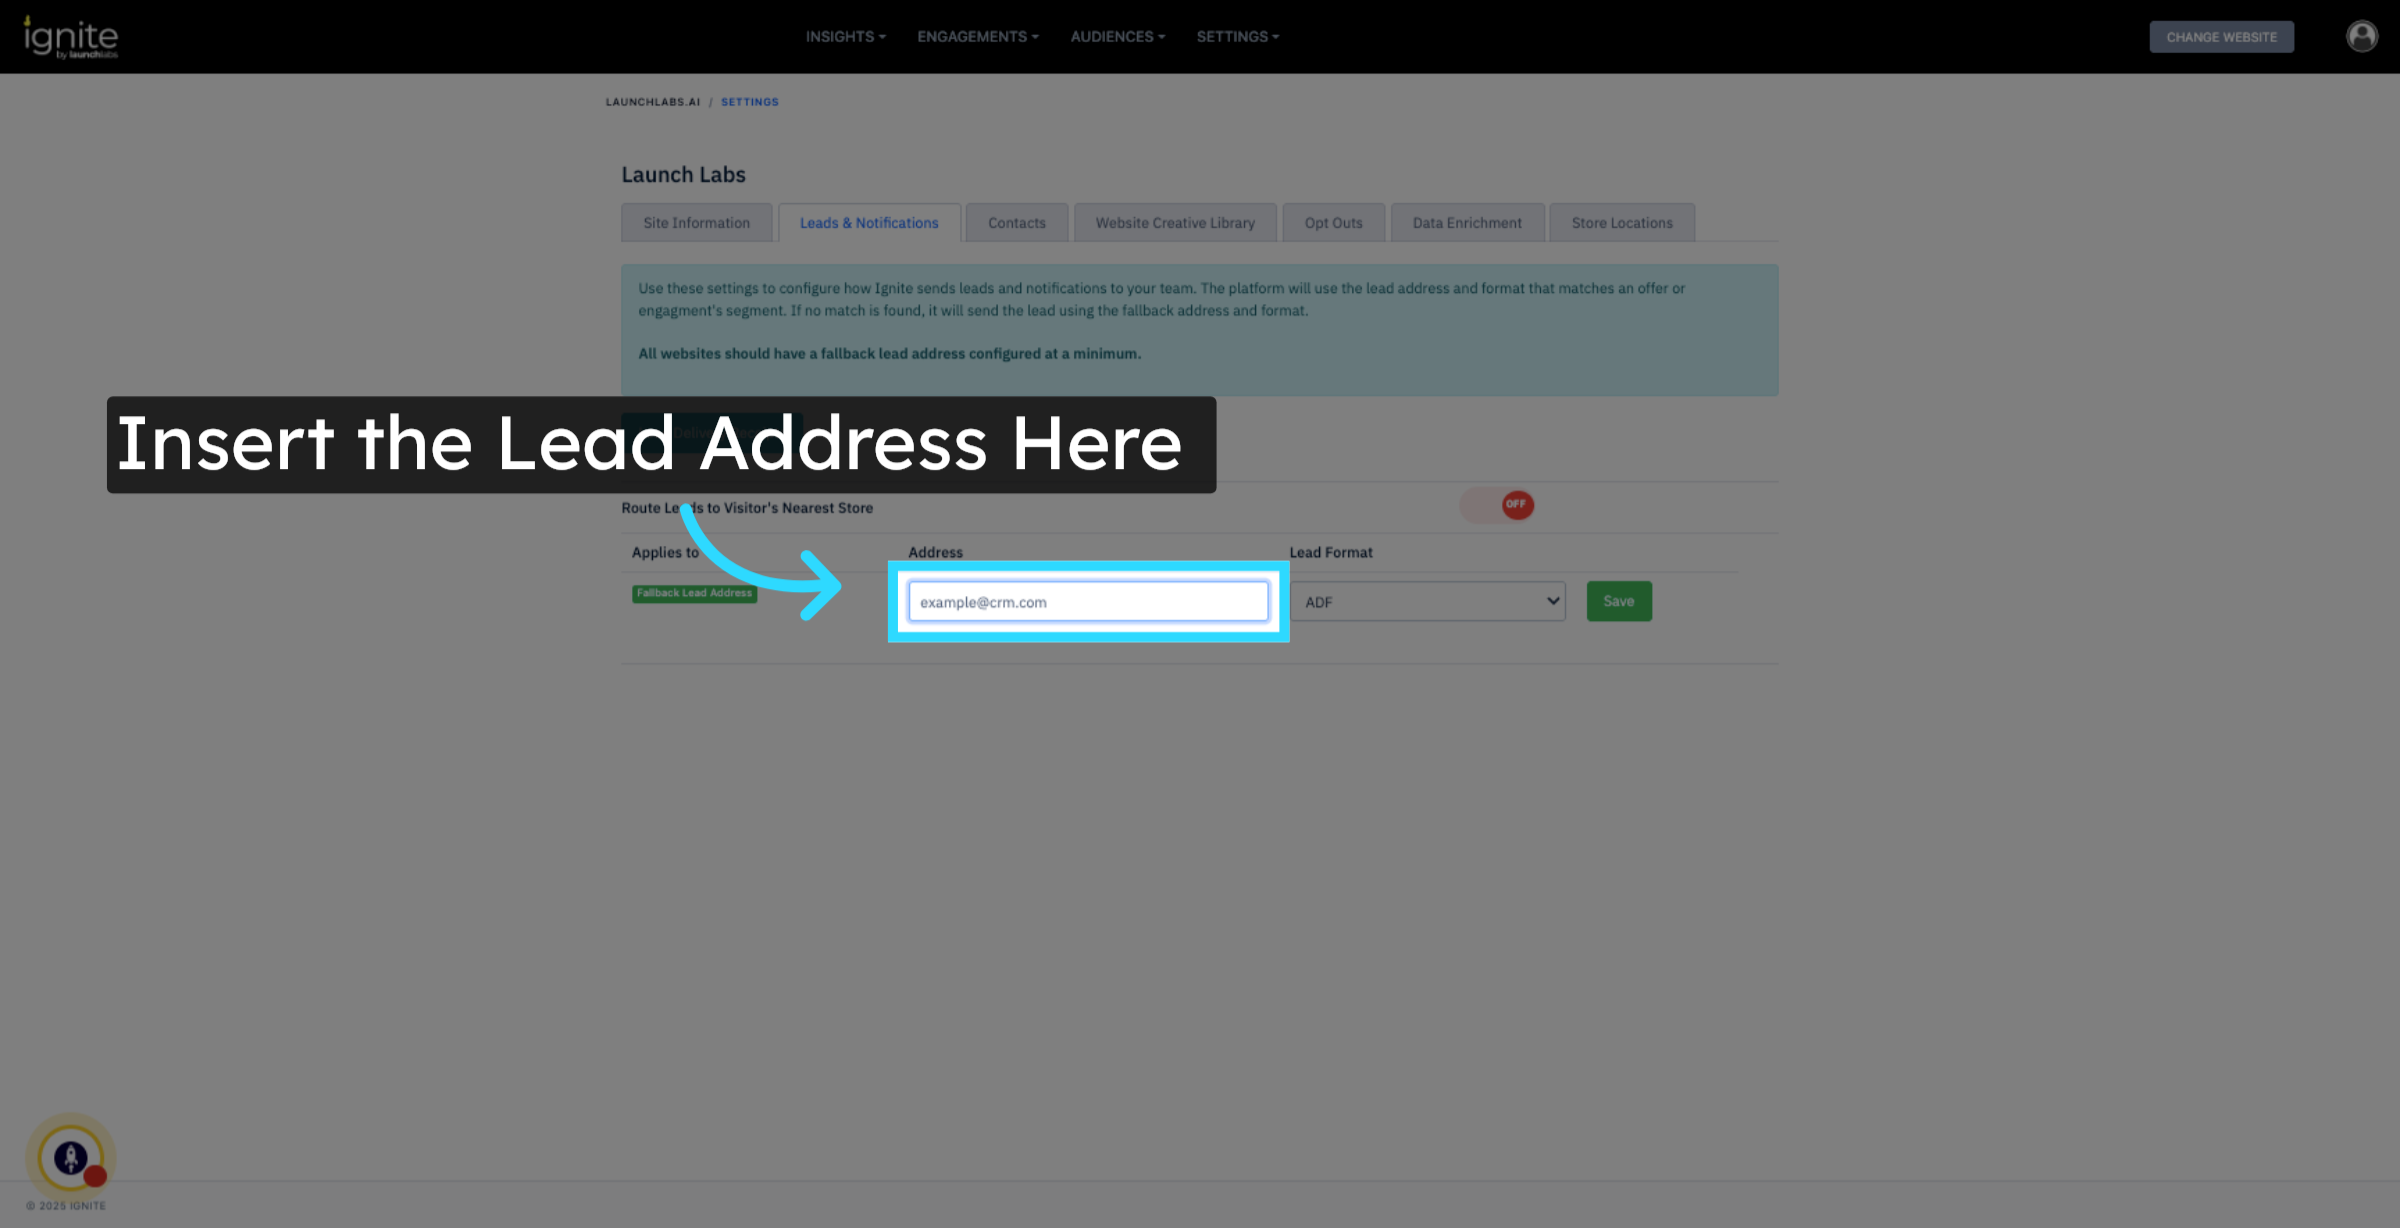
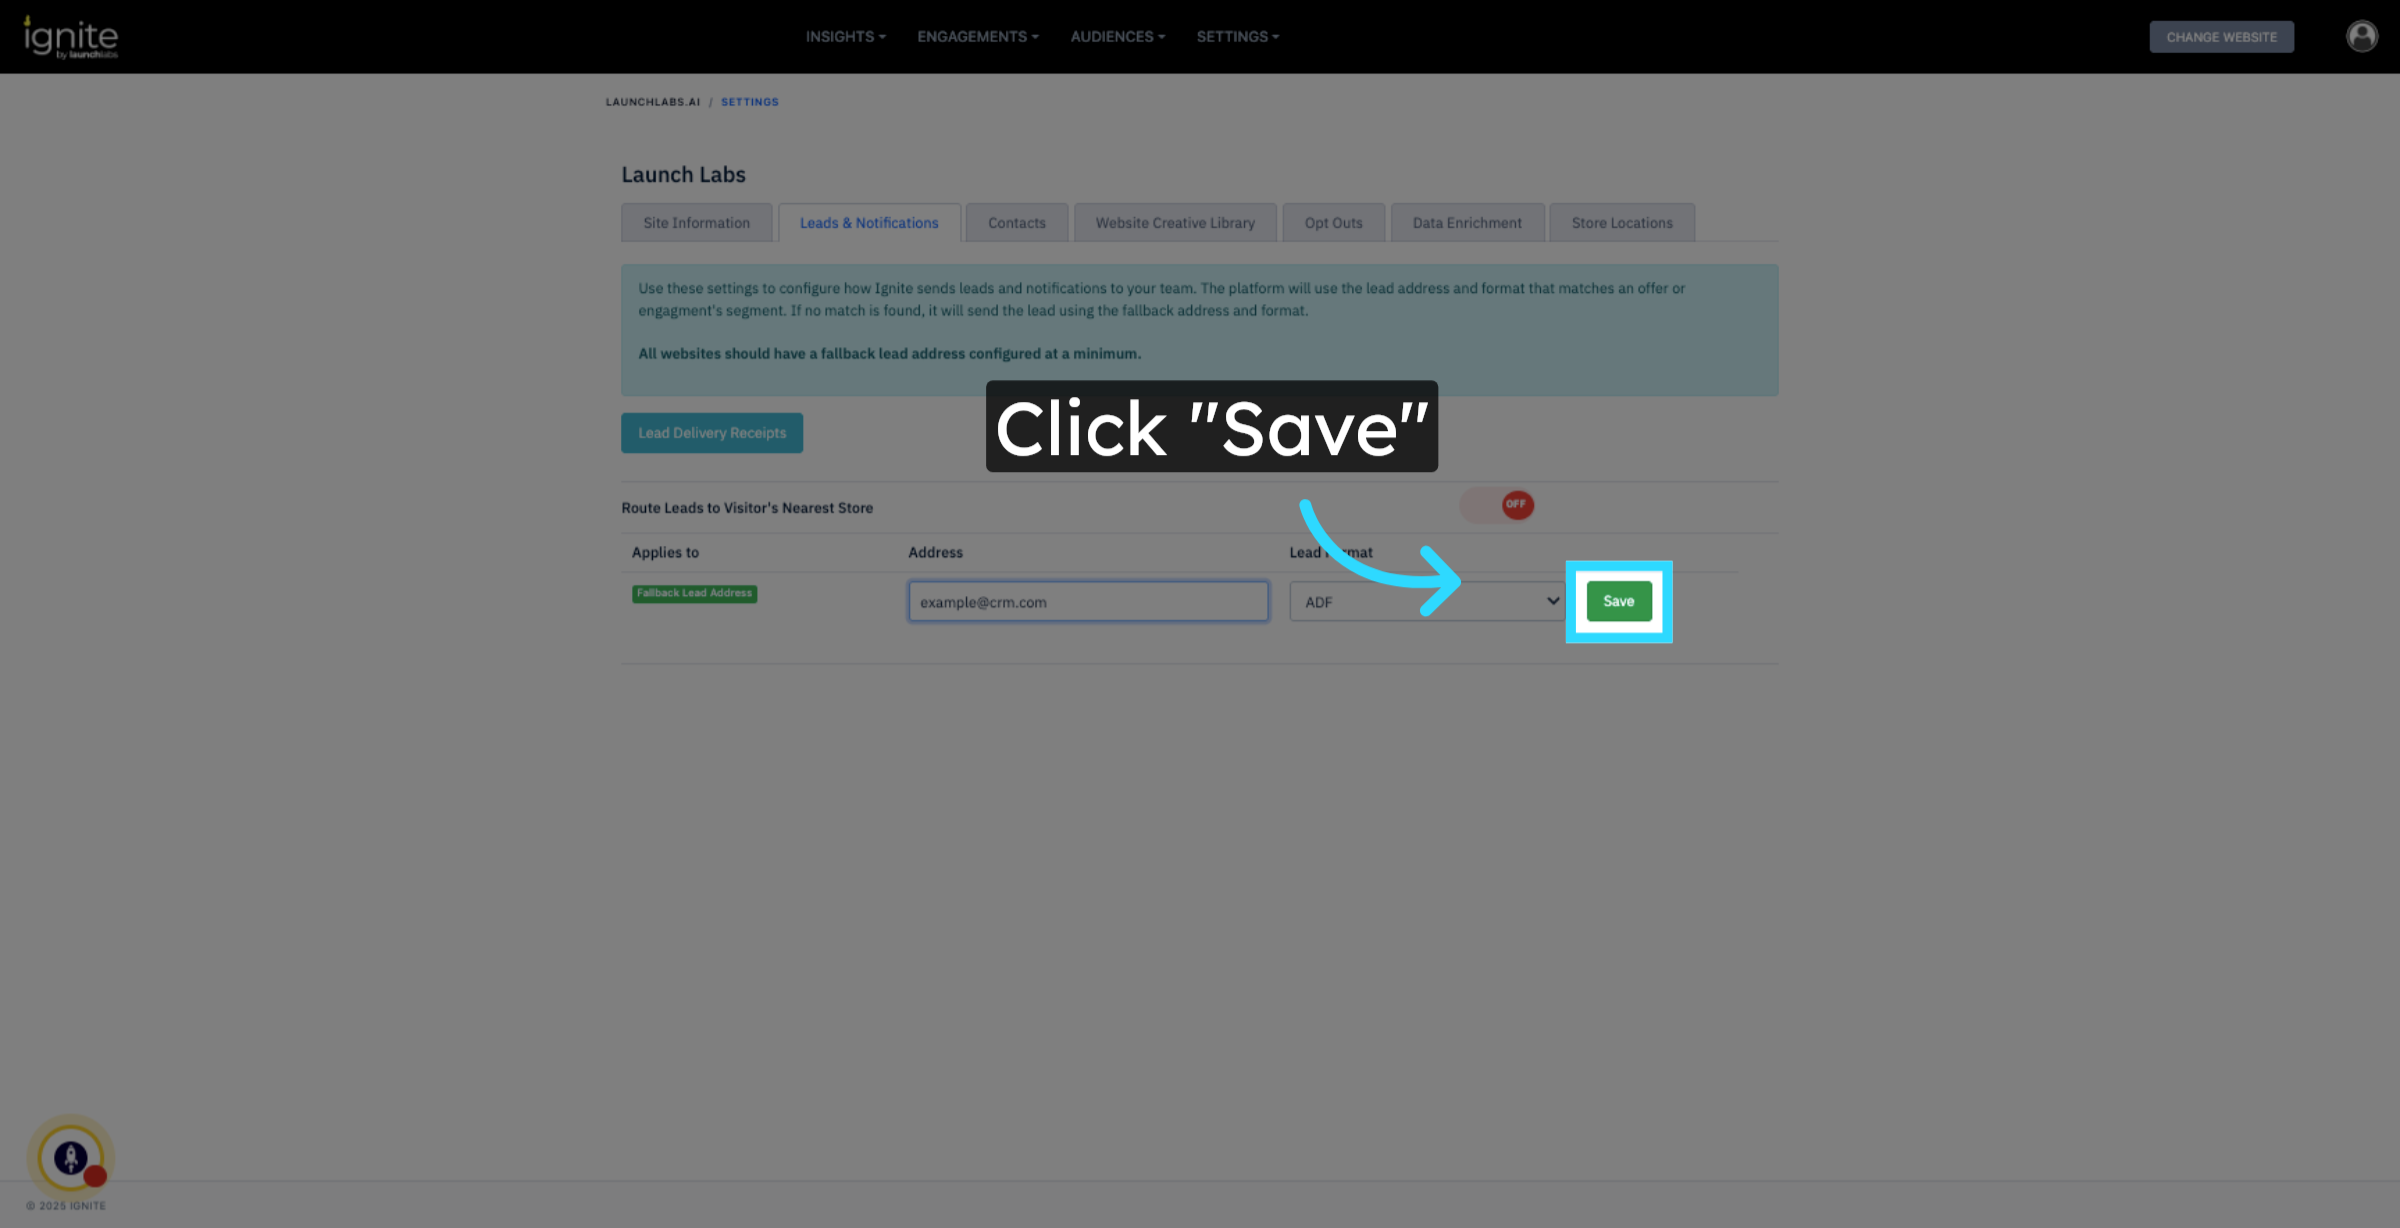
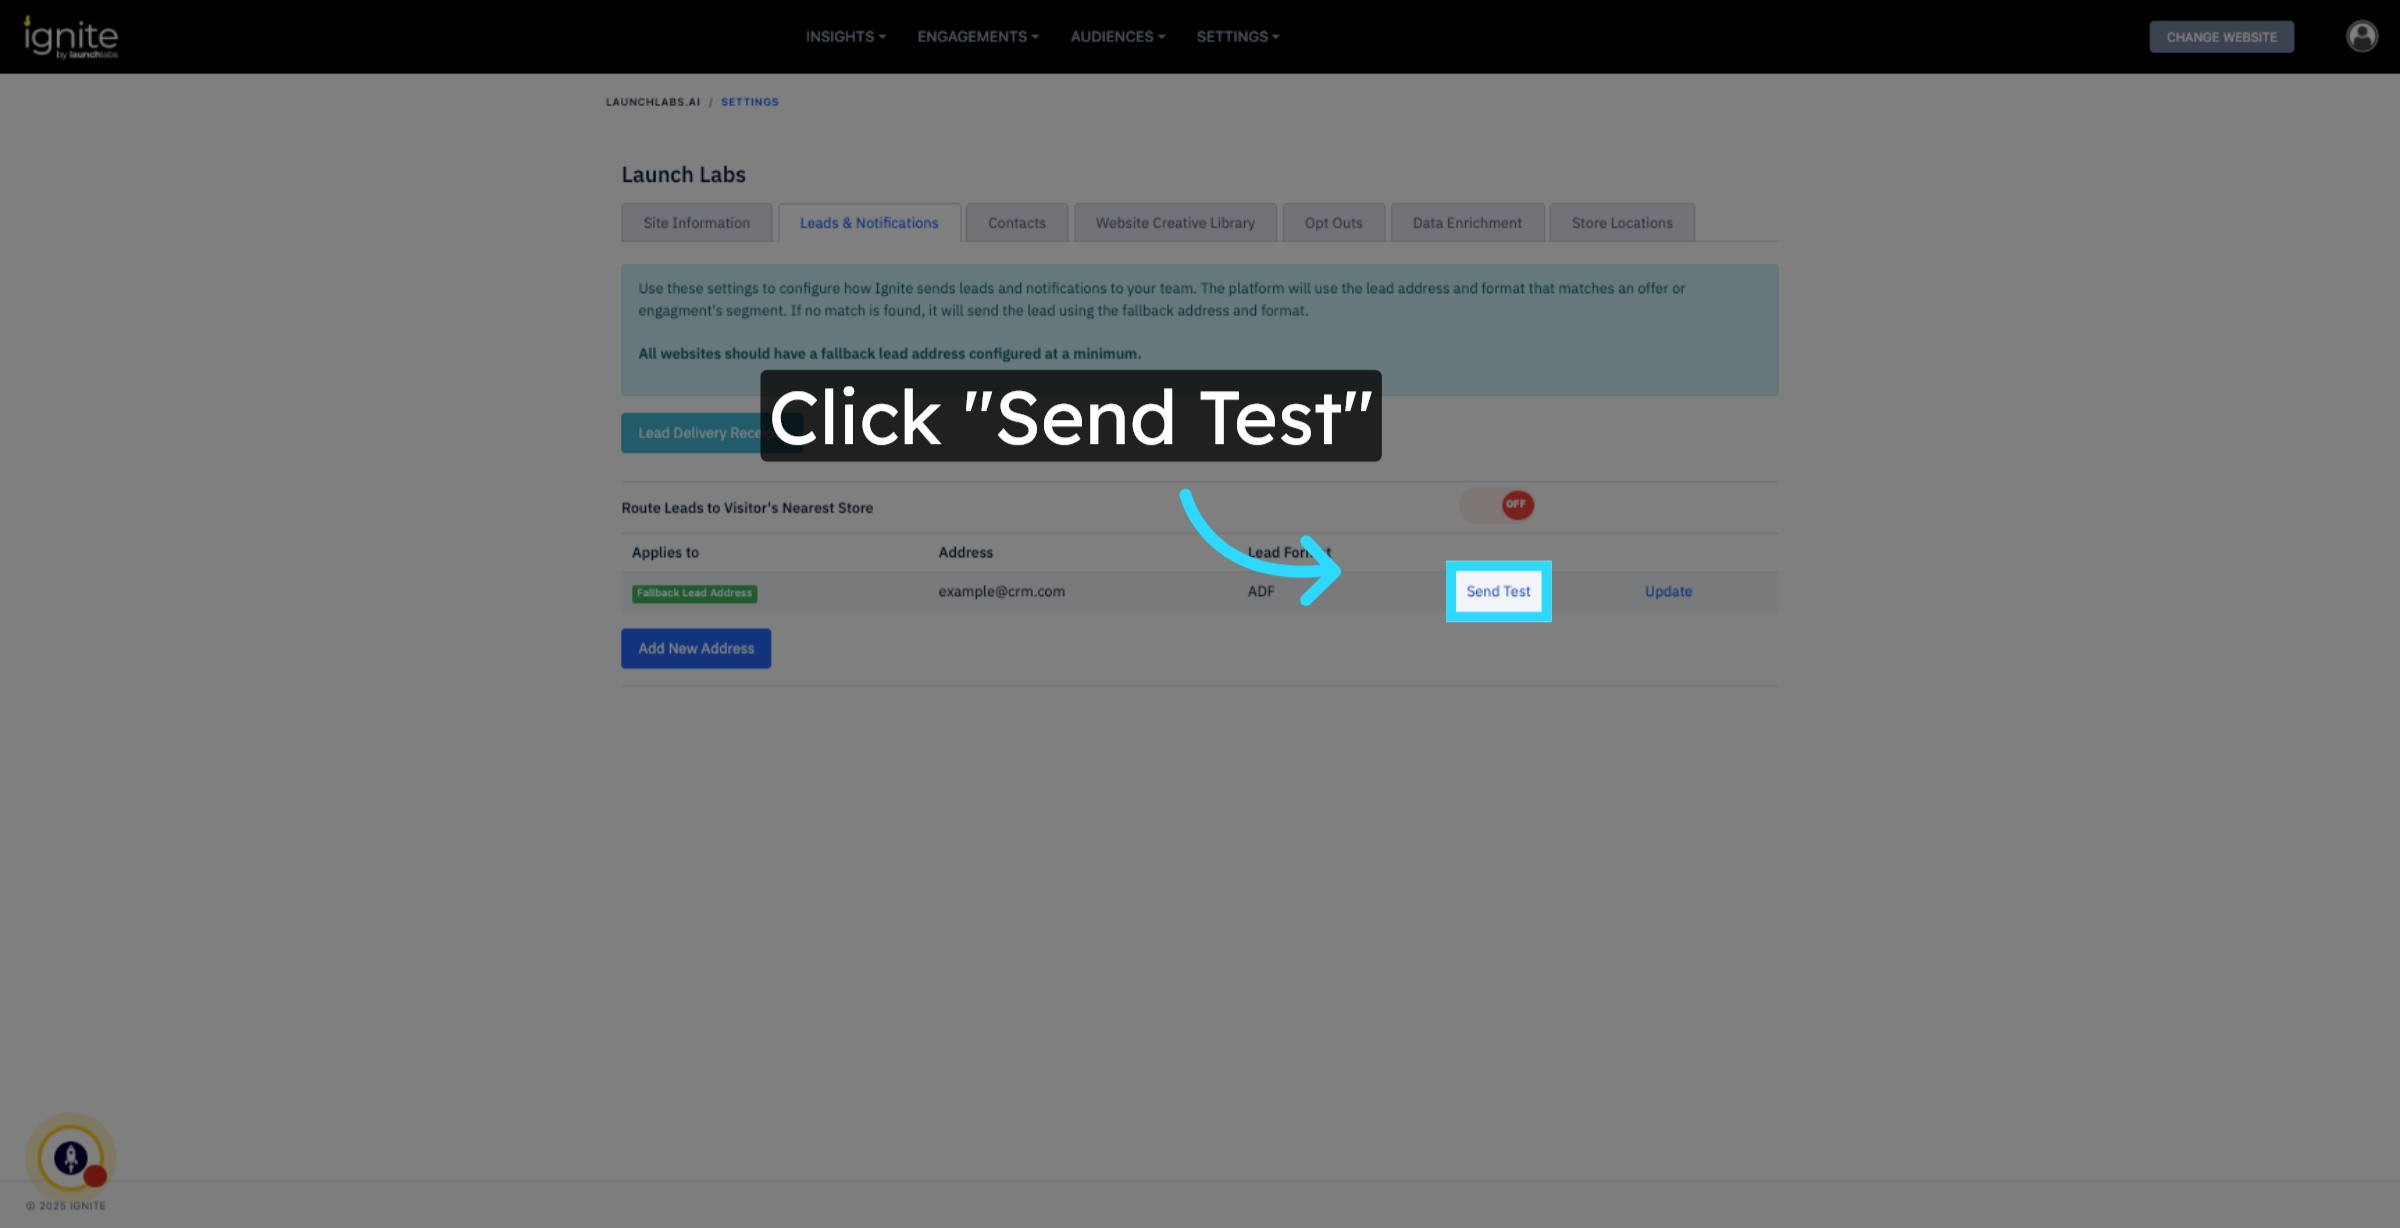
3. Set the Fallback Lead Address
Click Update next to the Fallback Lead Address field. Enter the email address where you’d like to receive lead notifications (e.g., example@crm.com) and then click Save to confirm. Notice the blue call out box. At minimum you should make sure your site has a fallback address listed here.

4. Test the Notification
Click Send Test to verify that notifications are successfully reaching the fallback email address.
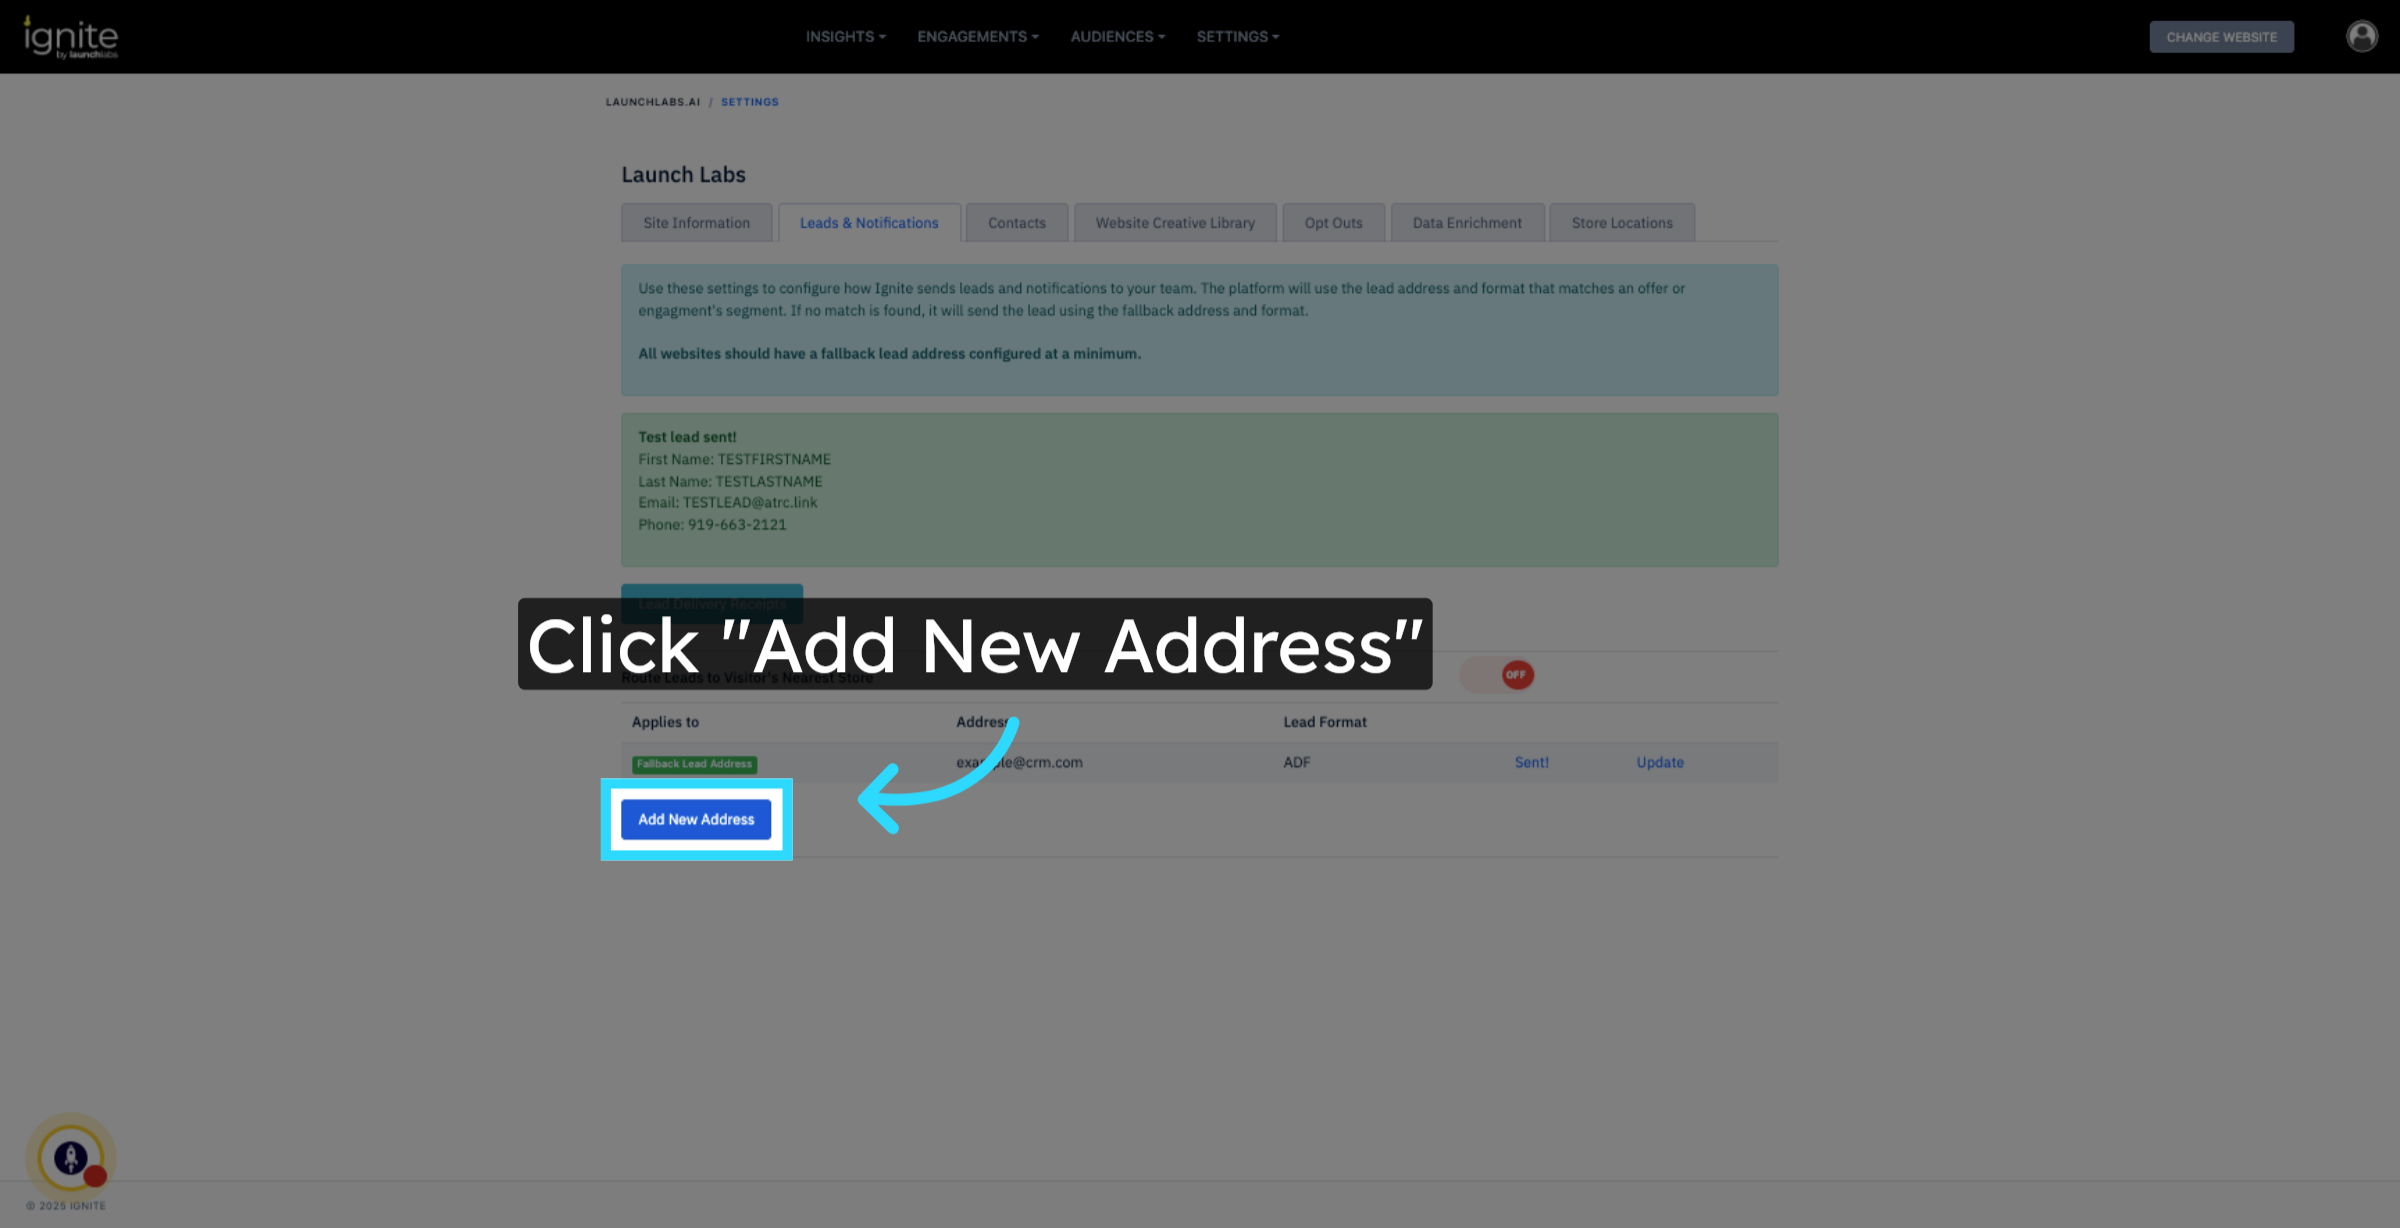
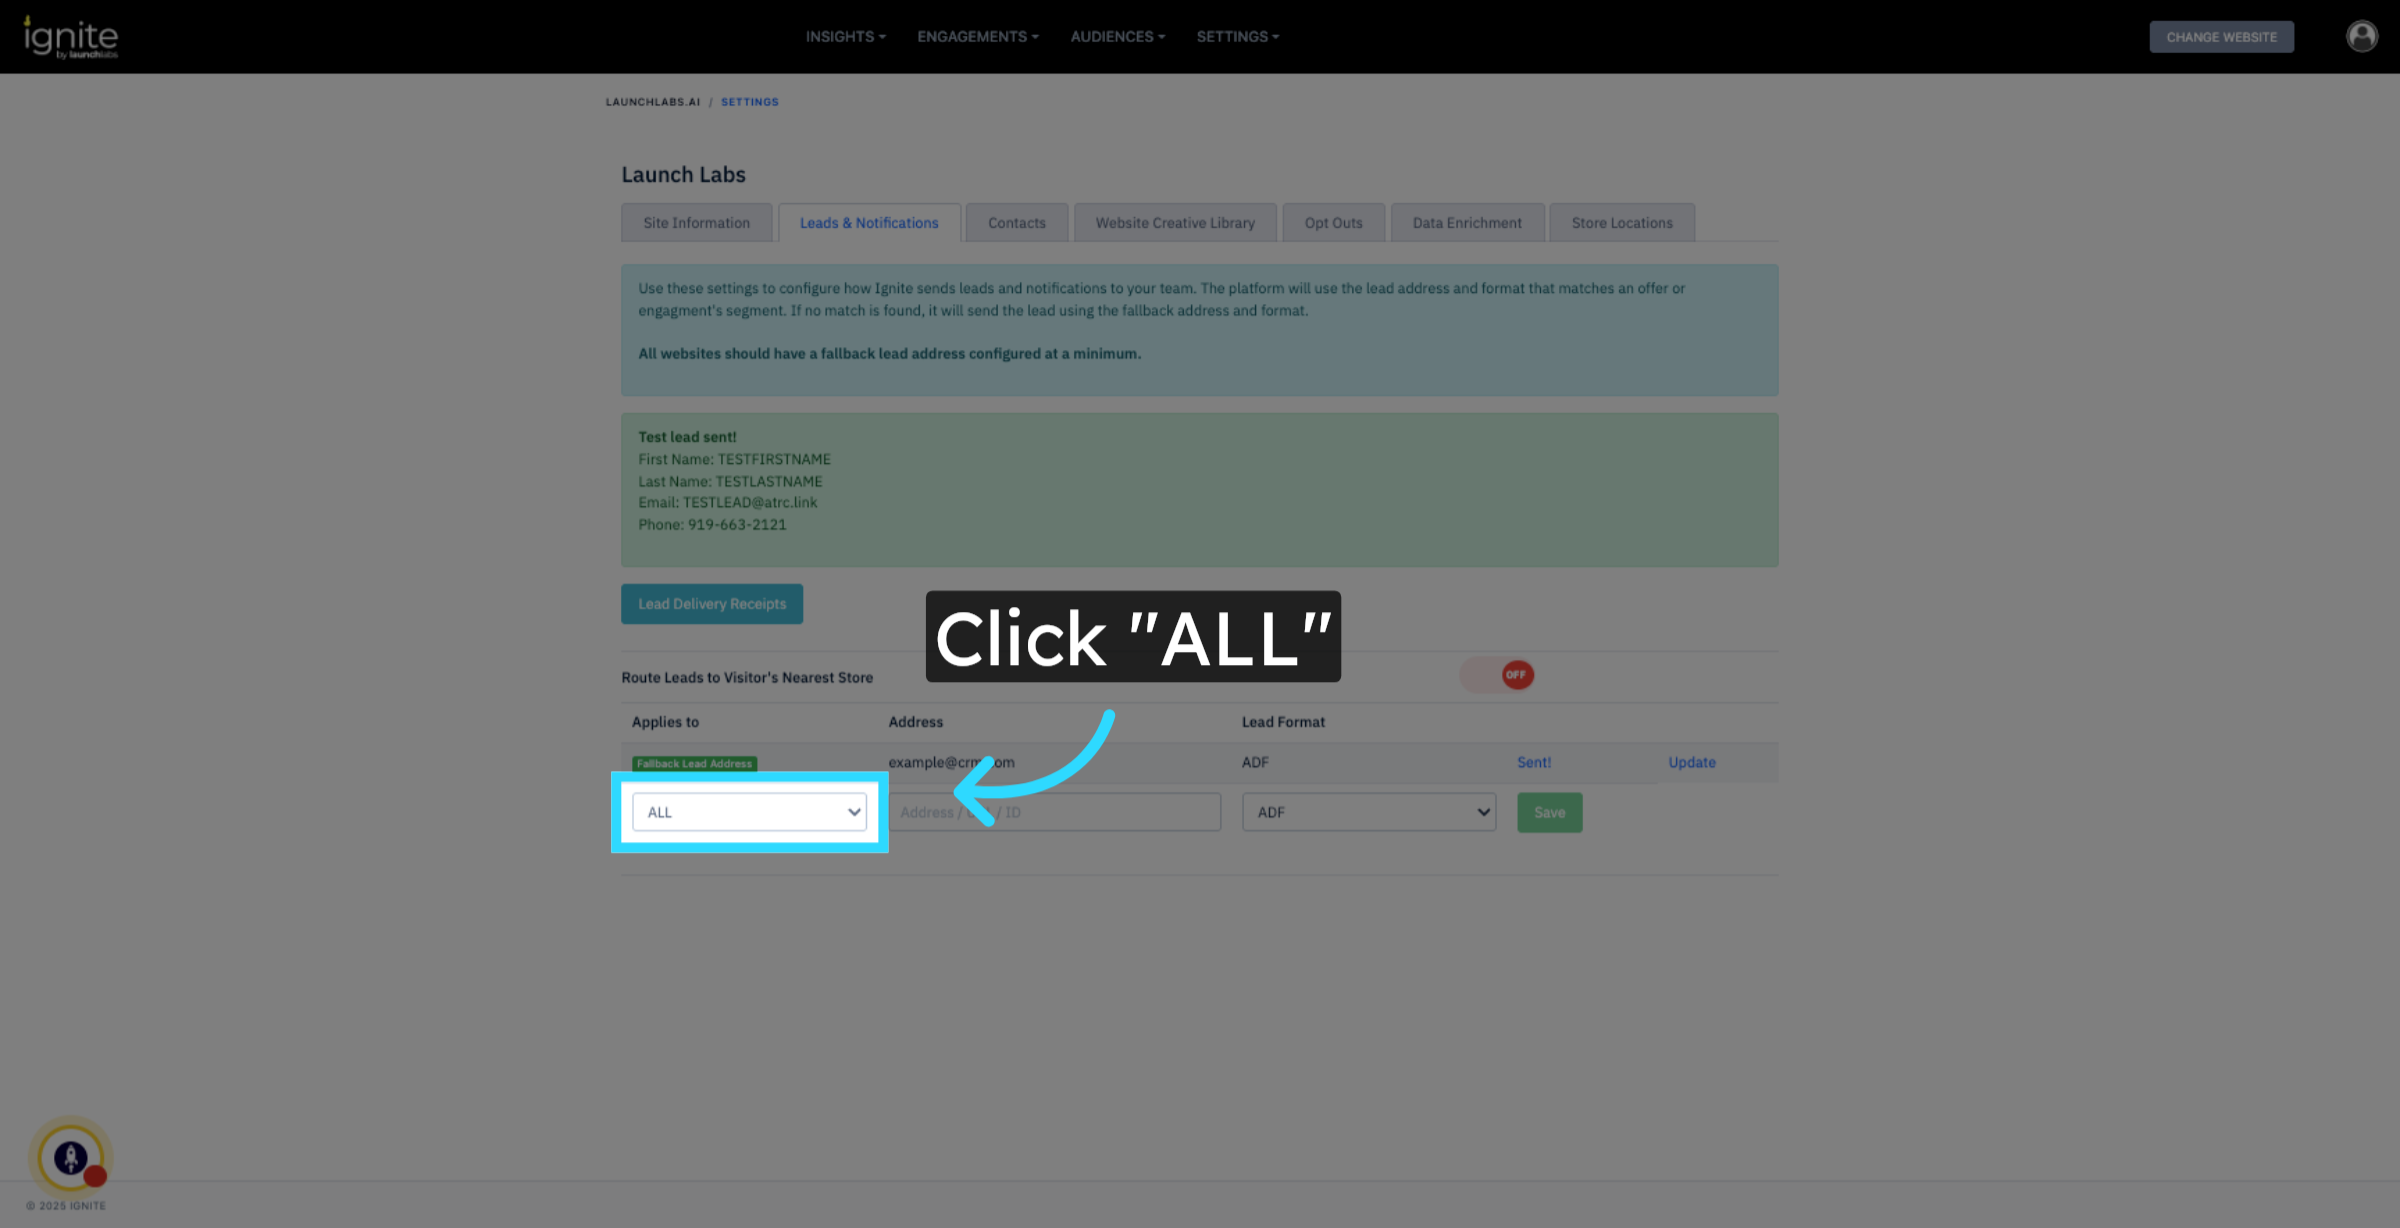
5. Add Additional Notification Recipients
To add more recipients, click Add New Address. A dropdown will appear where you can select the audience segment this address should apply to. Choosing ALL ensures that all lead submissions—regardless of audience—are sent to this address.
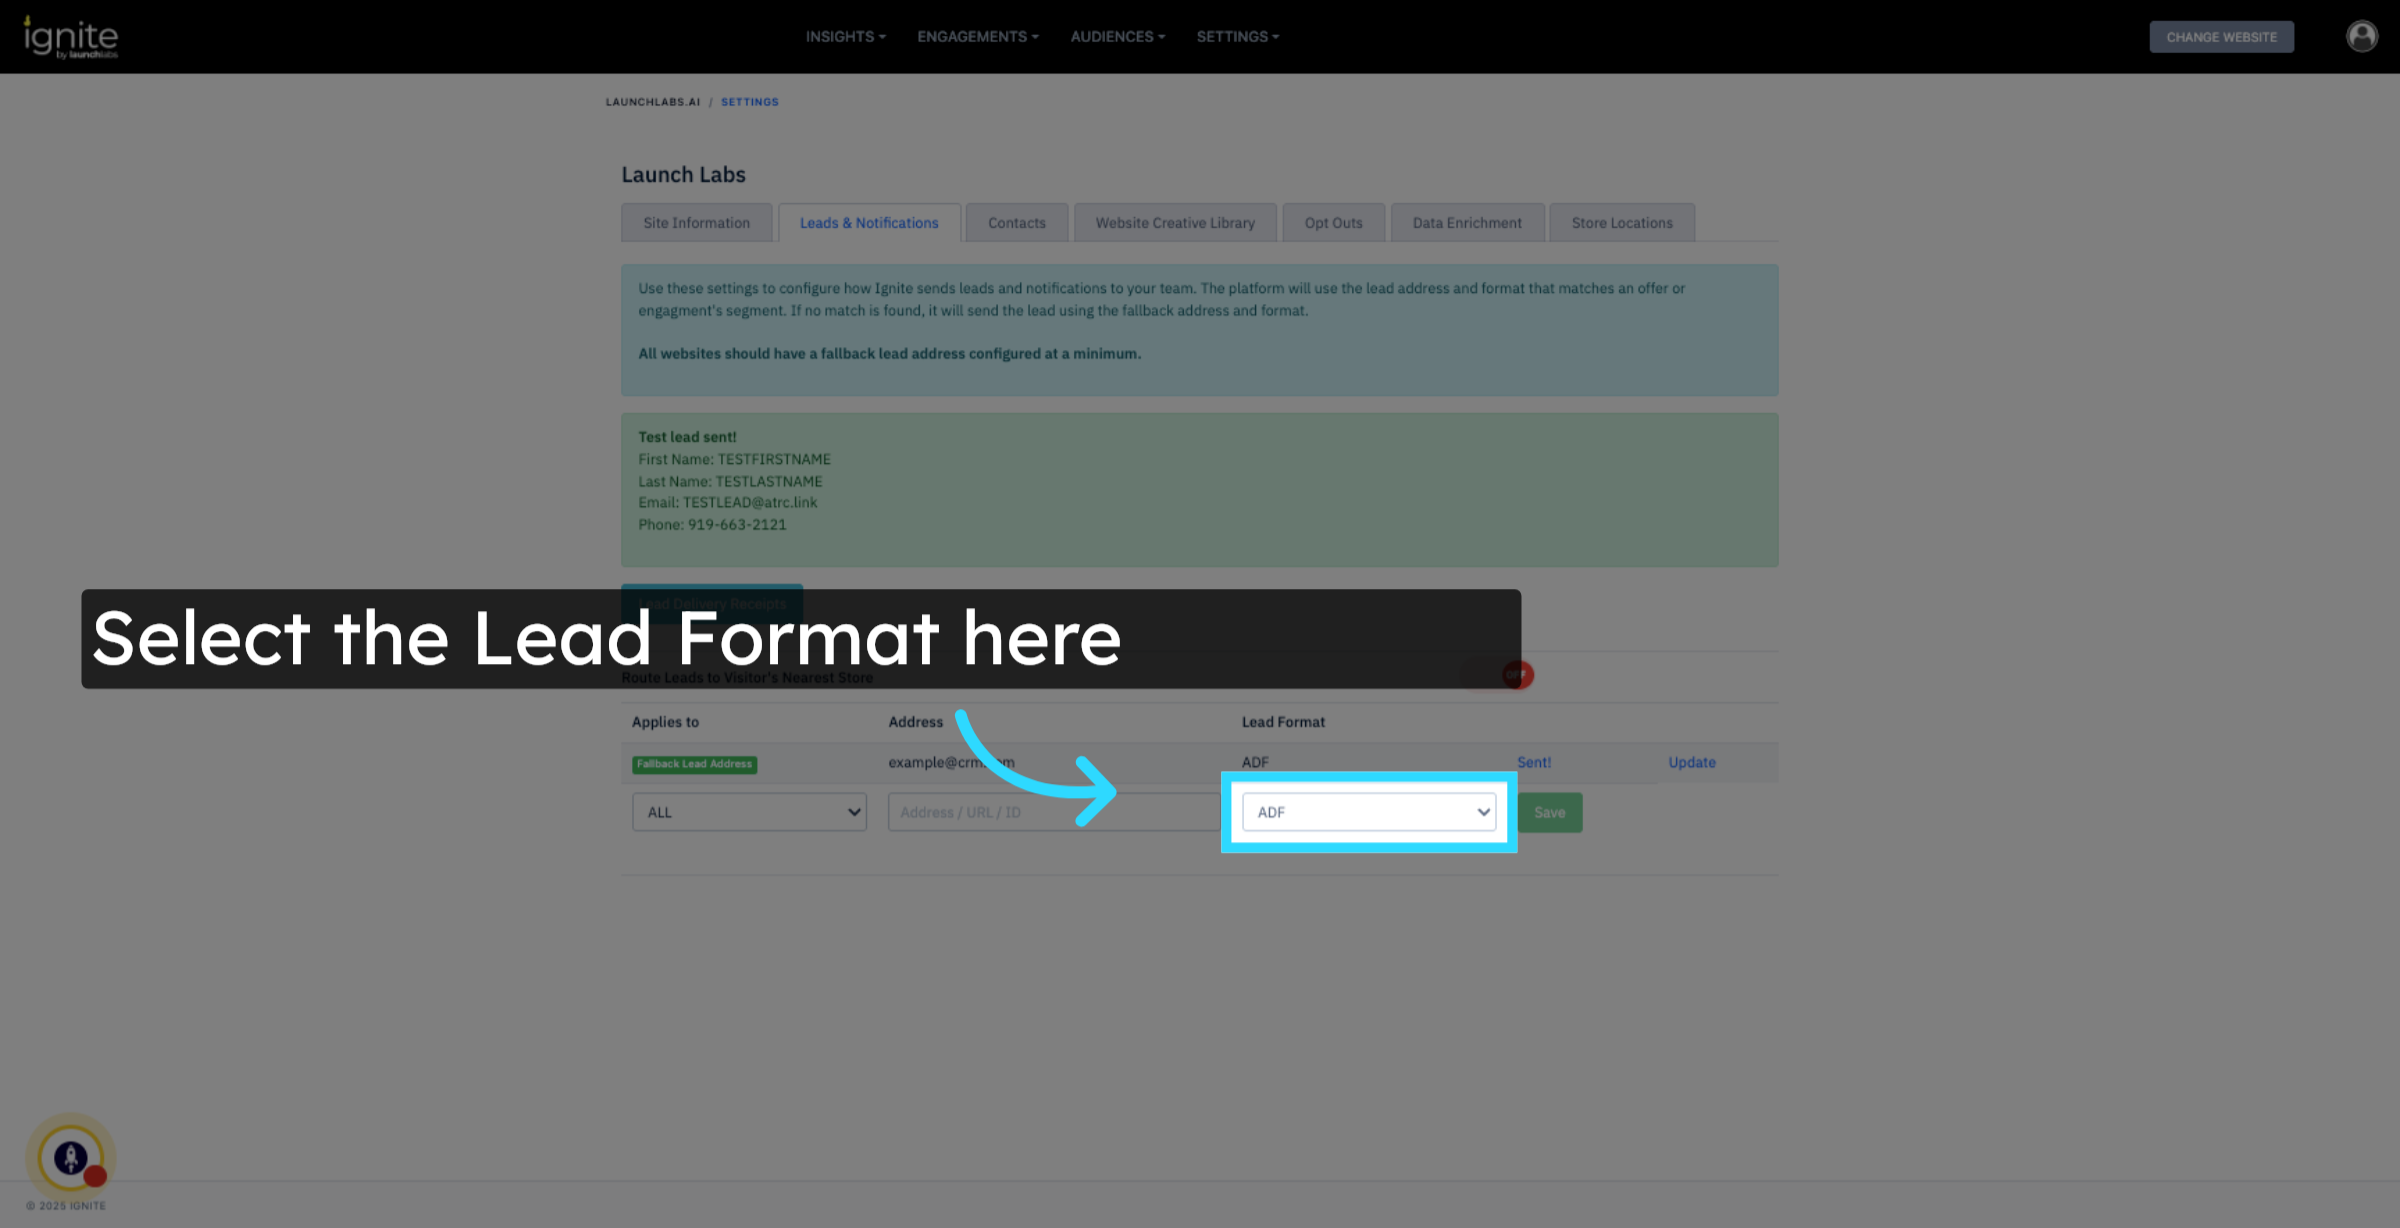
6. Choose Notification Format
Select the preferred Lead Format for how notifications will appear (e.g., ADF, Text, SMS, etc.). A full description of available formats can be found below.
For more information on Lead Routing Formats check out this article here.