Configuring Engage Email
Your Engage Email is automatically templated based on how your write your offer. You have the option to use the default creative provided by the platform or you can upload your own creative.

This article explains how to configure Engage Email in Ignite. Engage Email allows you to connect offers with email campaigns, customize subject lines, and preview creative assets before sending.
Watch this video tutorial to see the full configuration process in action:
👉 Before following this guide, make sure your offers and creative assets are uploaded in Ignite.
Step-by-Step Instructions
Follow these steps to configure Engage Email. Screenshots from the video should be included for each major step.
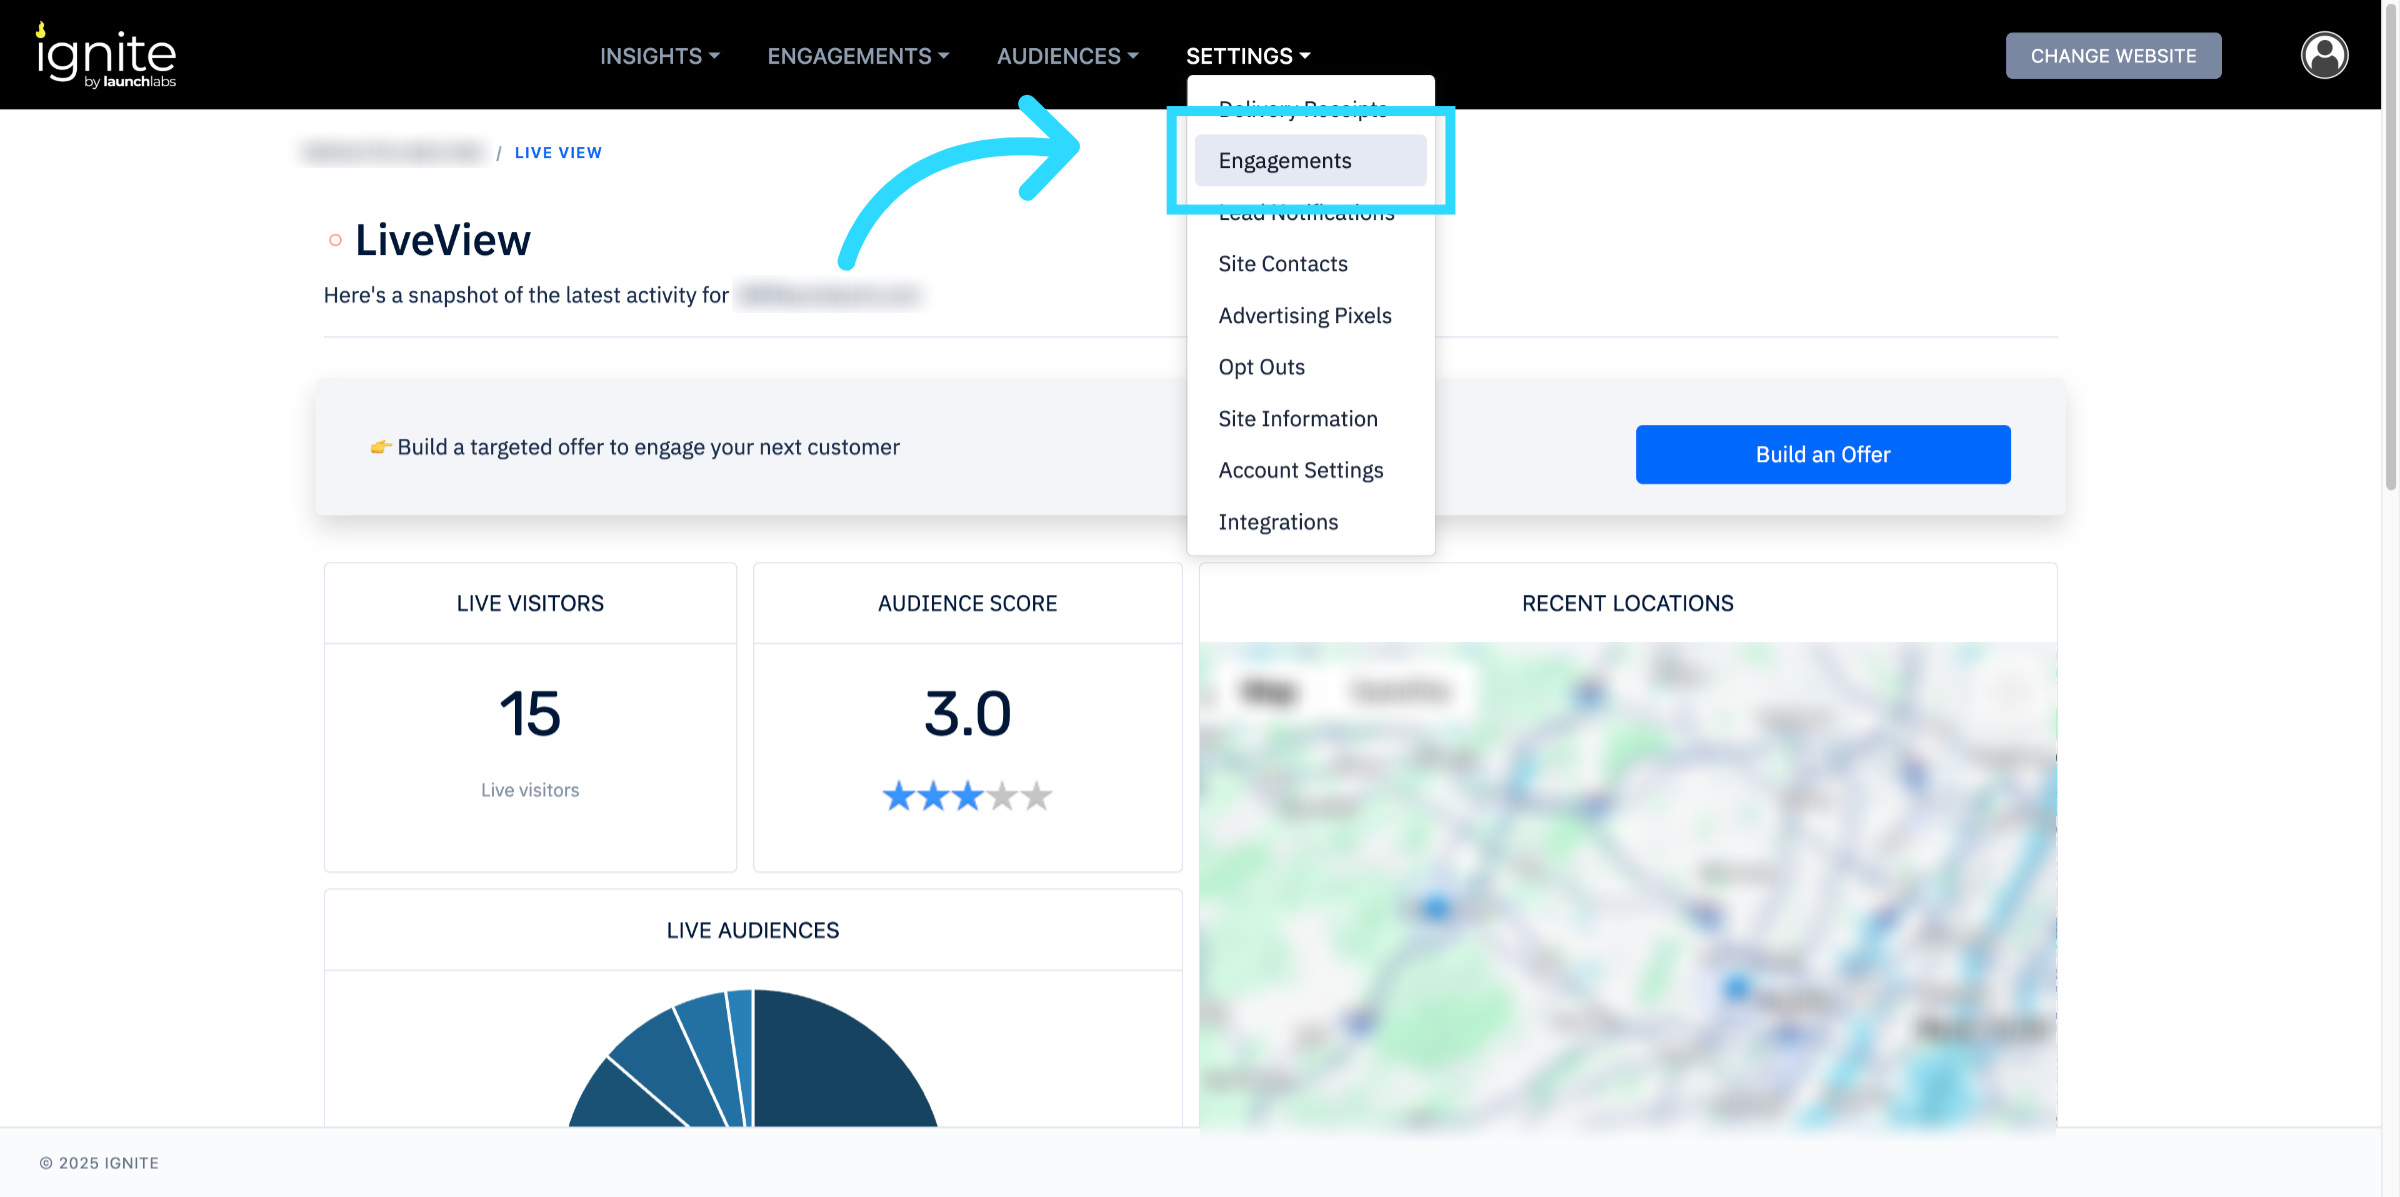
1. Open Engagements
Go to the platform and click Settings in the top navigation bar and select Engagements.
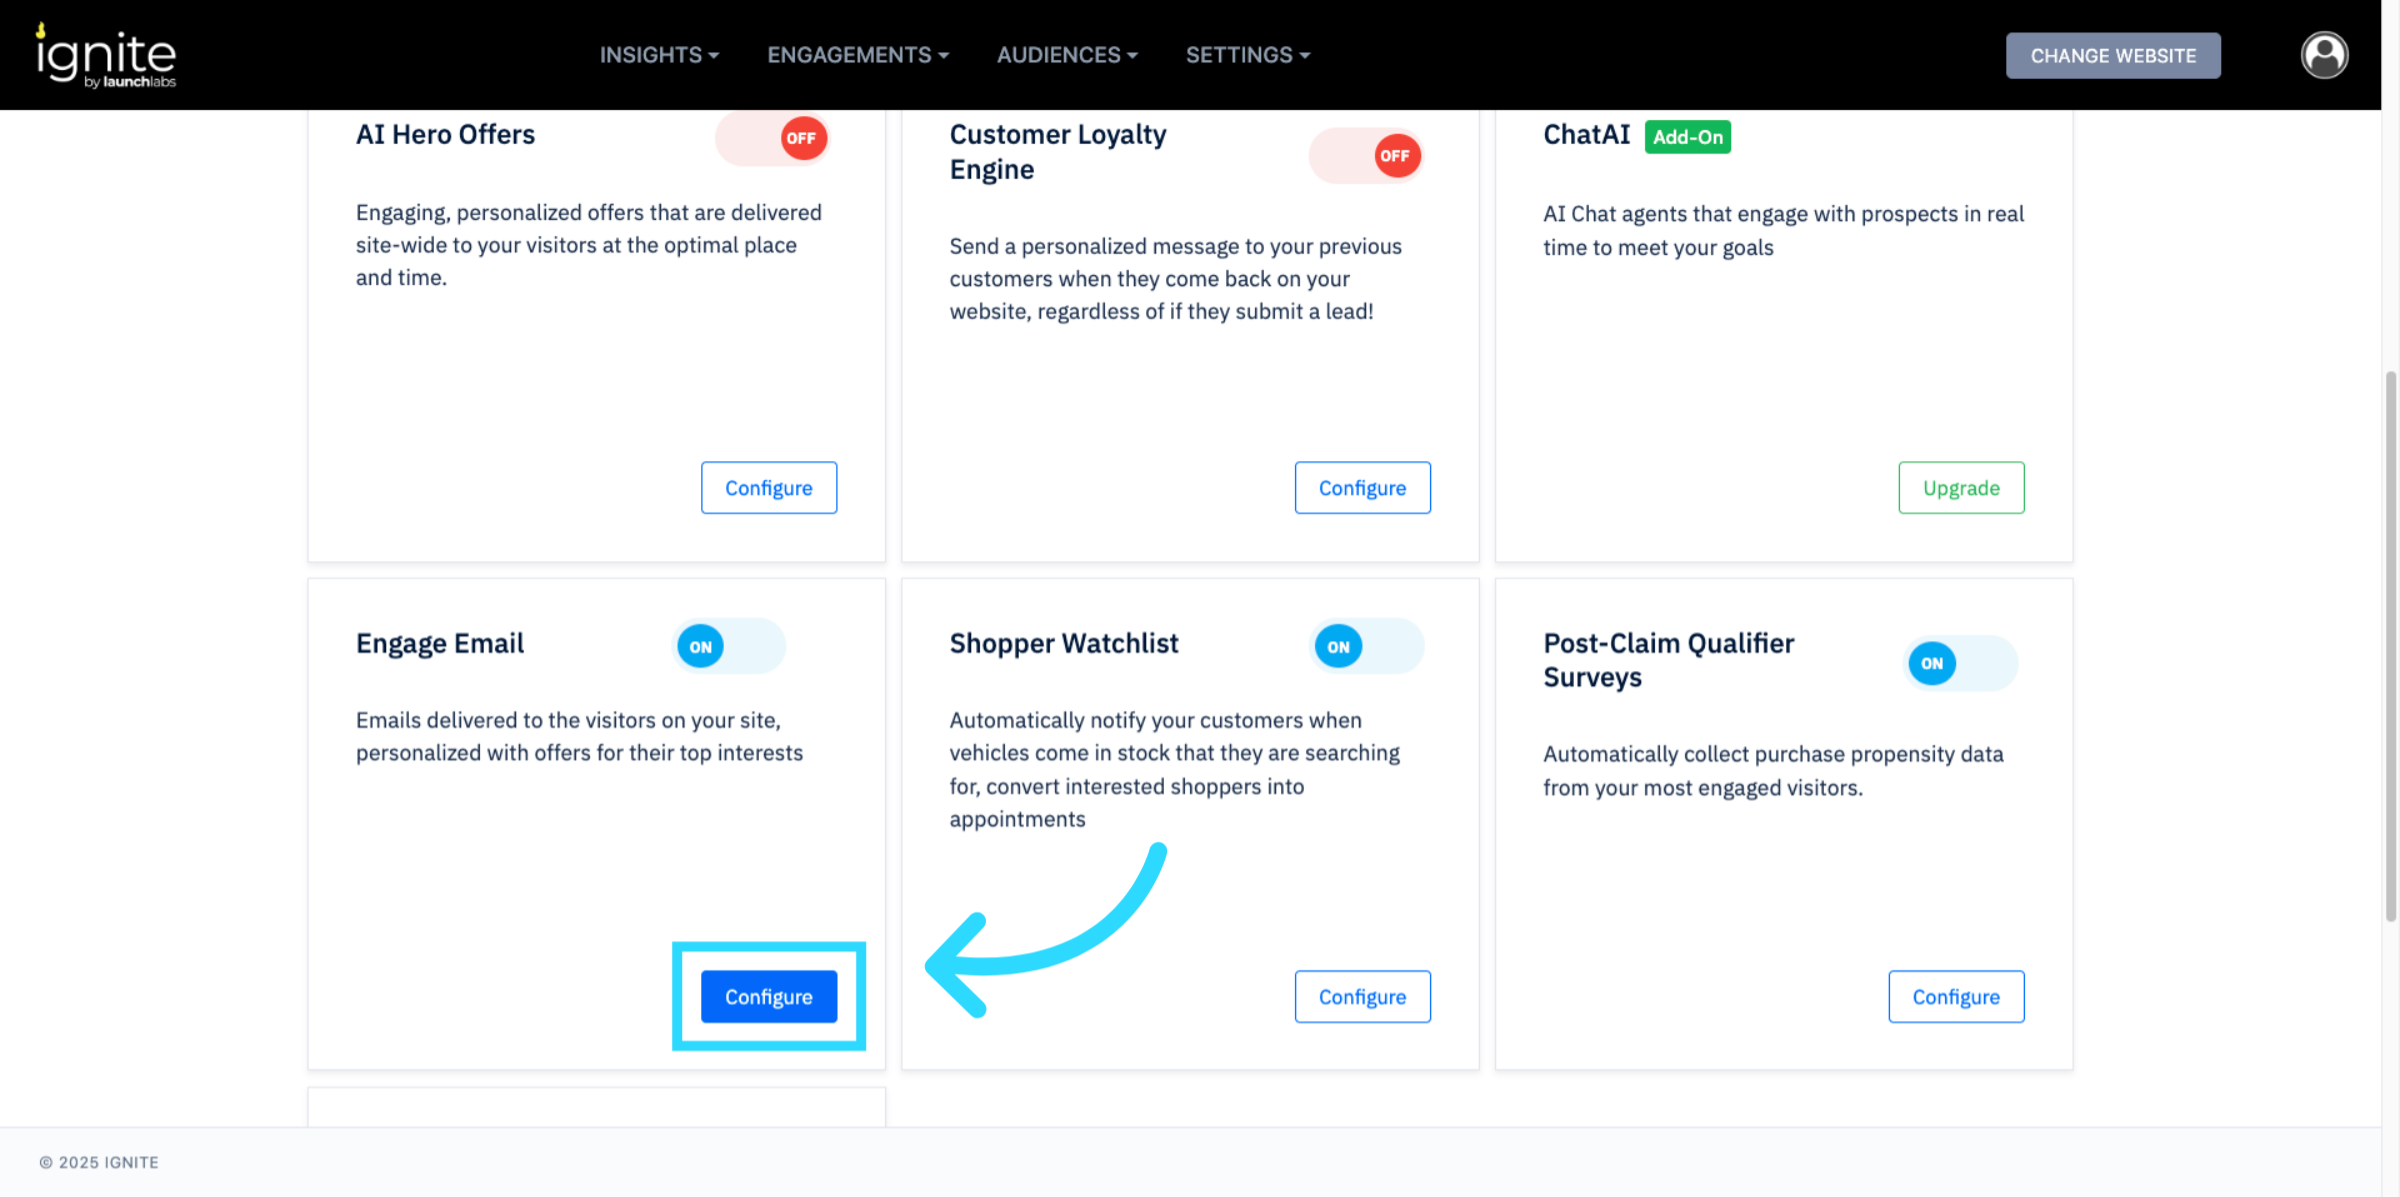
2. Enable Engage Email
Locate Engage Email and toggle it On. Then click Configure to open the settings panel.
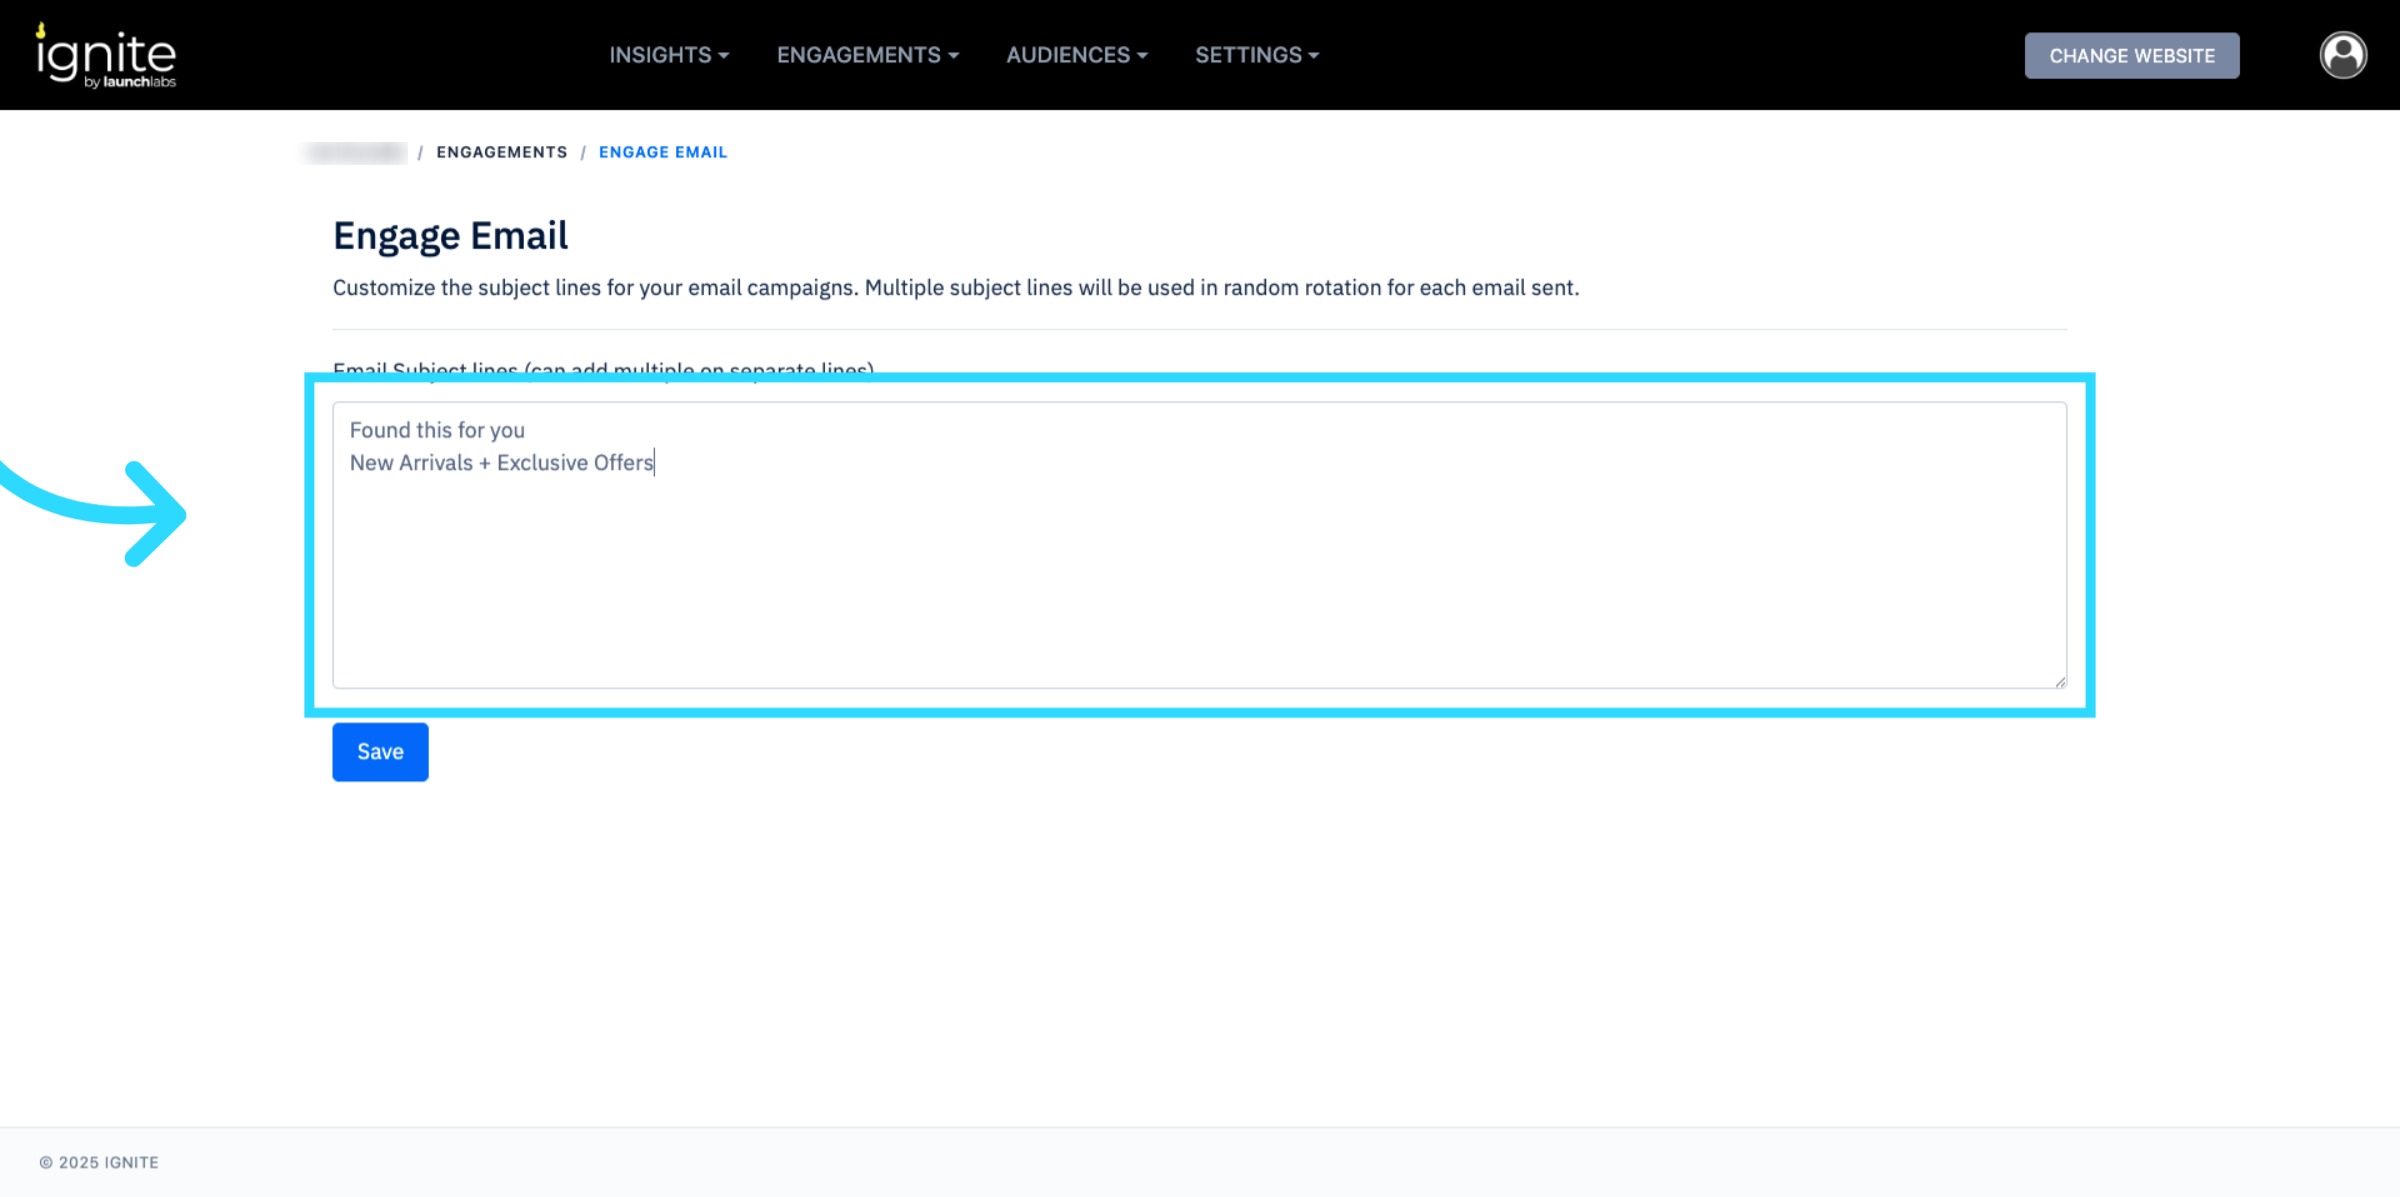
3. Add Subject Lines
In the Email Subject Lines box, add or edit subject lines for your campaign. You can enter multiple options on separate lines to allow for varied messaging. Click Save when finished.
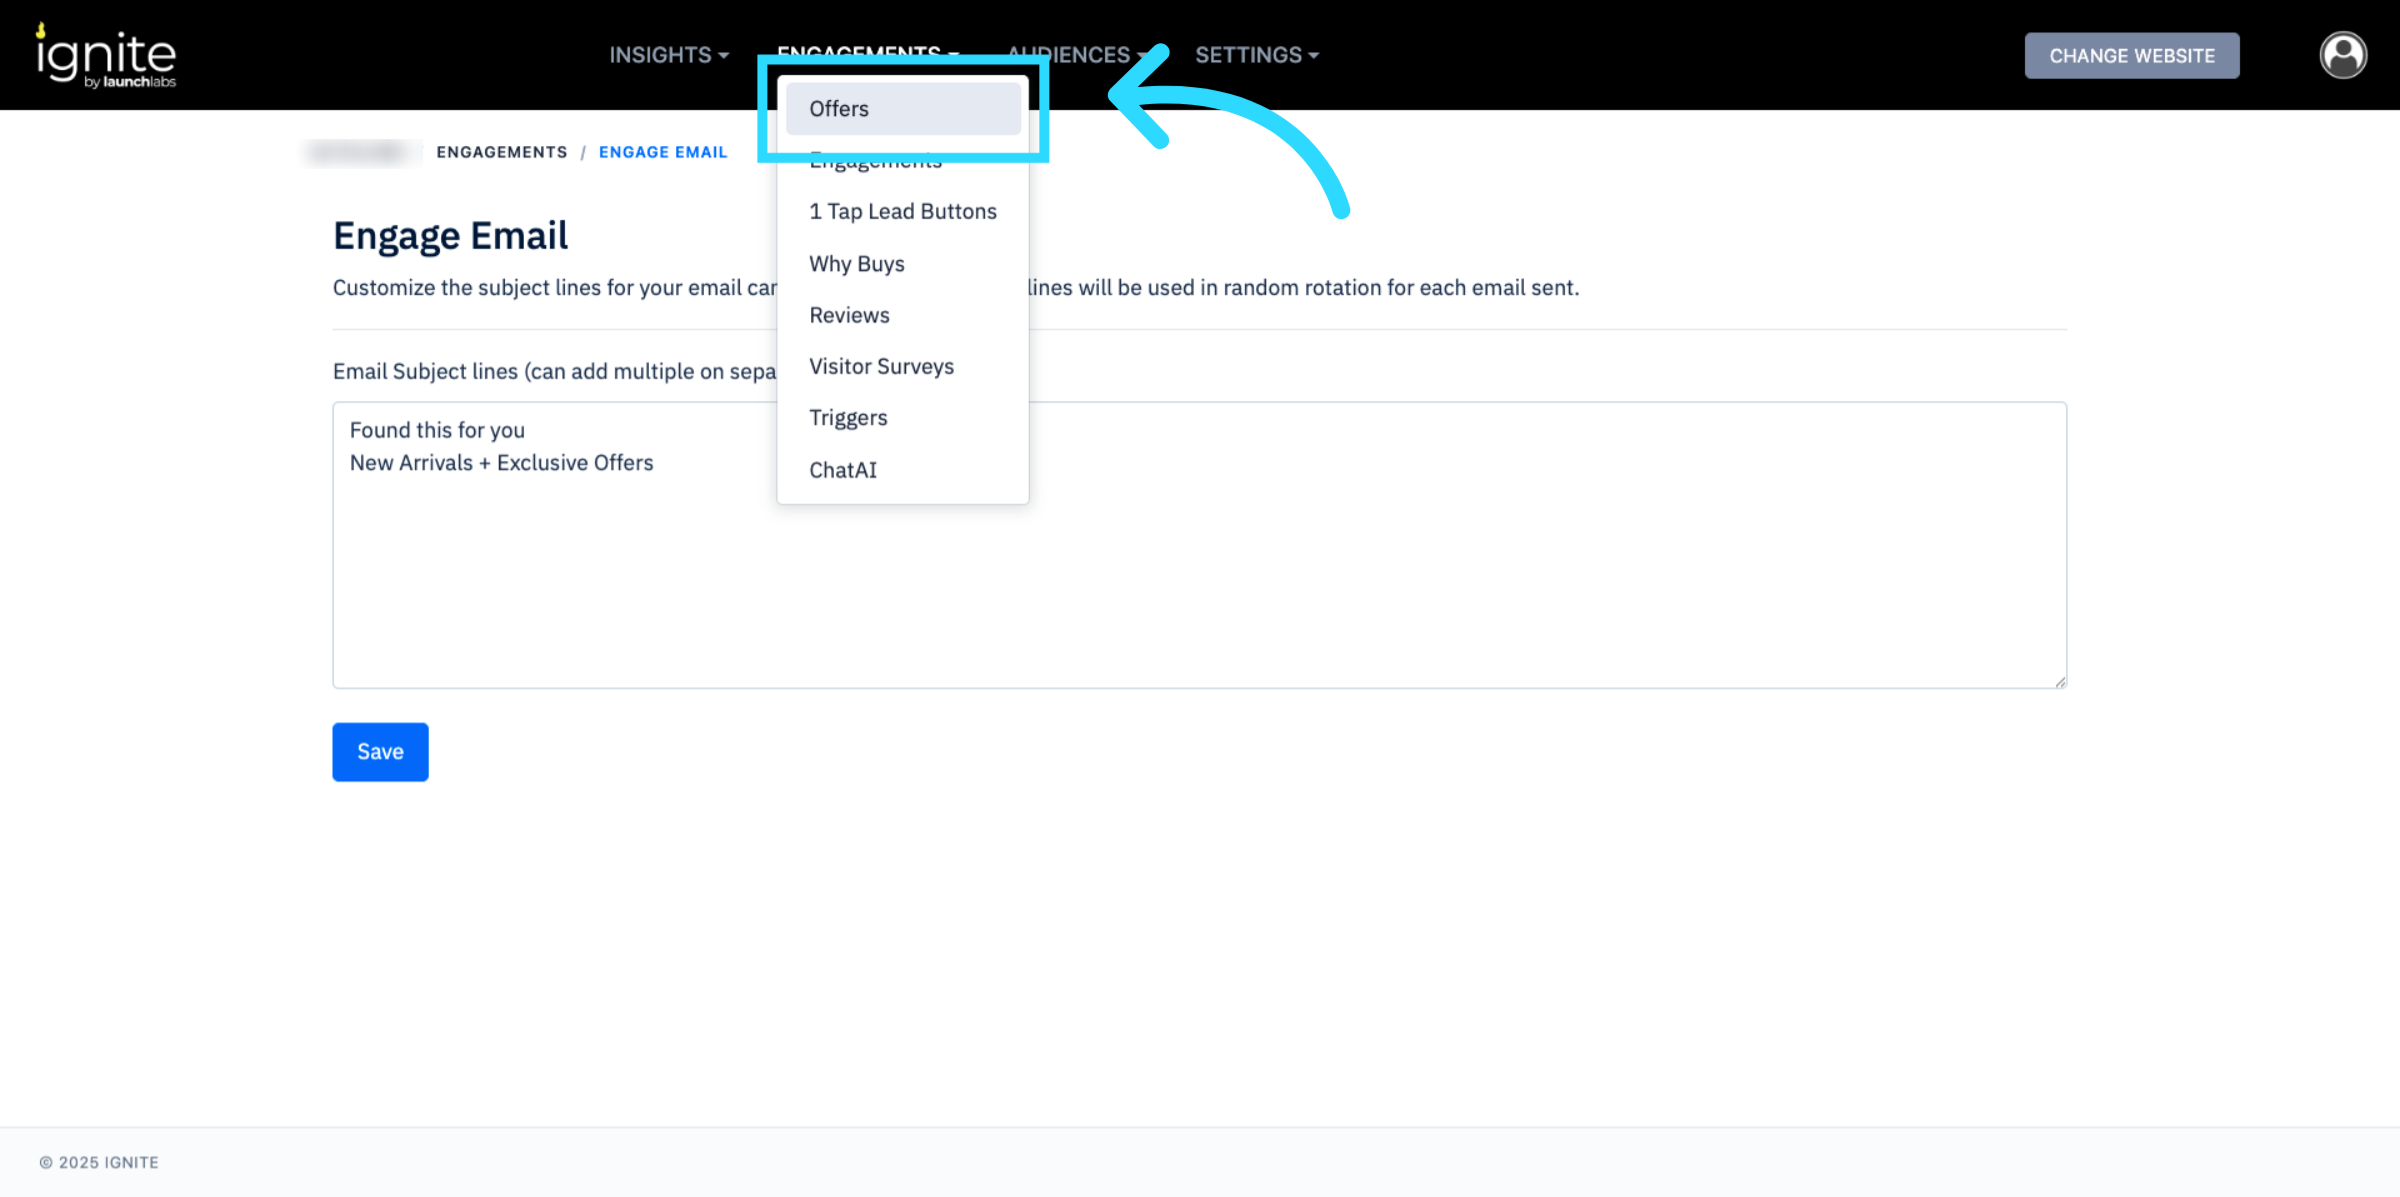
4. Link Offers to Engage Email
From the Engagements menu, click Offers. Find the offer you want to include and click Manage Offer.
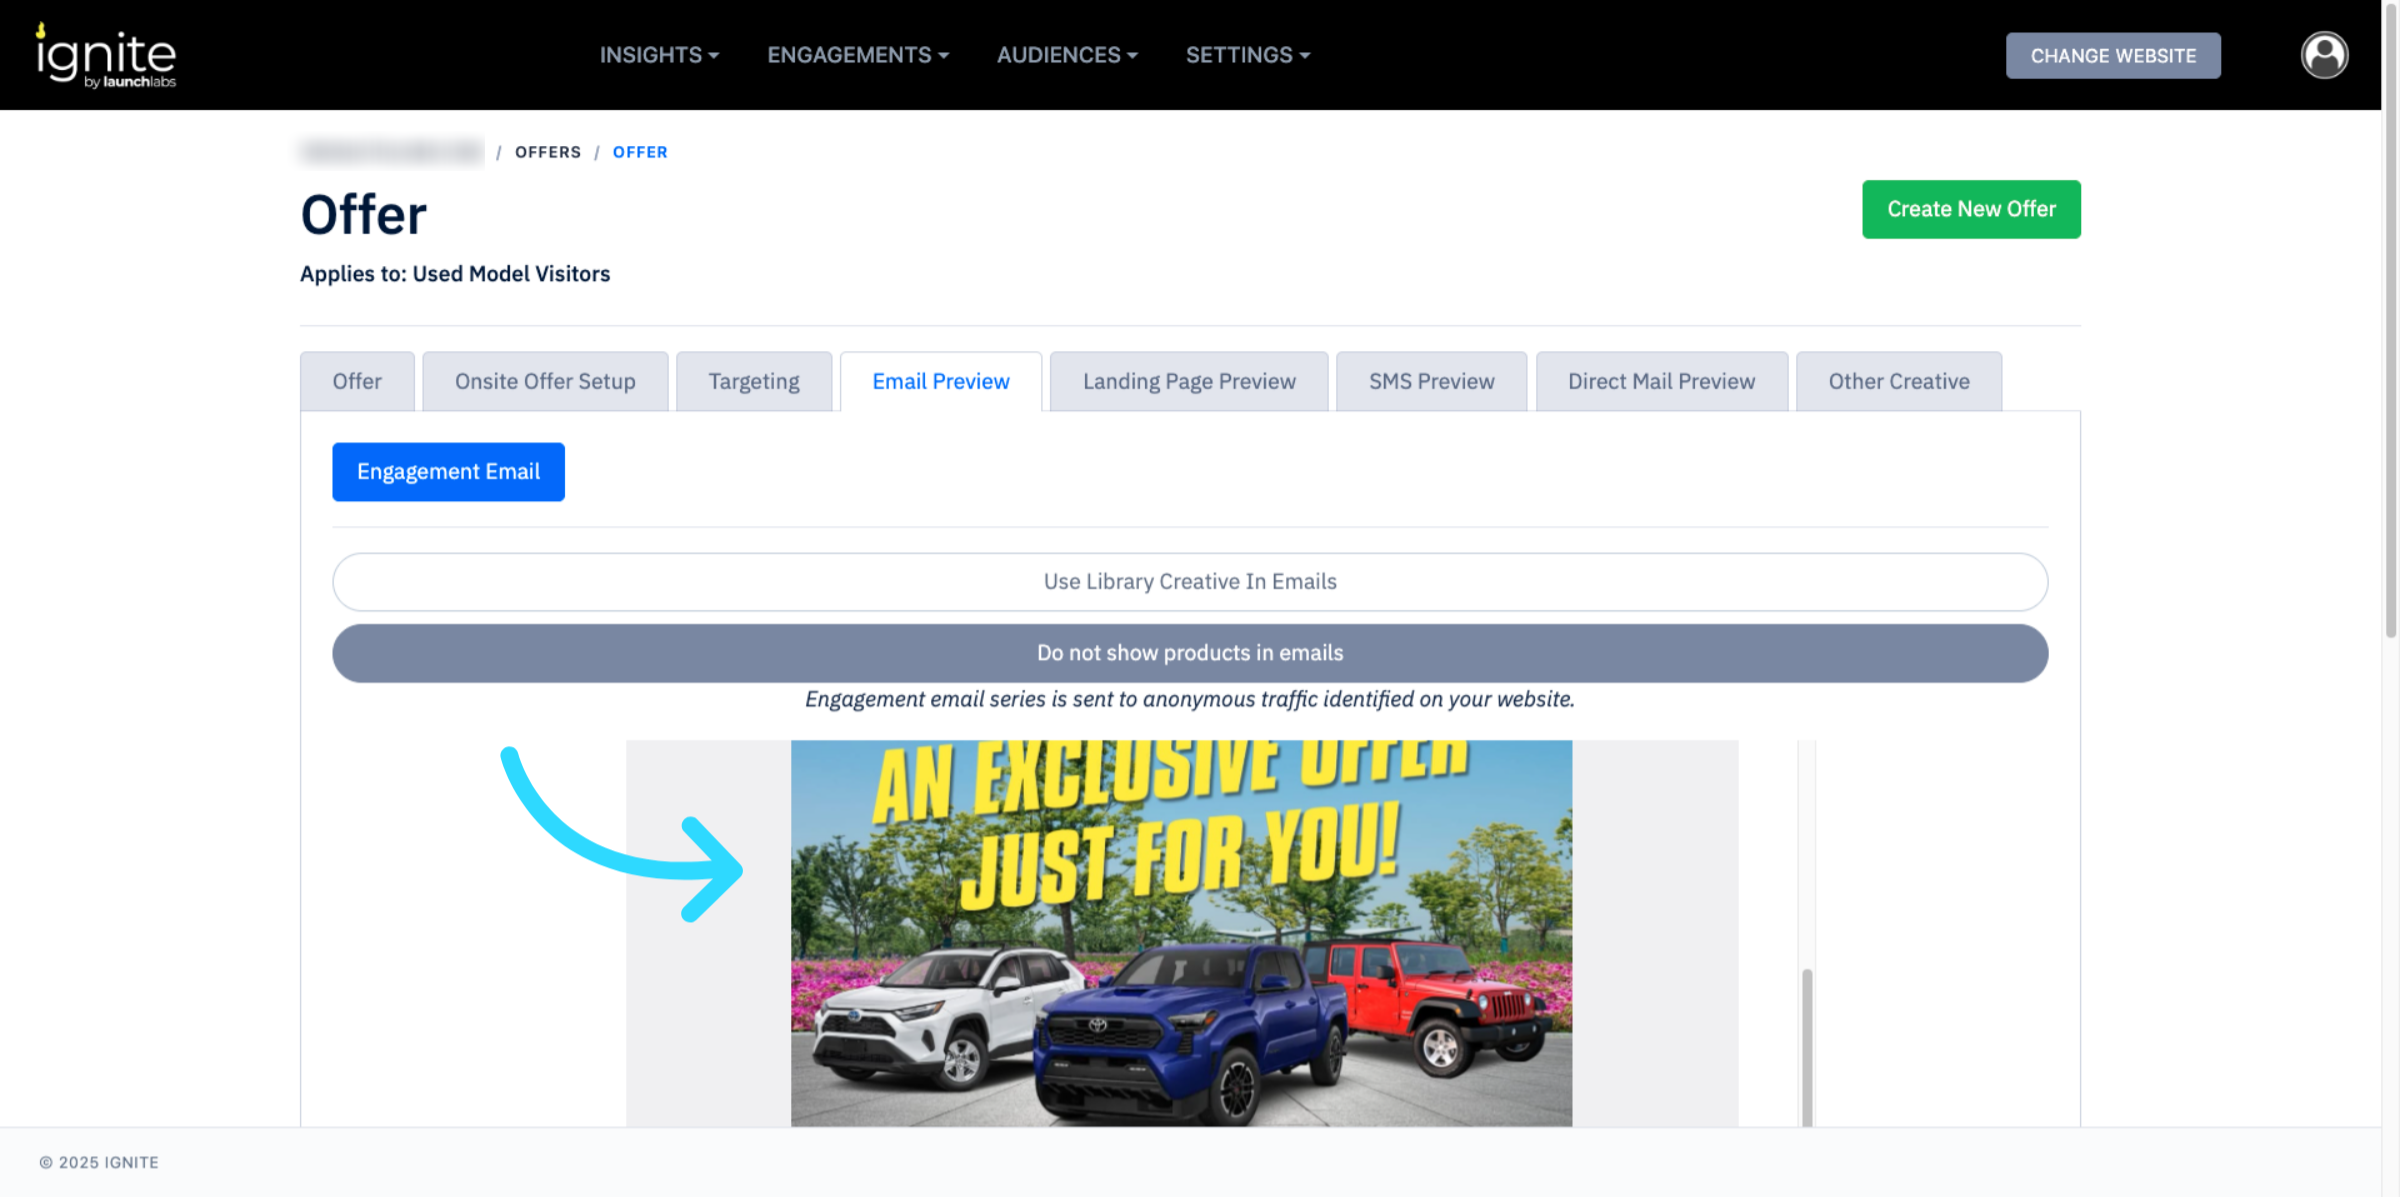
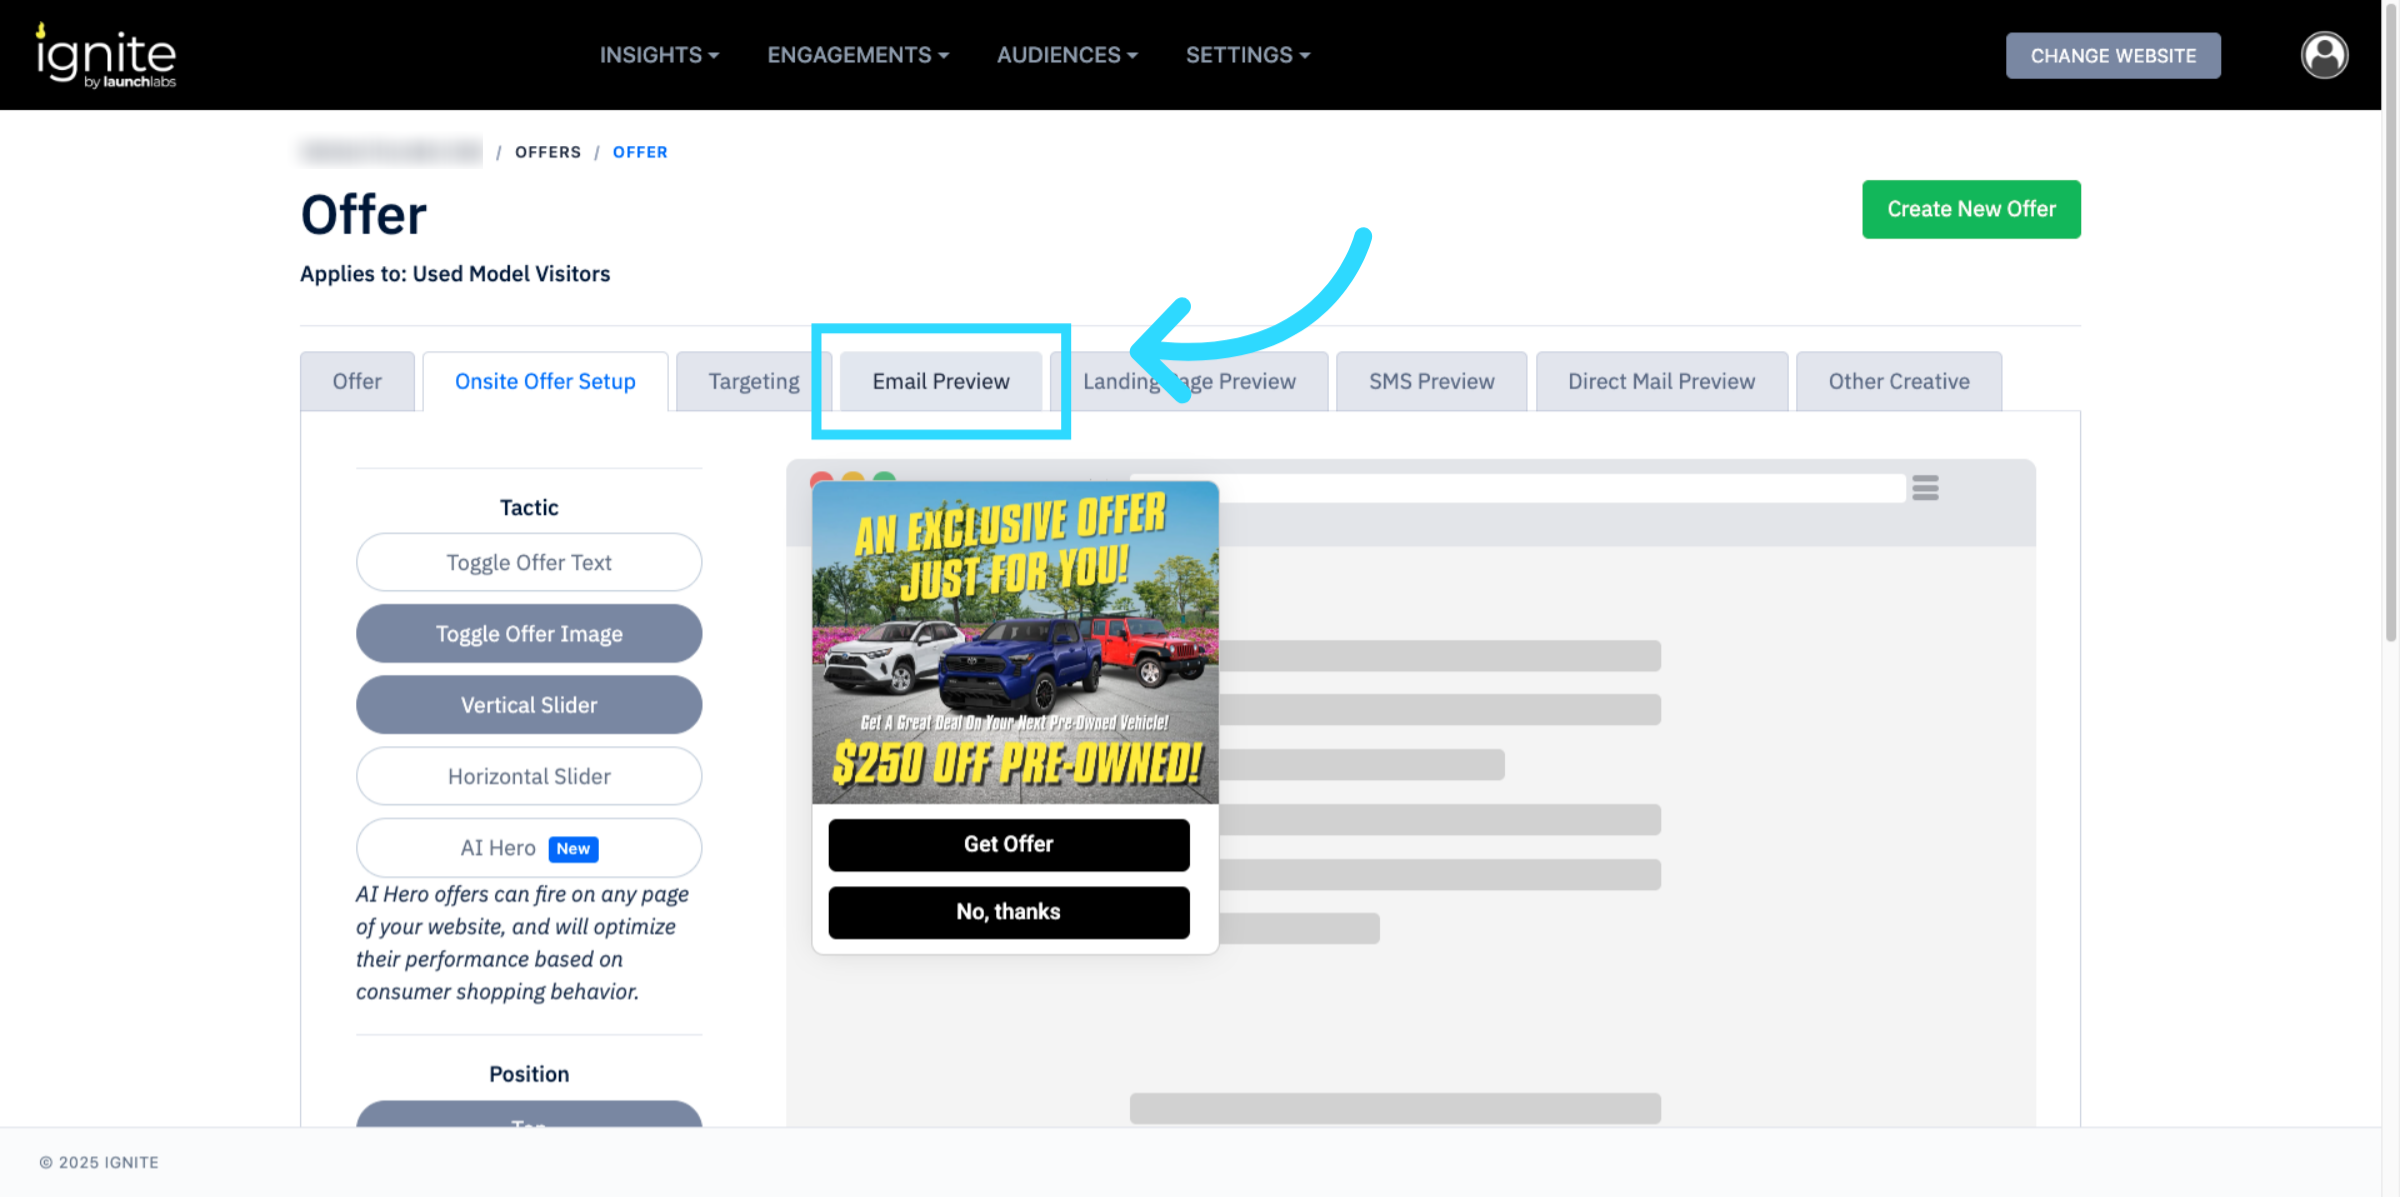
5. Preview the Email
Click Email Preview to review how your email will appear to recipients.
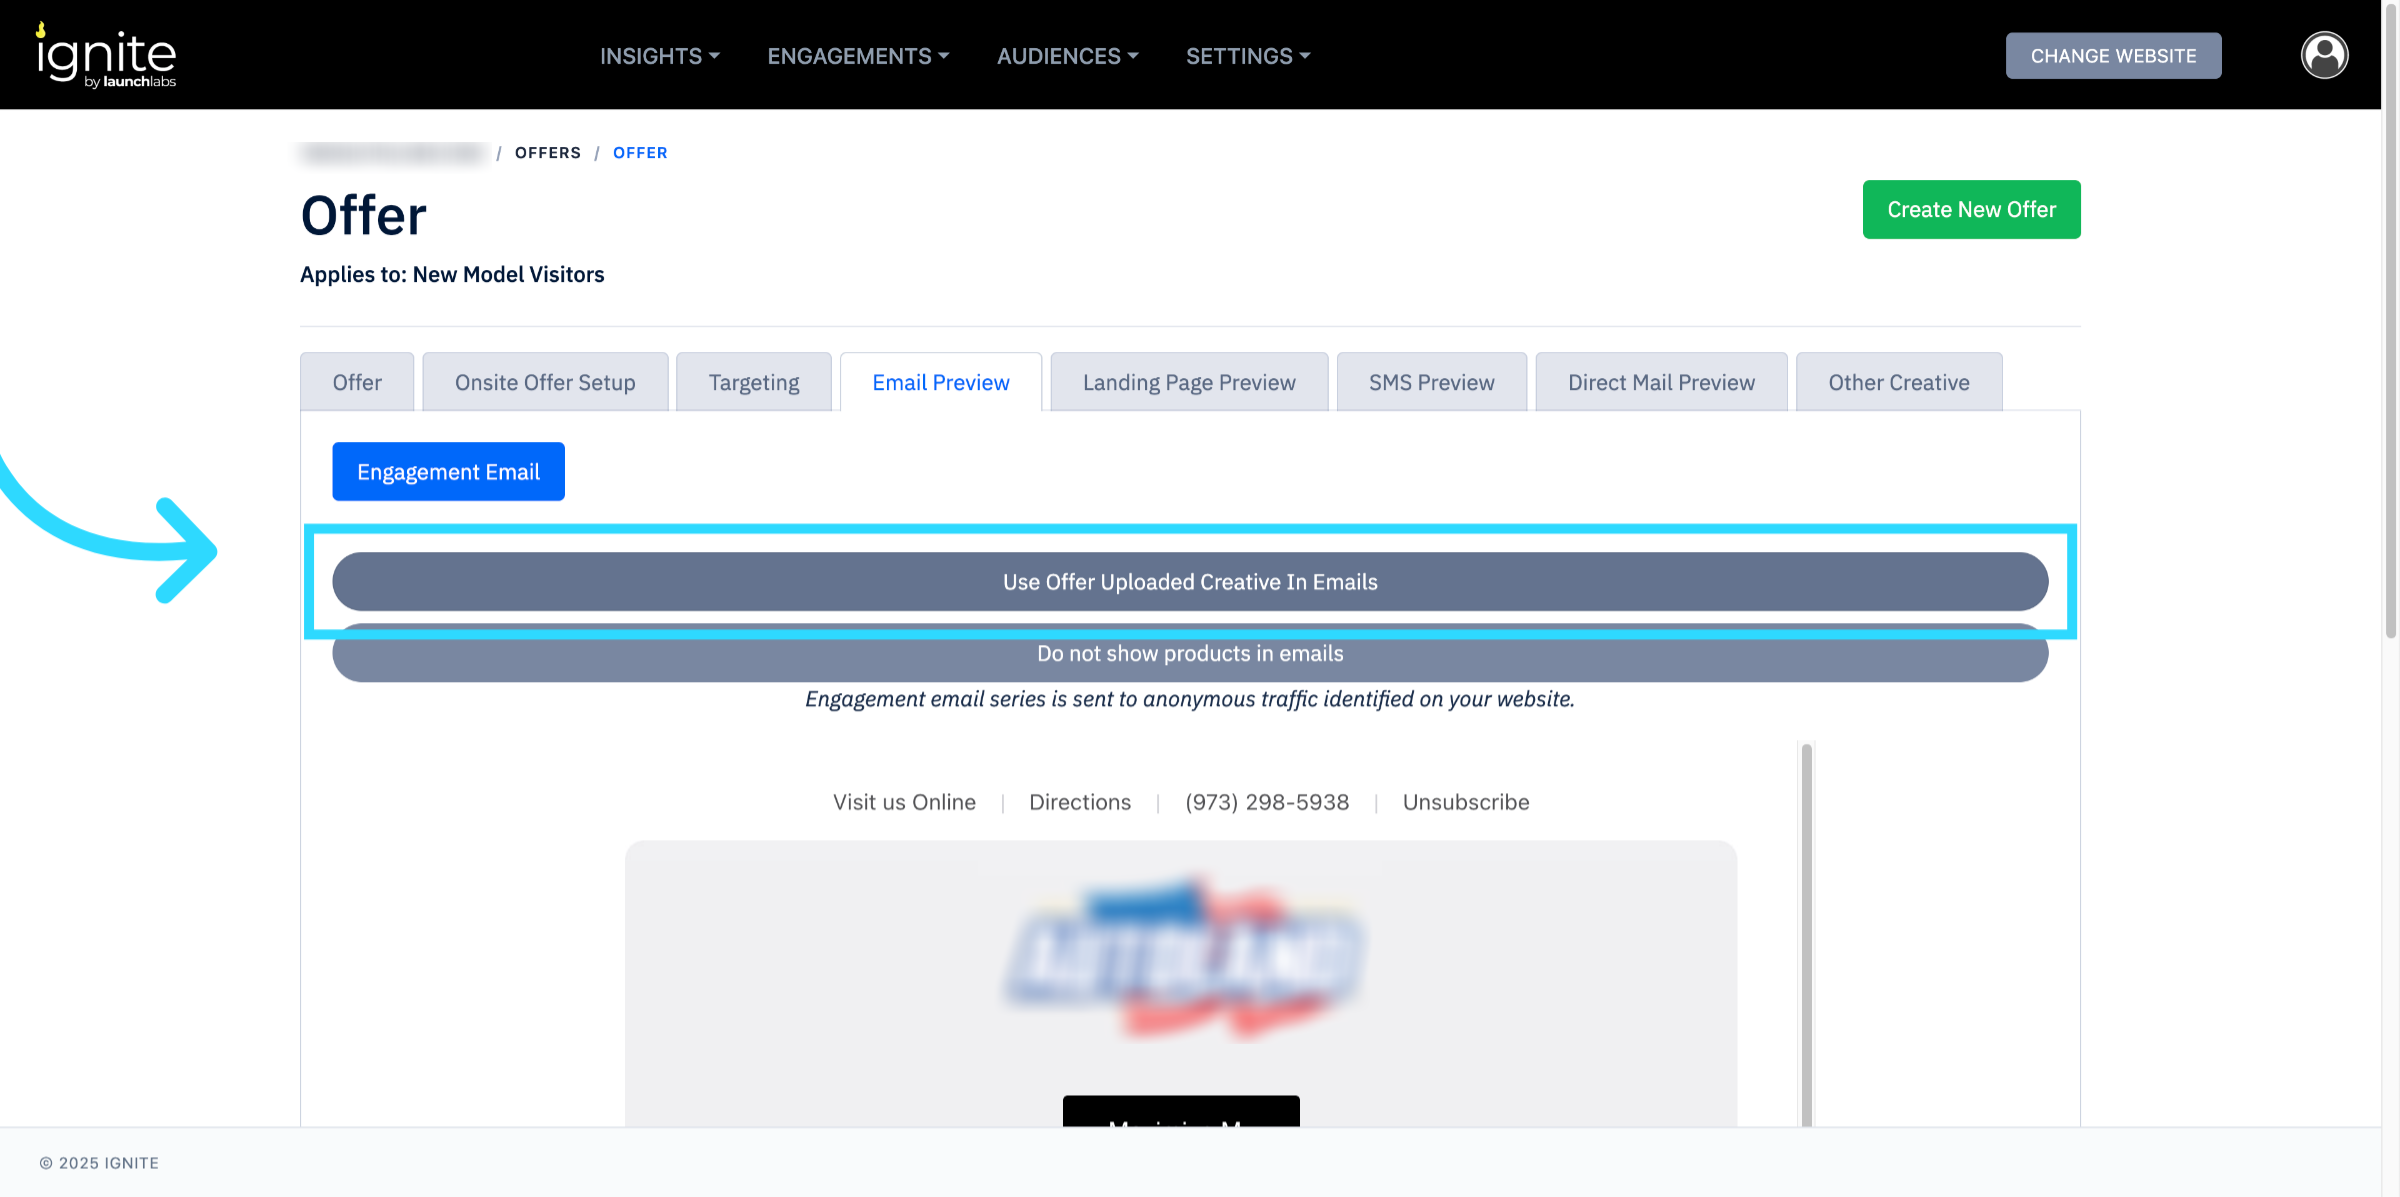
6. Use Uploaded Creative
Select Use Offer Uploaded Creative in Emails to include the creative assets associated with your offer.
7. Final Review
Scroll through the email preview to confirm that all subject lines, offers, and creative assets are displaying correctly.