How to Add a New Website to Ignite
This article explains how to add a new website to your agency’s Ignite account. This process includes creating a new account, inviting users to manage the account, adding the website details, logo, and updating brand information.
Watch this video tutorial to see the full process in action:
Step-by-Step Instructions
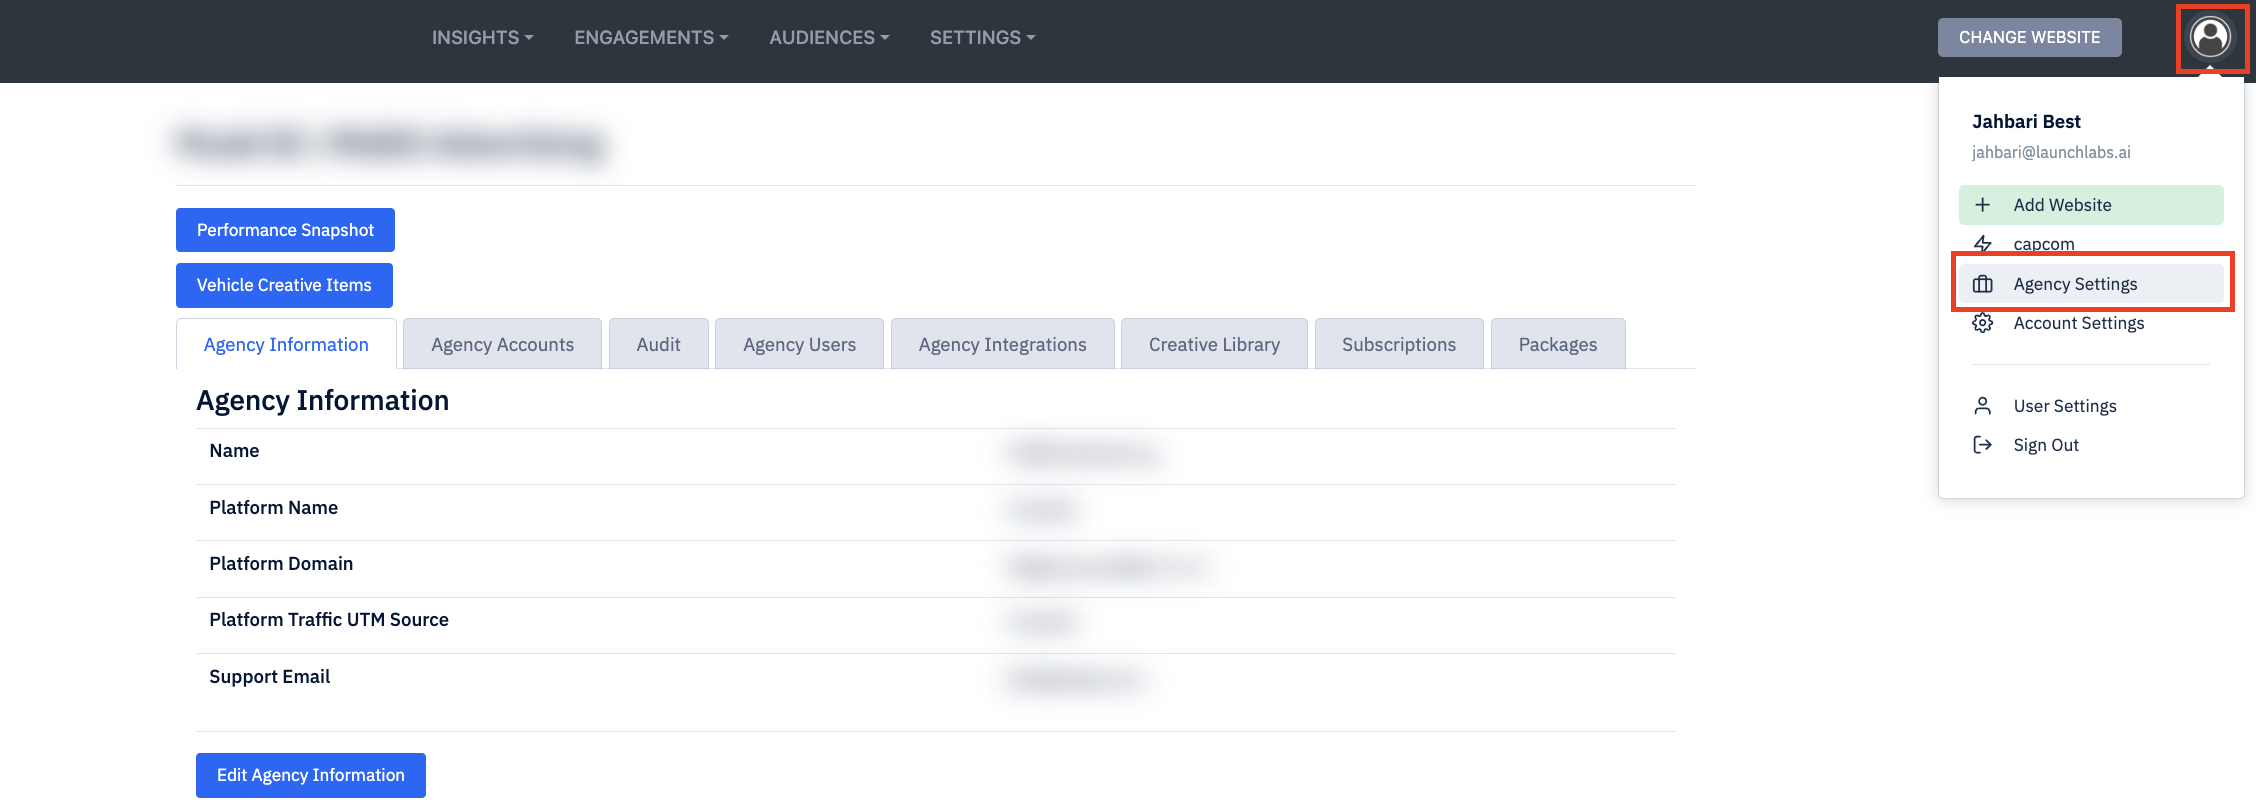
1. Go to Agency Settings
Navigate to the platform, click the person icon in the top-right corner, and select Agency Settings.
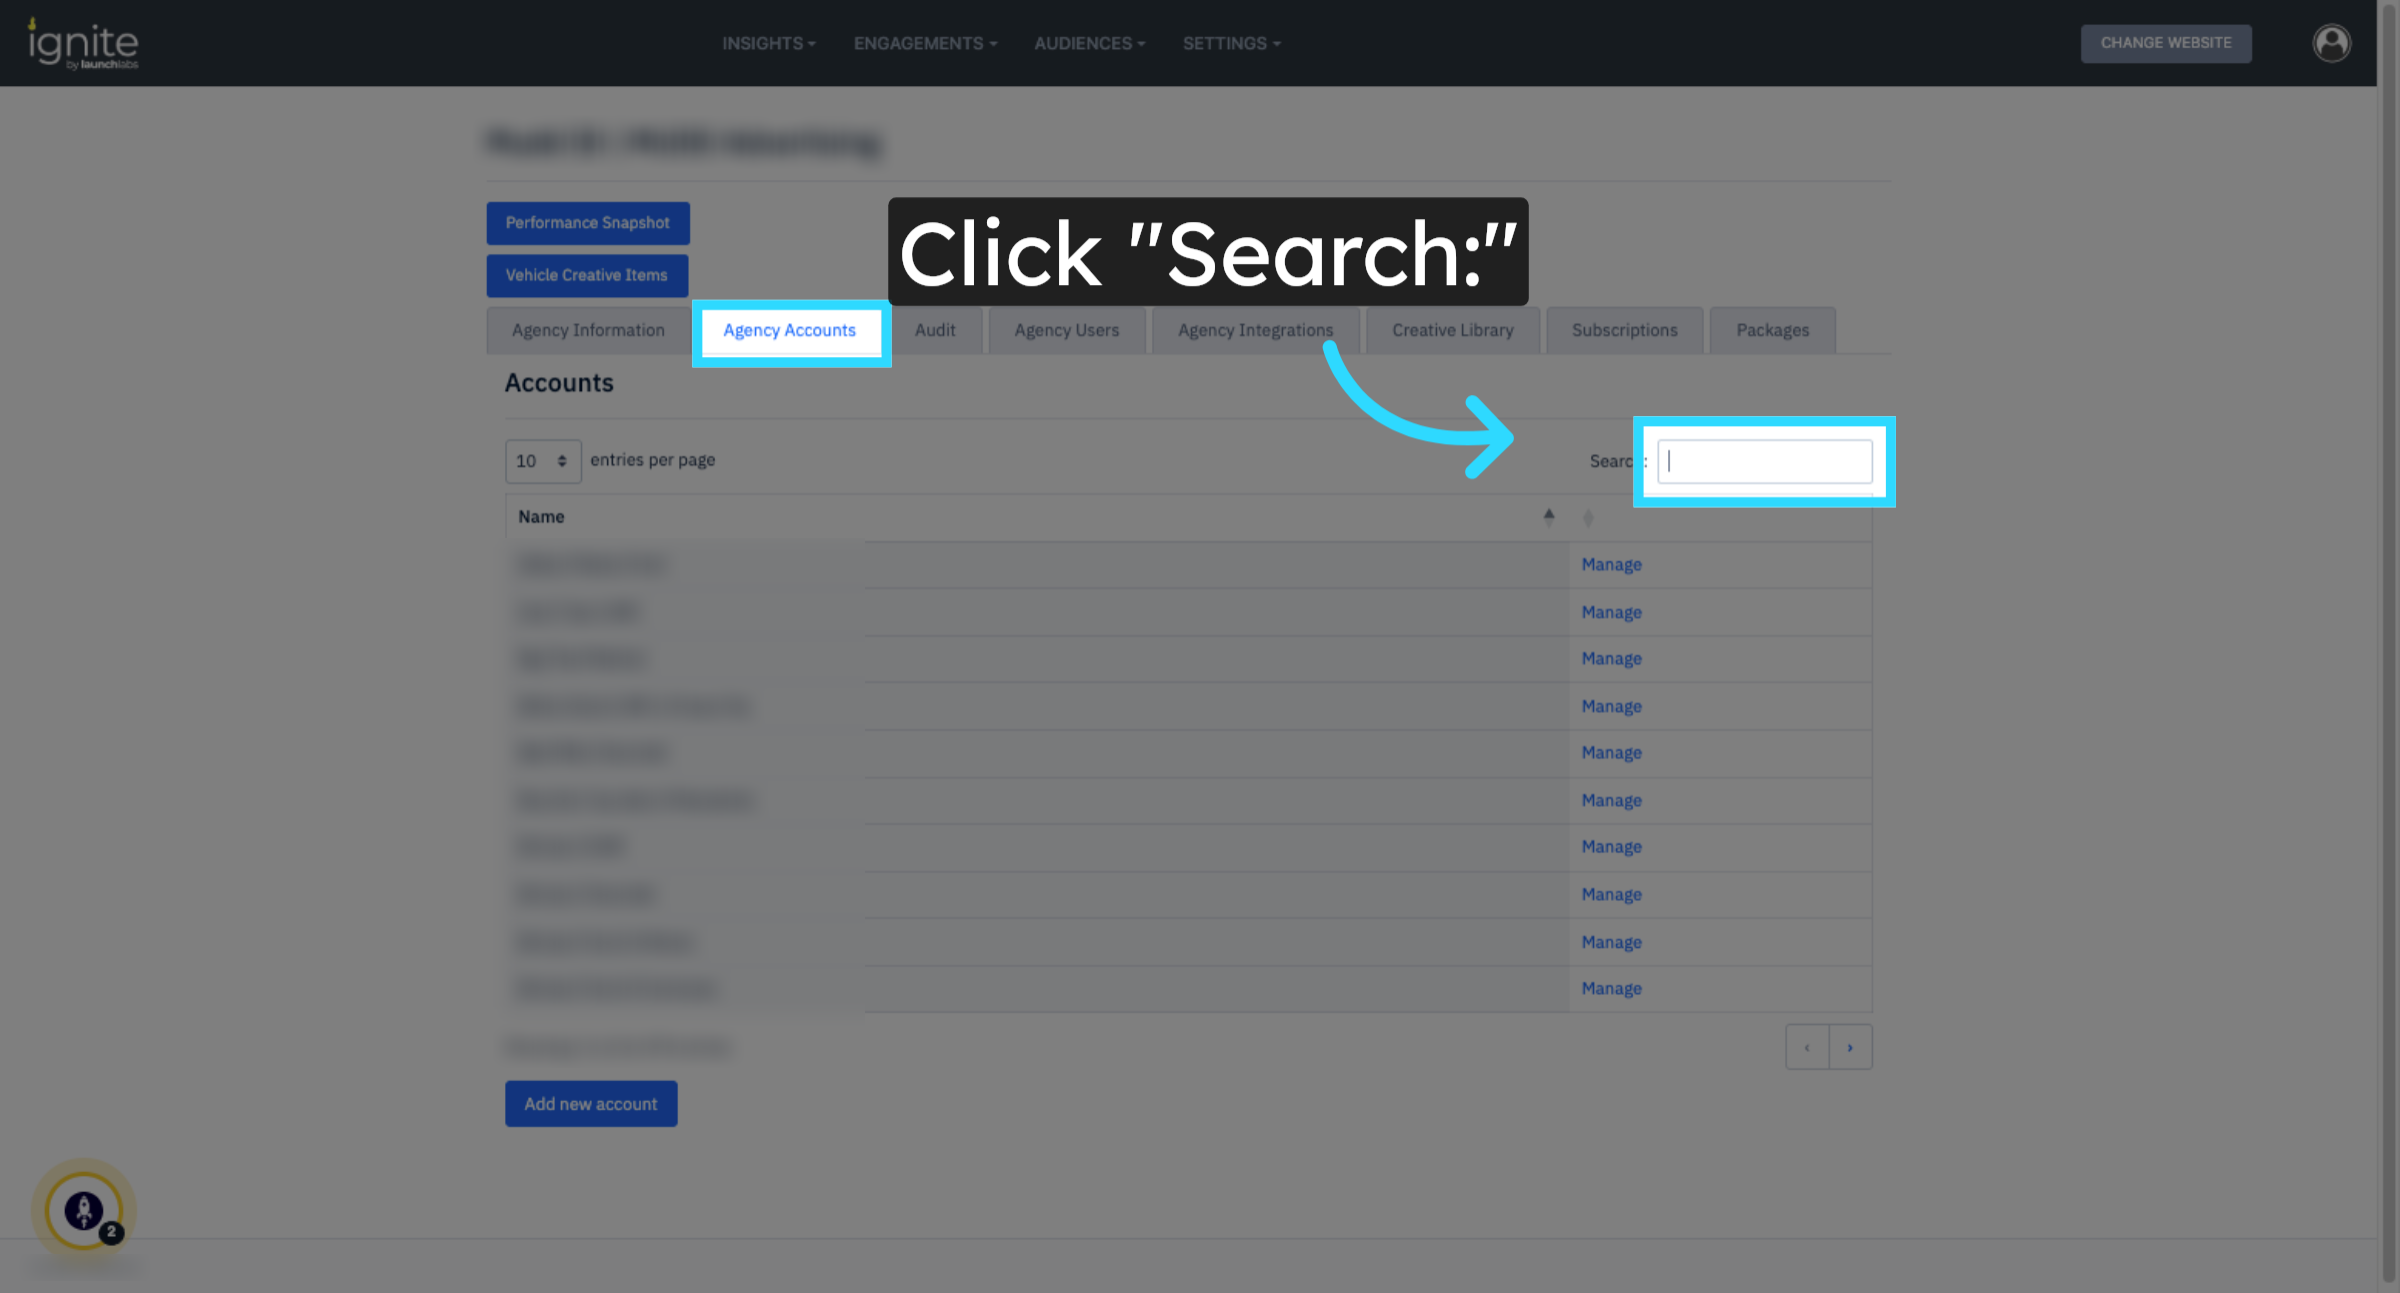
2. Search for an Existing Account
Click on the Agency Accounts tab. Use the Search function to ensure the account you’re about to add doesn’t already exist.
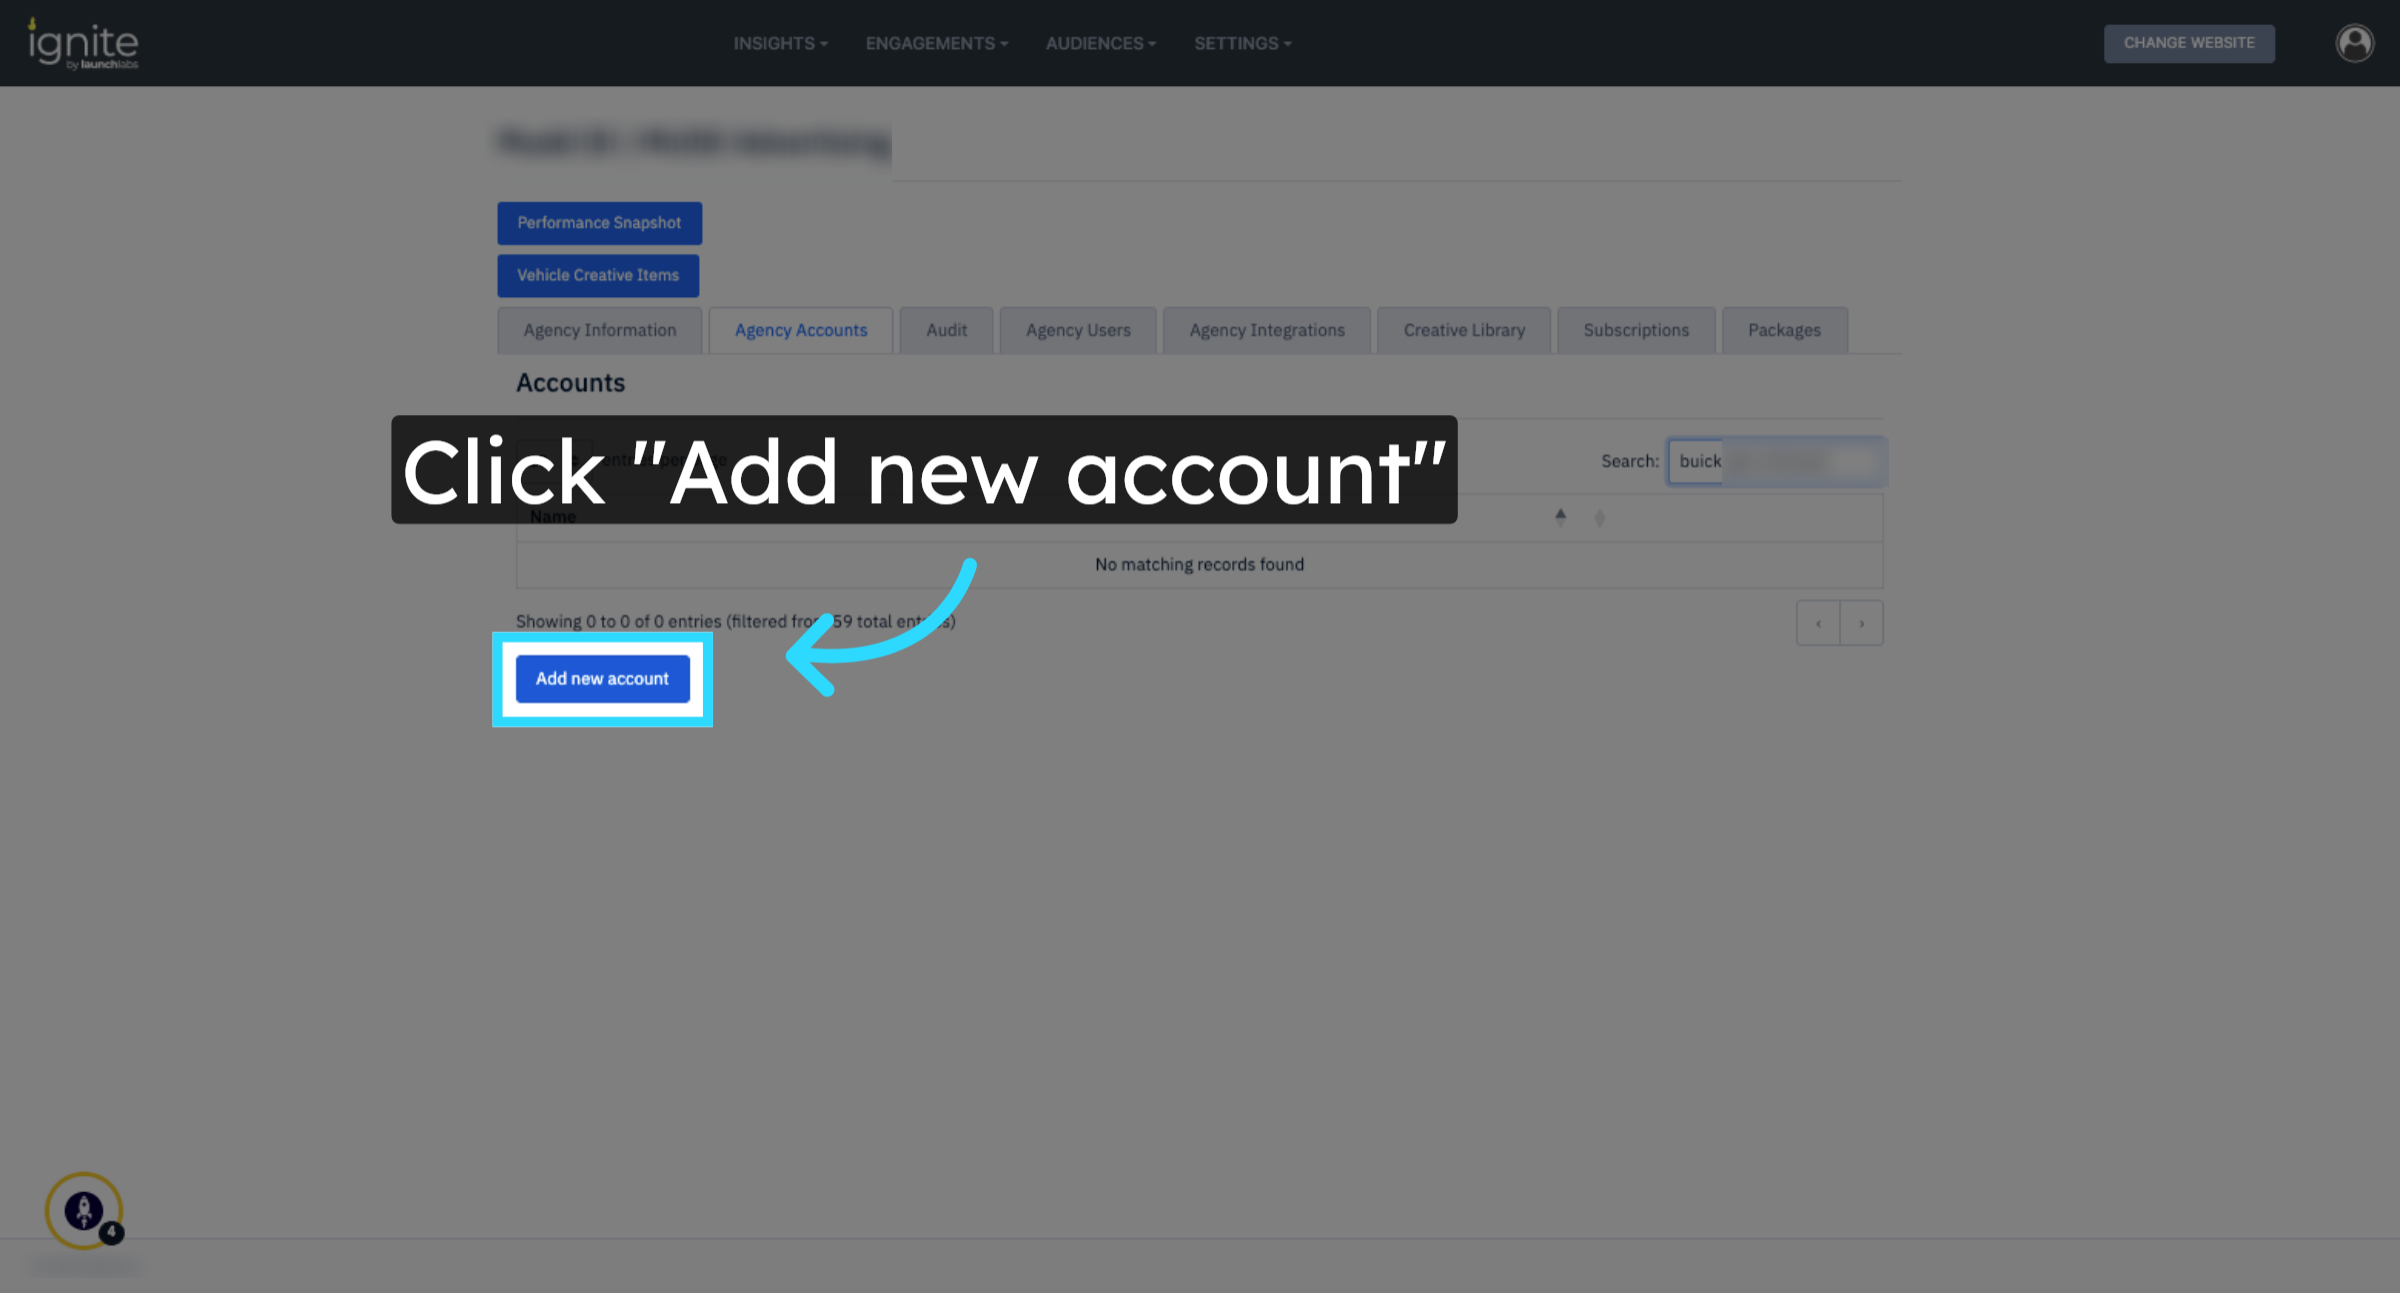
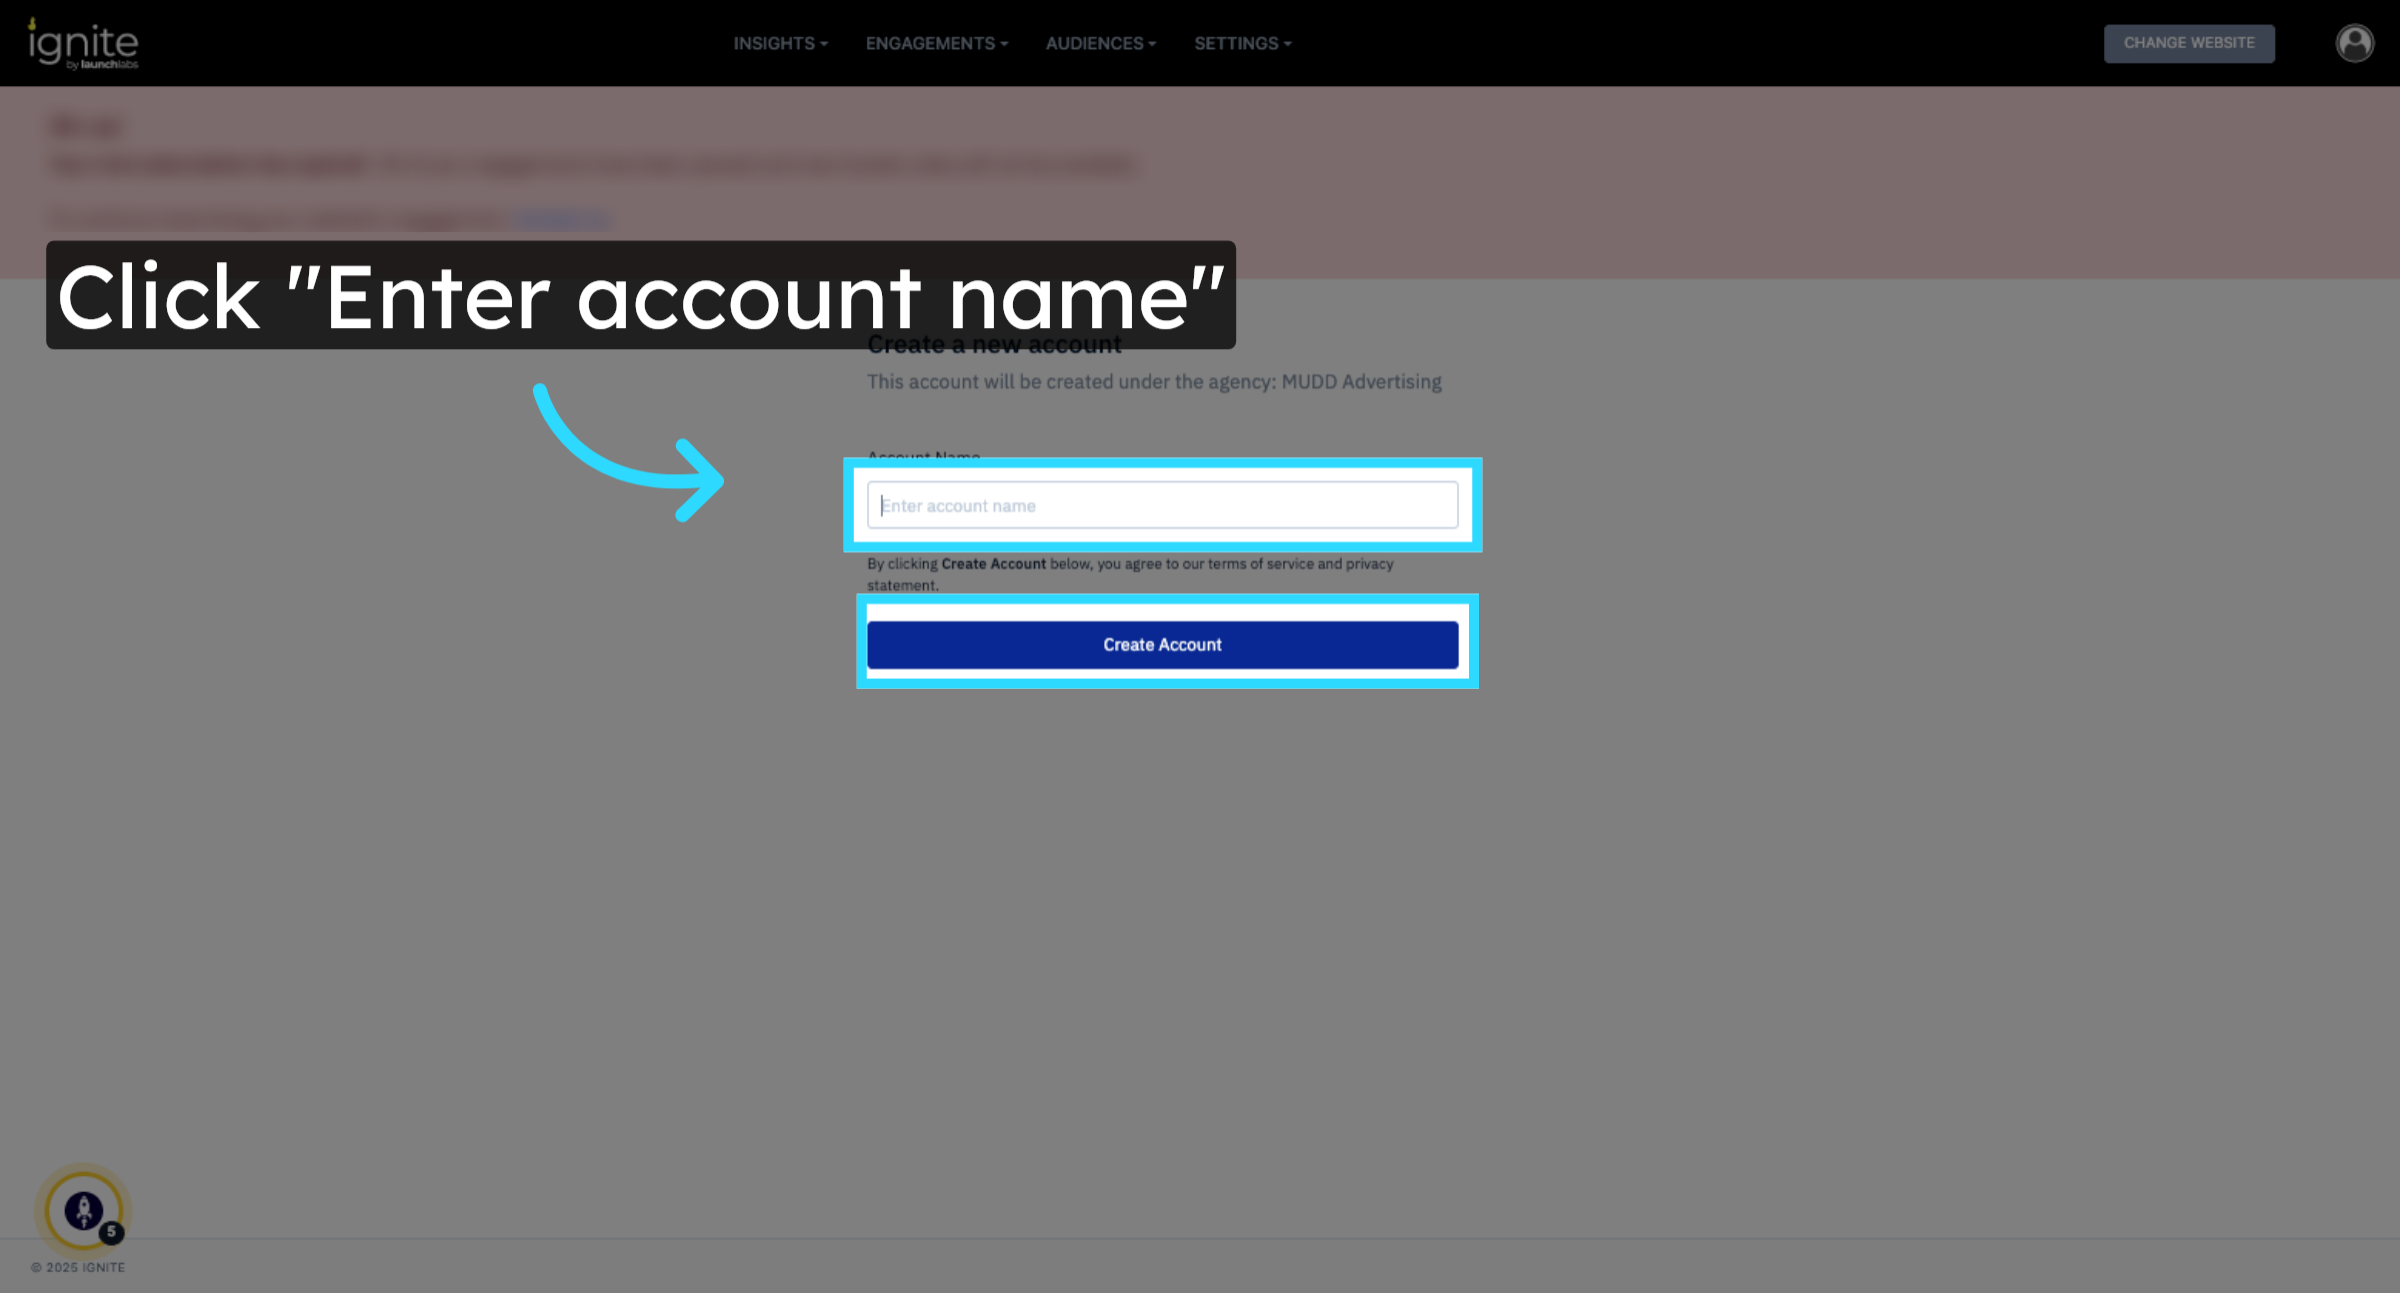
3. Create a New Account
Click Add New Account, enter the account name, and select Create Account.
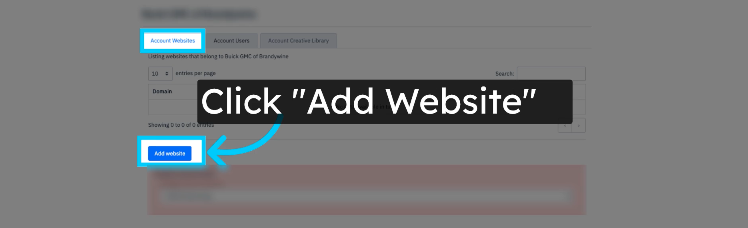
4. Add the Website
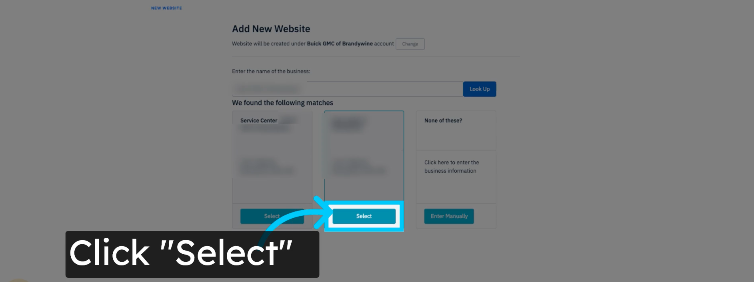
Navigate to the Account Websites tab and click Add Website. Enter the name of the business you’re adding and then click Look Up to search for the business profile. When the correct business profile appears, select it.
⚠️ For dealerships, make sure to select the dealership, not the service center.
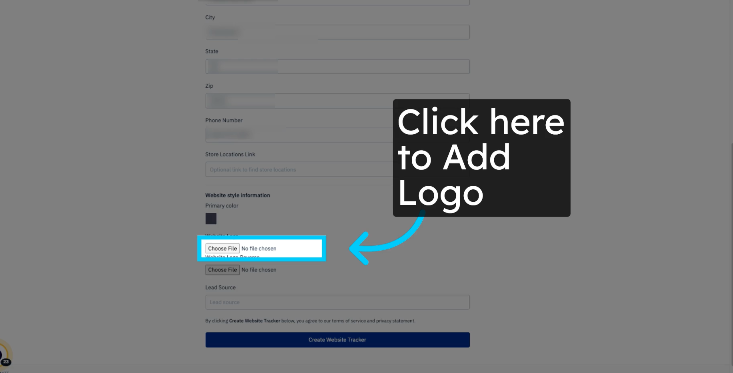
5. Confirm Website Details
Once the profile loads, verify that the website URL, business address, and industry type are accurate. Below these fields, you can upload the business logo to be associated with the website.
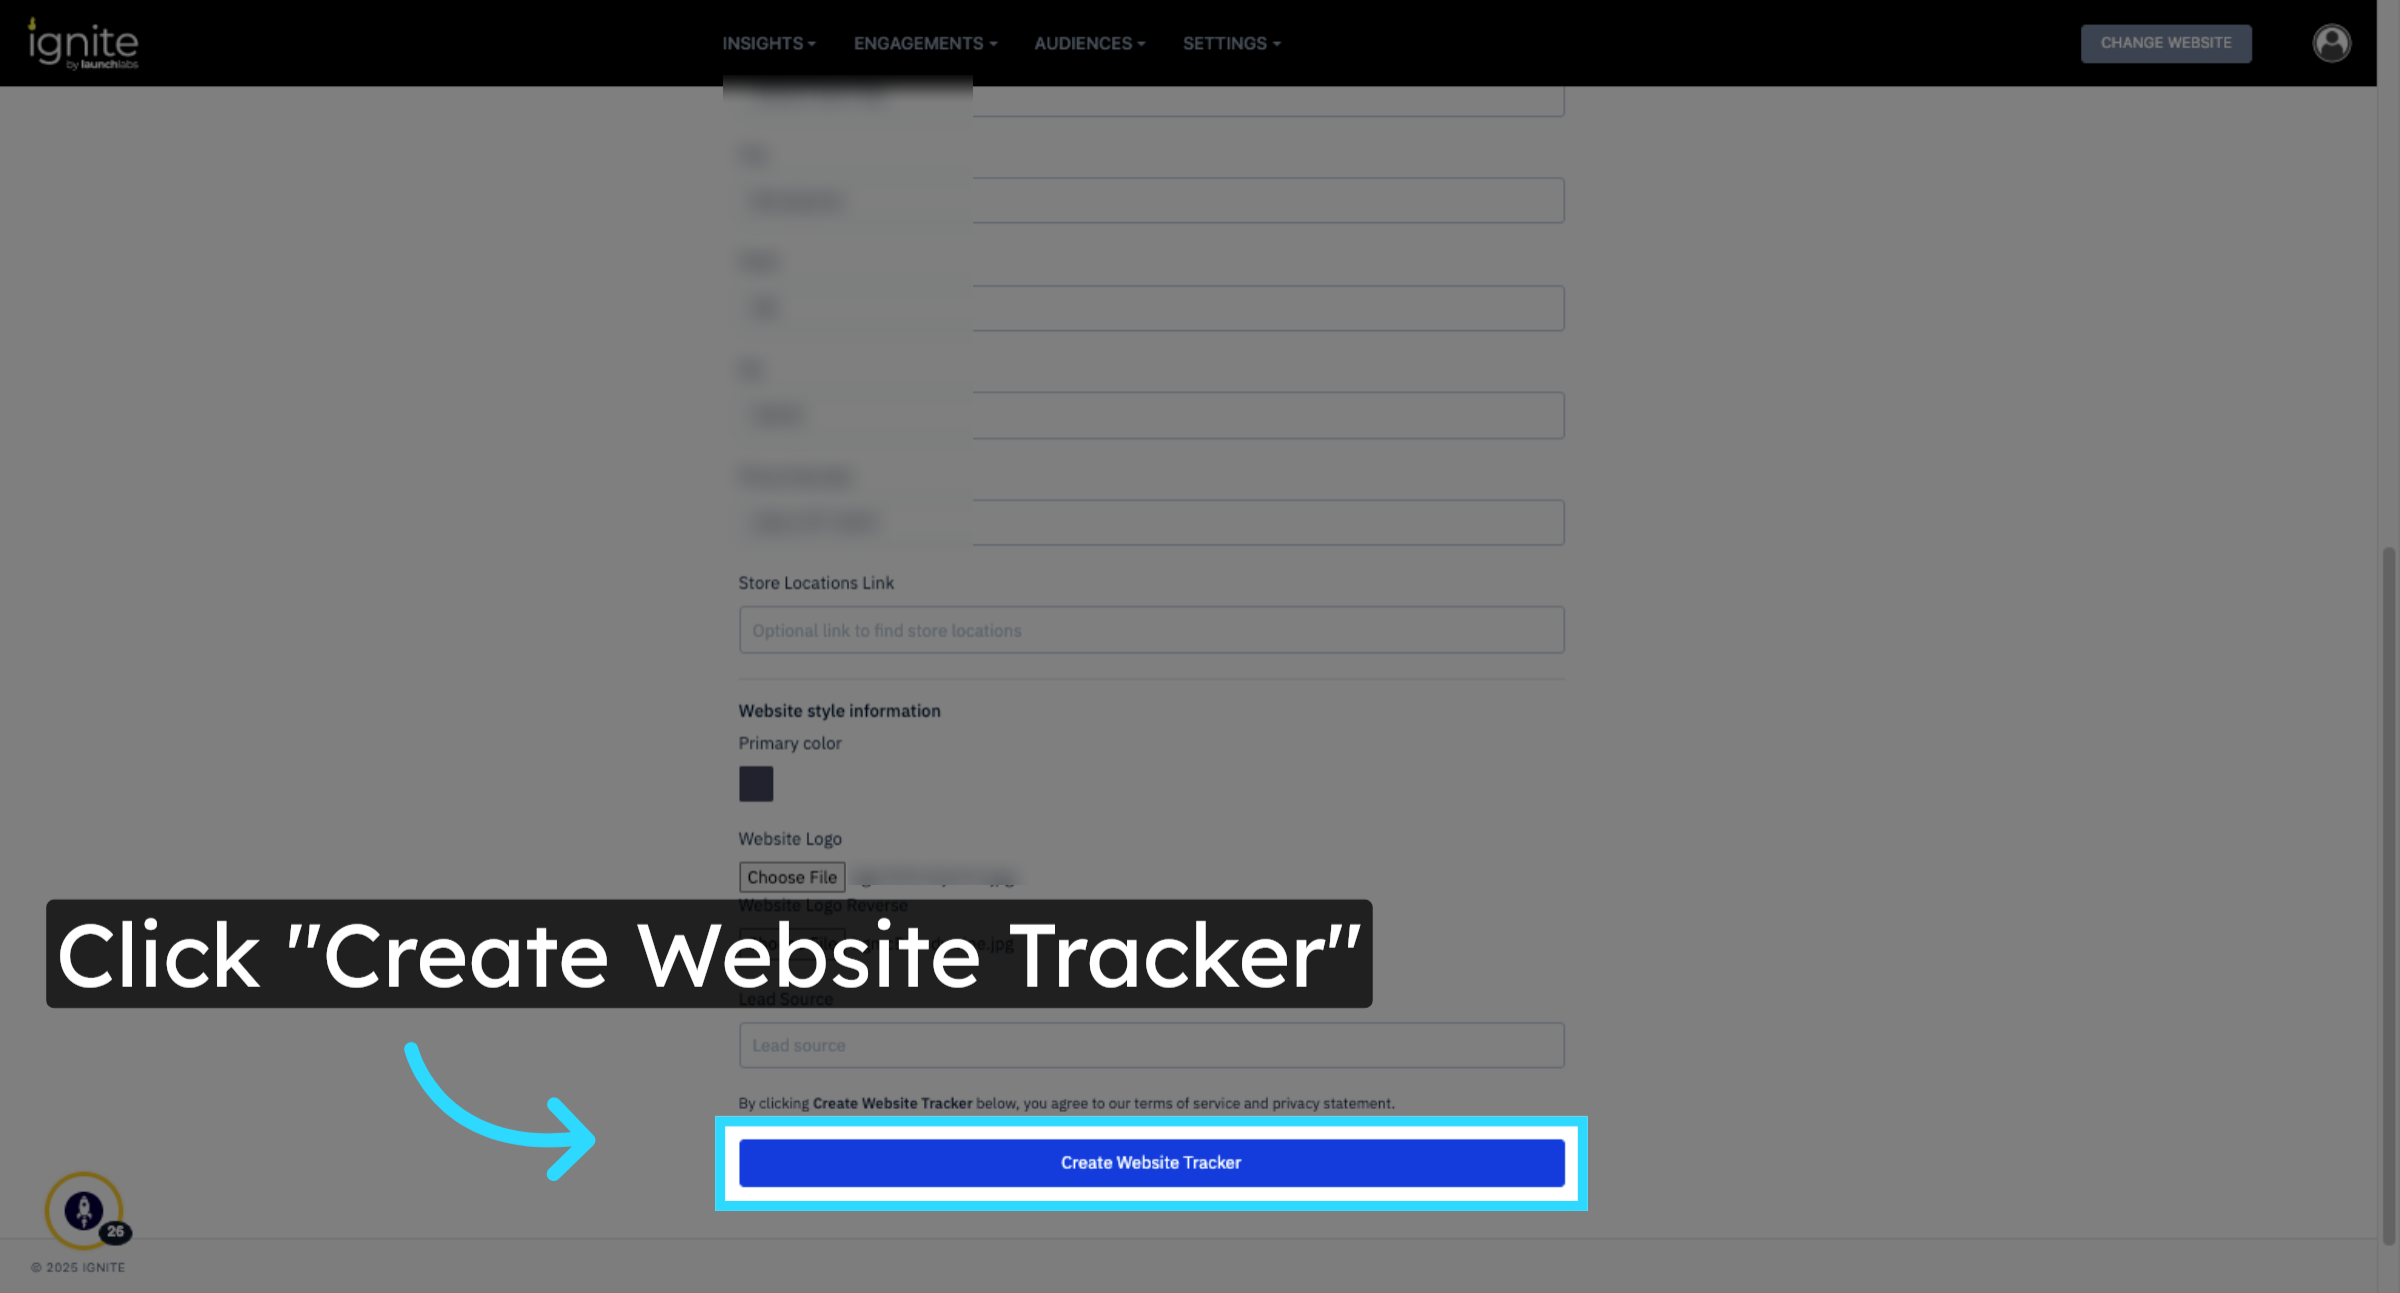
6. Create Website Tracker
Click Create Website Tracker to generate the tracking tag. Then click Next to continue.
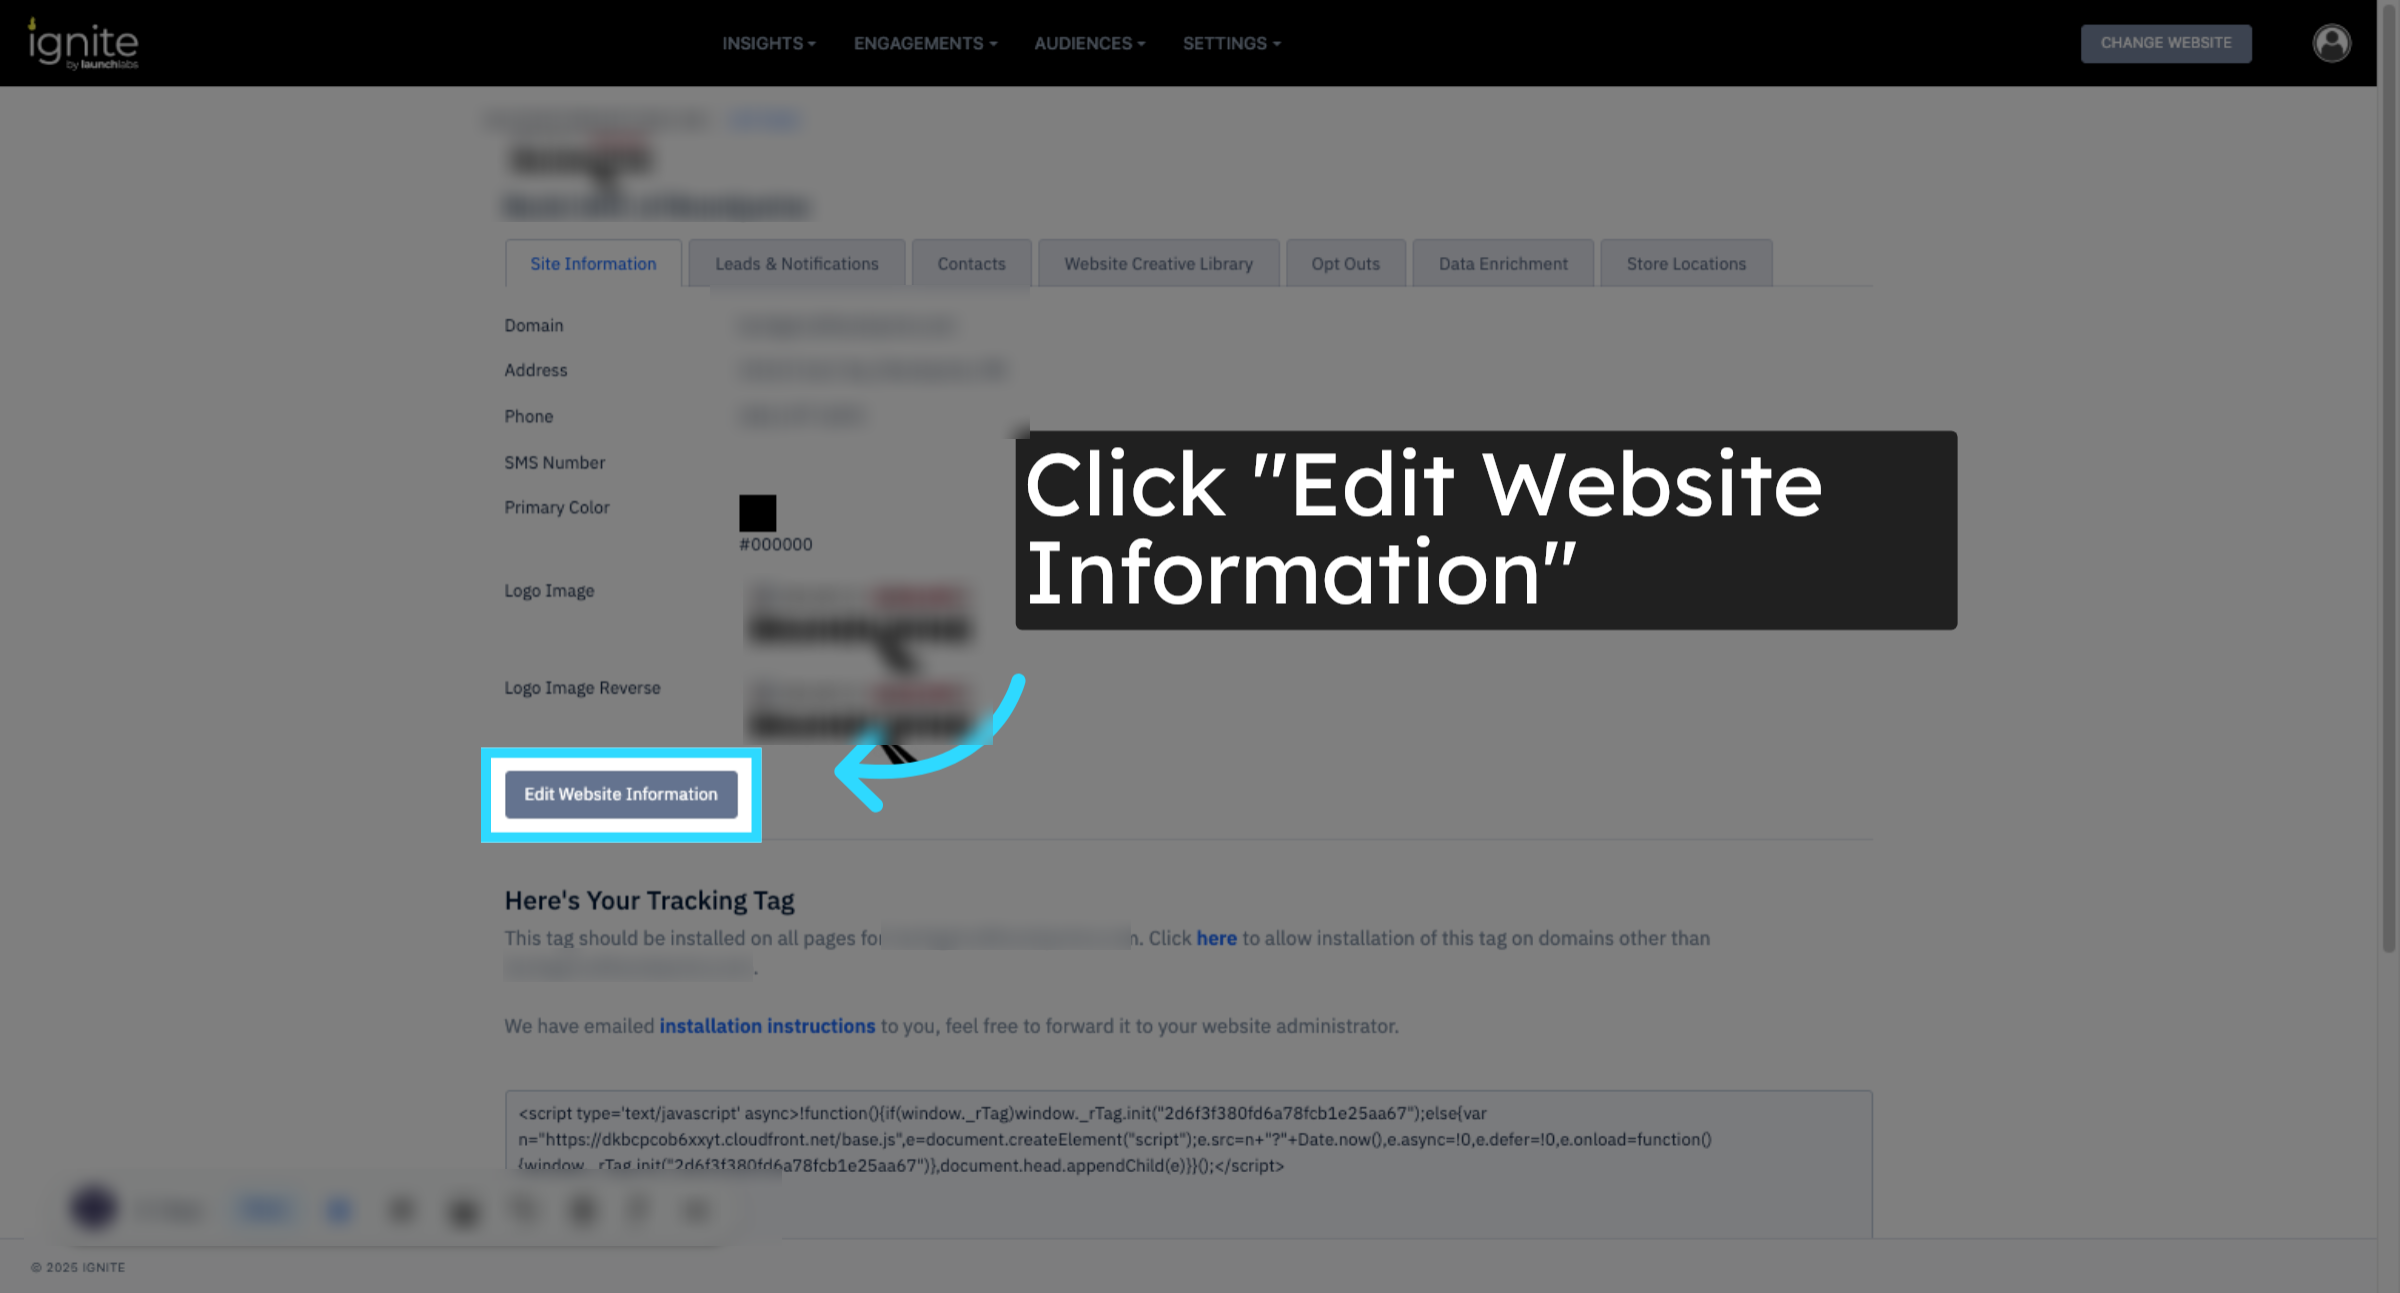
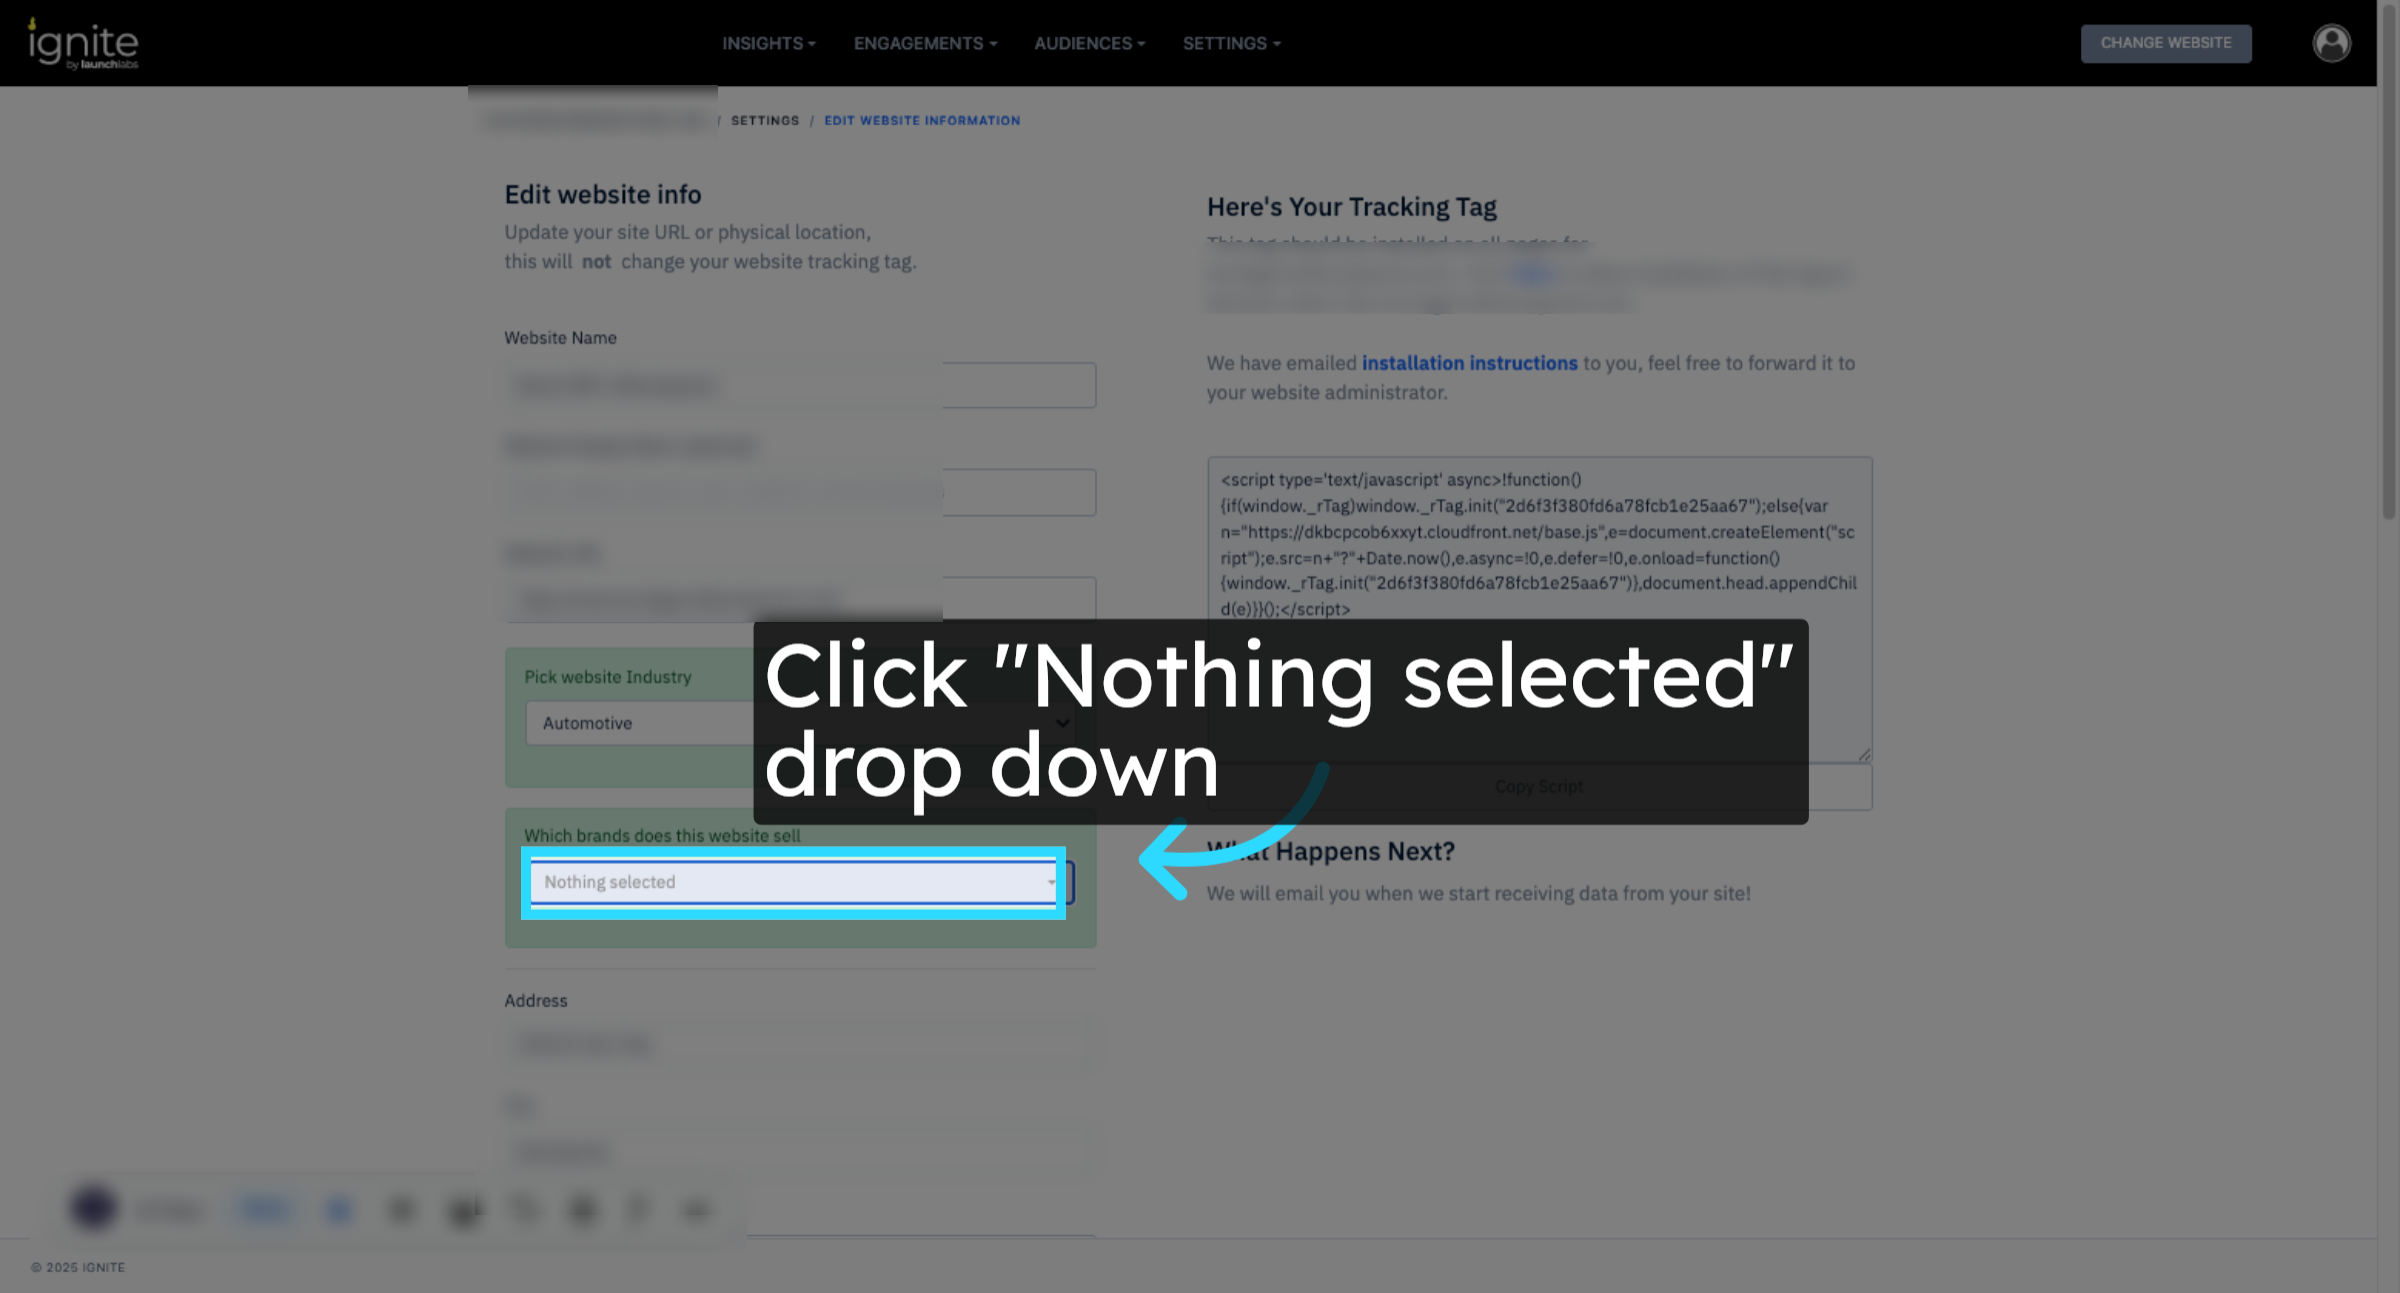
7. Edit Website Information
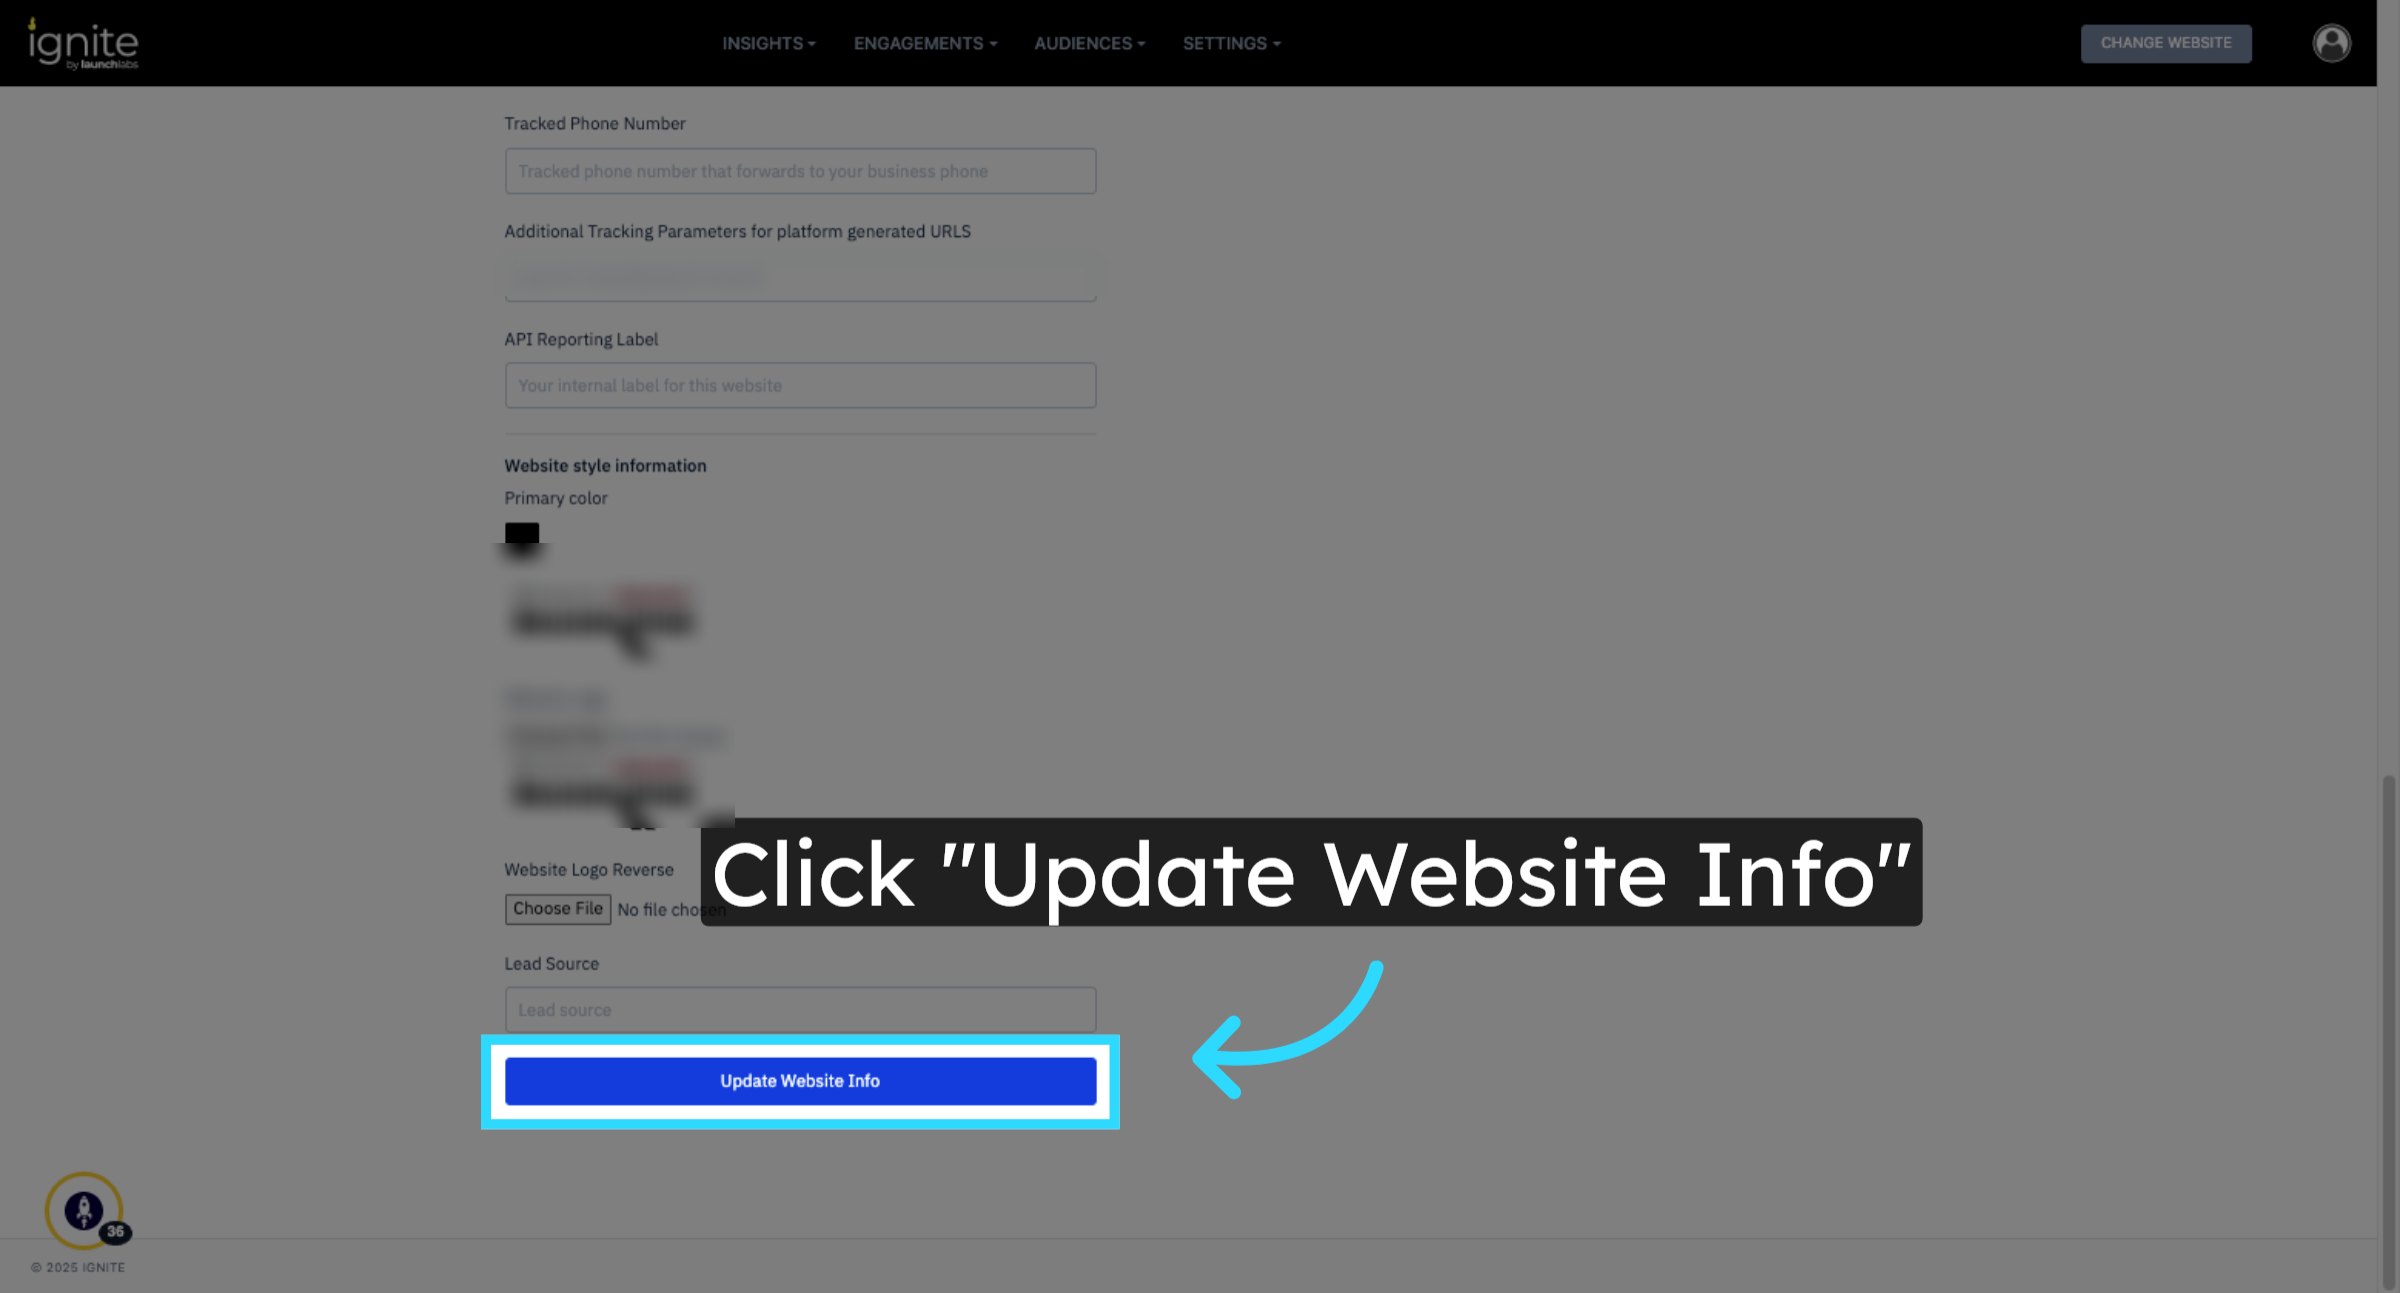
From the settings, go to Site Information. Click Edit Website Information to update details like Brands associated with the site. Scroll down and click Update Website Info to save changes.