Configuring 1-Tap Lead Buttons
This article explains how to configure 1-Tap Lead Buttons within the platform. These single-tap conversion buttons can be placed anywhere on your site to instantly capture leads with a verified phone number via SMS. Even if there’s no on-page offer available, these buttons will still fire so visitors always have a clear path to convert.
⚠️ 1-Tap Lead Buttons are only available on mobile devices because they rely on SMS functionality to collect verified phone numbers. They will not appear or function on desktop.
There are a few important things to note regarding 1 Tap Lead Button Engagement:
- 1-Tap Buttons are mobile device engagements similar to that of Conversion Hub, meaning they will not be seen by a desktop visitor.
- If both Conversion Hub and 1-Tap Button are enabled for a site, Conversion Hub will take precedence over the 1-Tap Engagement.
- If there is an On-Site Offer enabled for a segment (for example New Model Visitors) and there is also a 1-Tap Offer enabled for that same audience segment(New Model Visitors), the On-Site offer will take precedence over the 1-Tap Engagement.
Watch this video tutorial to see the full configuration process in action:
Step-by-Step Instructions
Follow these steps to configure a 1-Tap Lead Button. Screenshots from the video should be added for each major step.
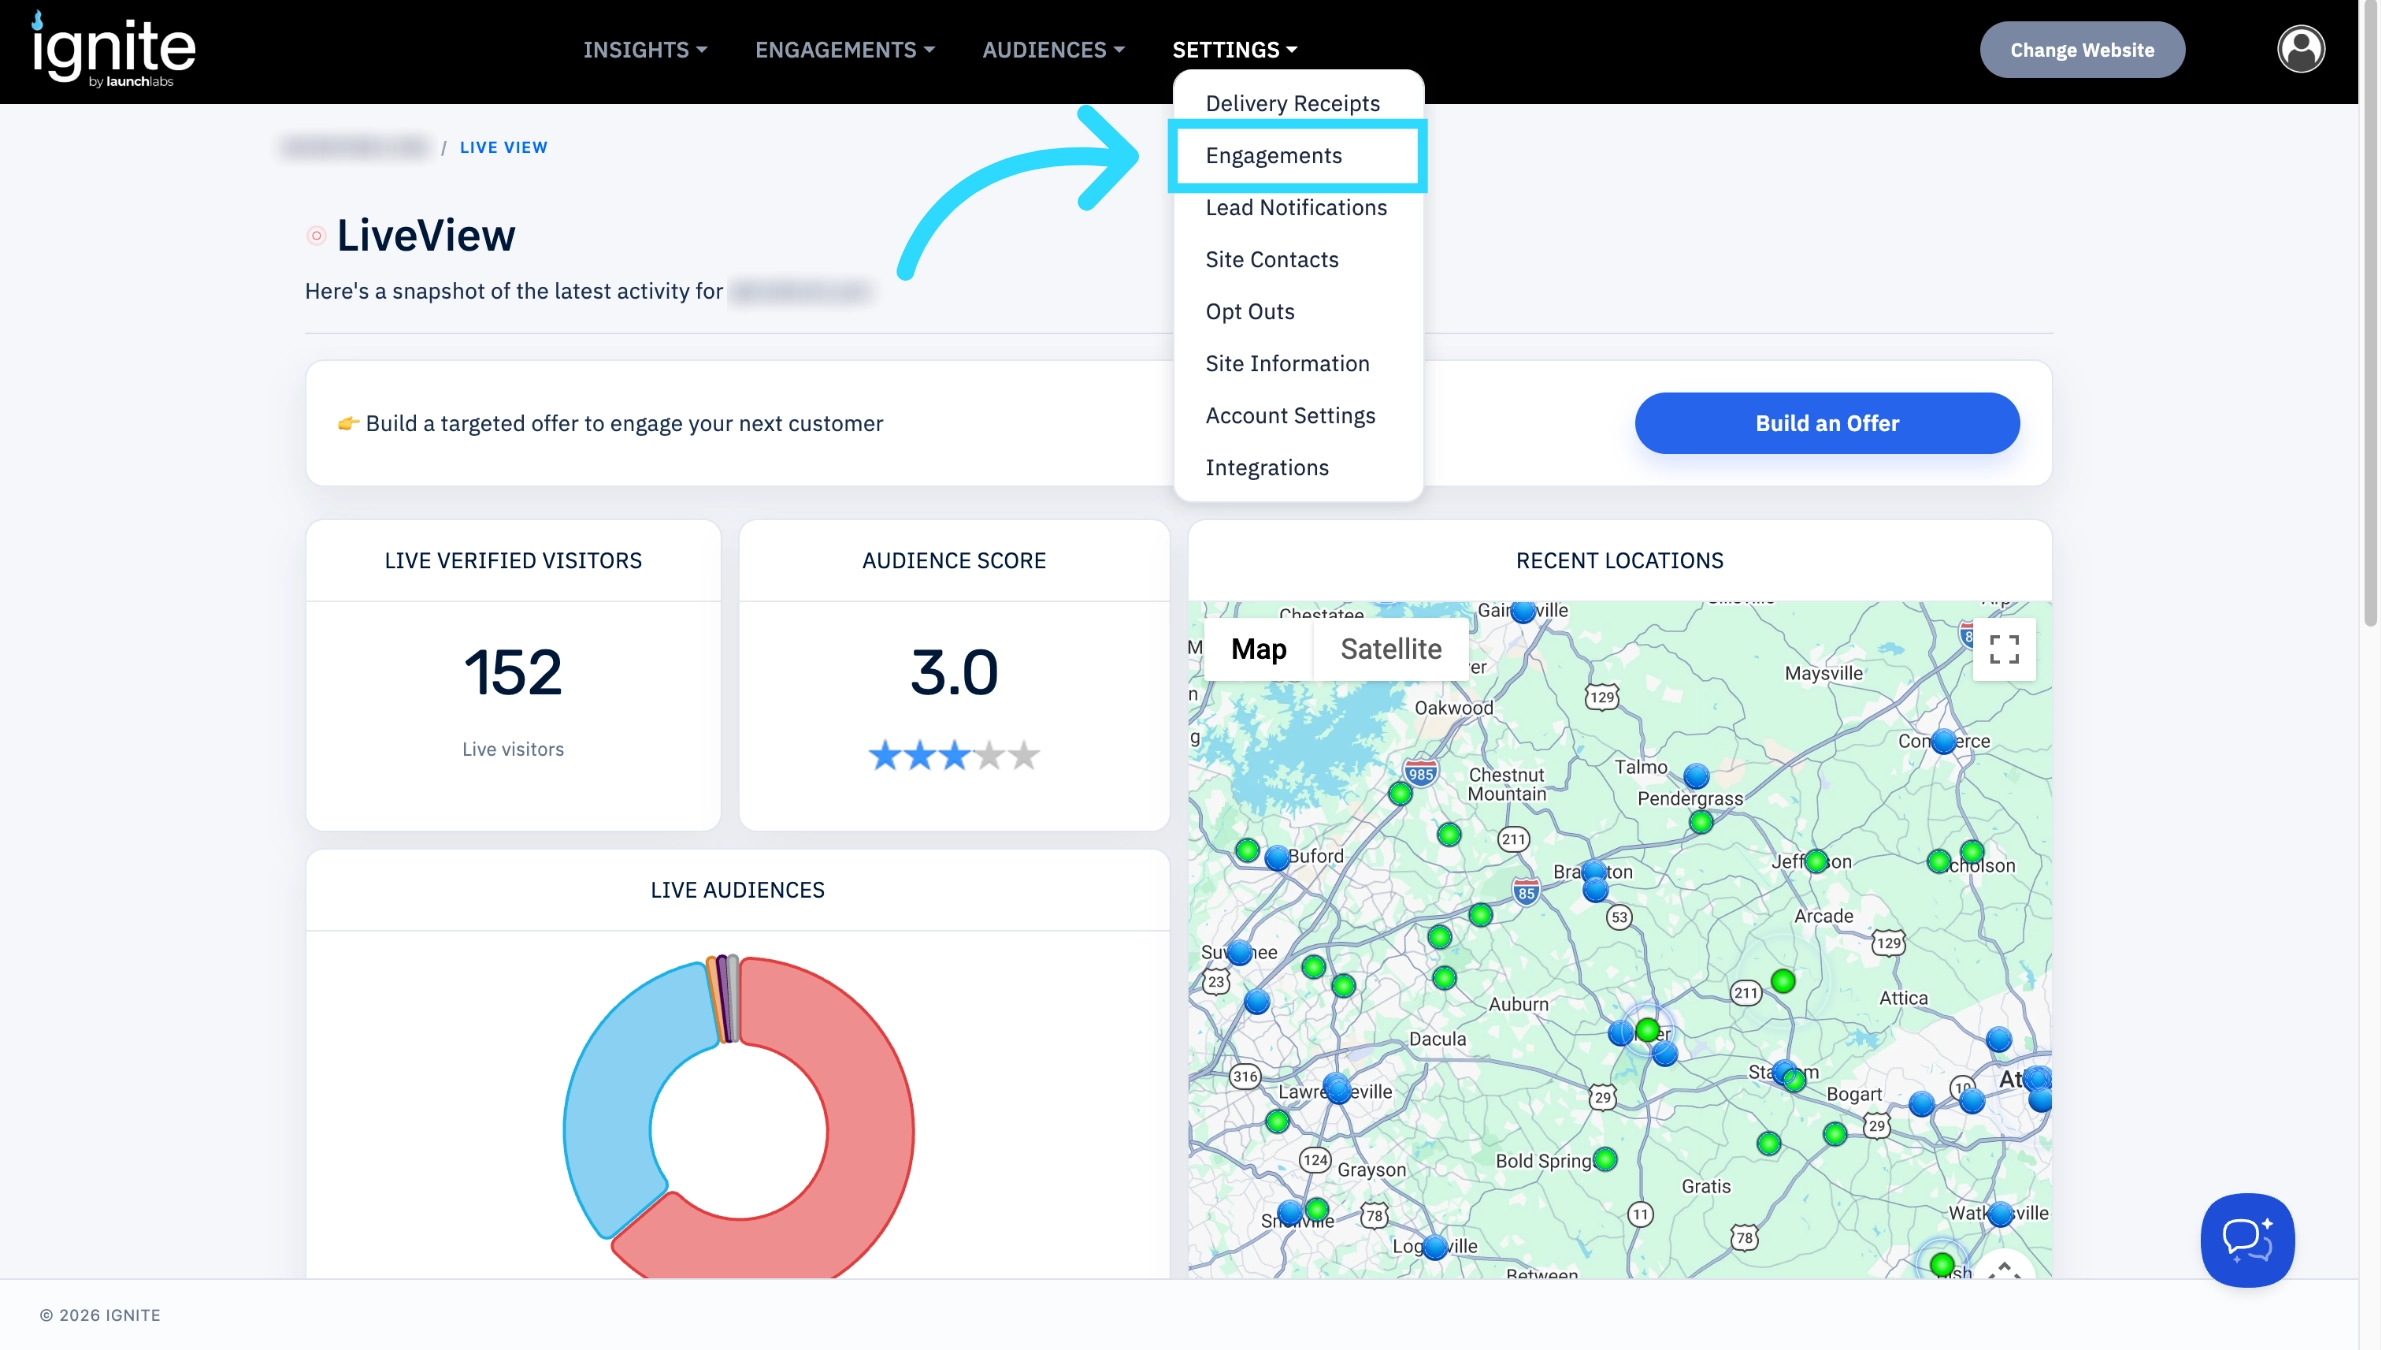
1. Open Engagements
From the top navigation bar, click Settings, then select Engagements from the dropdown.
2. Configure 1-Tap Lead Buttons
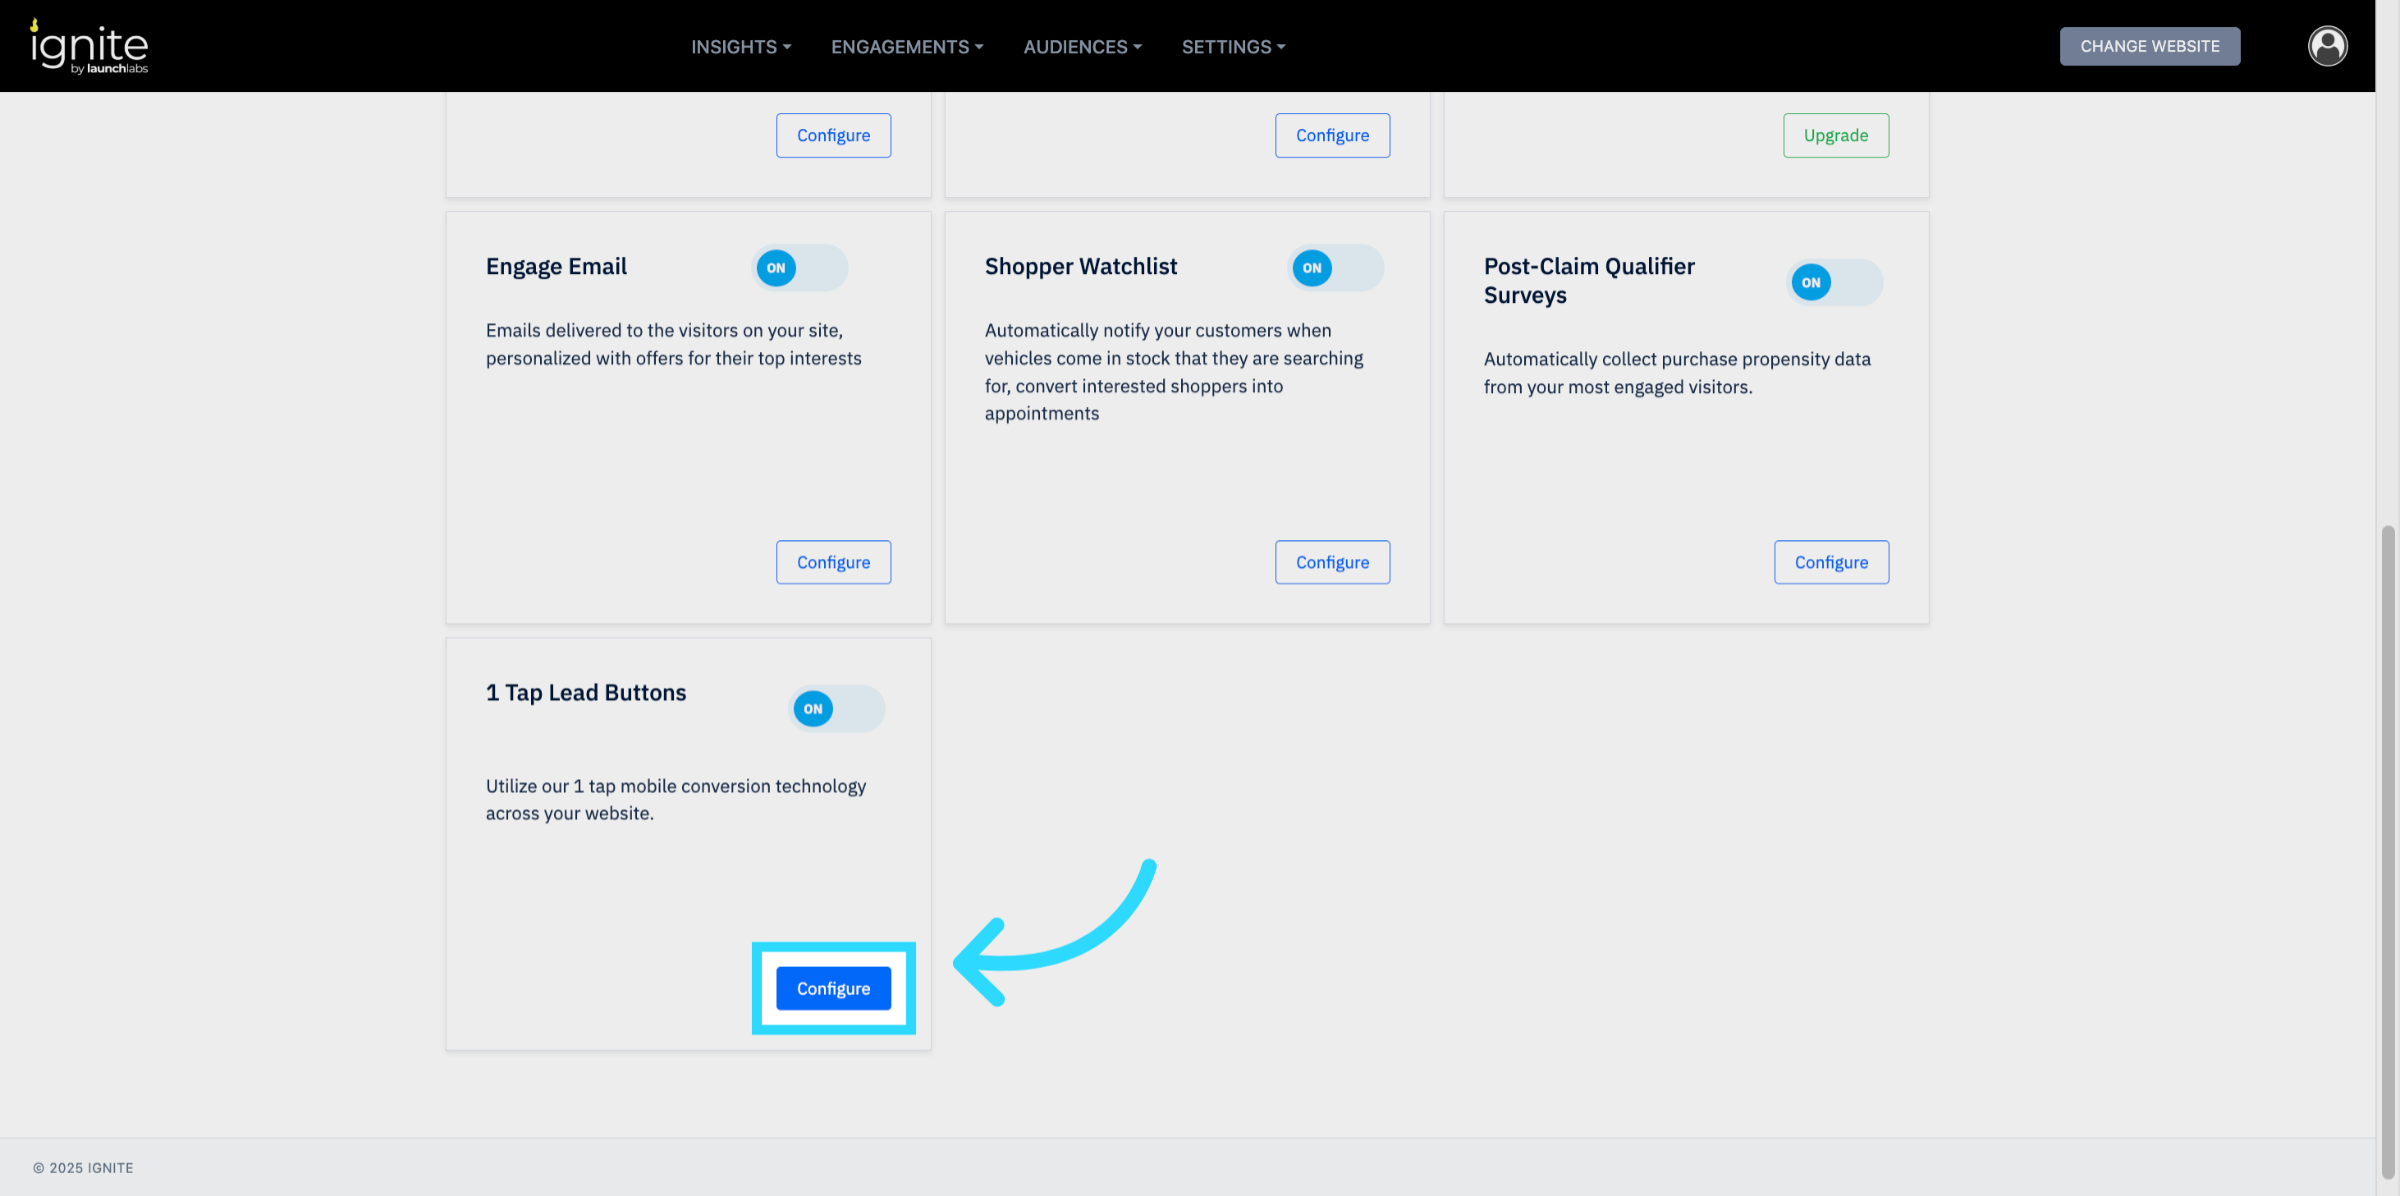
Scroll to the 1-Tap Lead Buttons section and click Configure.
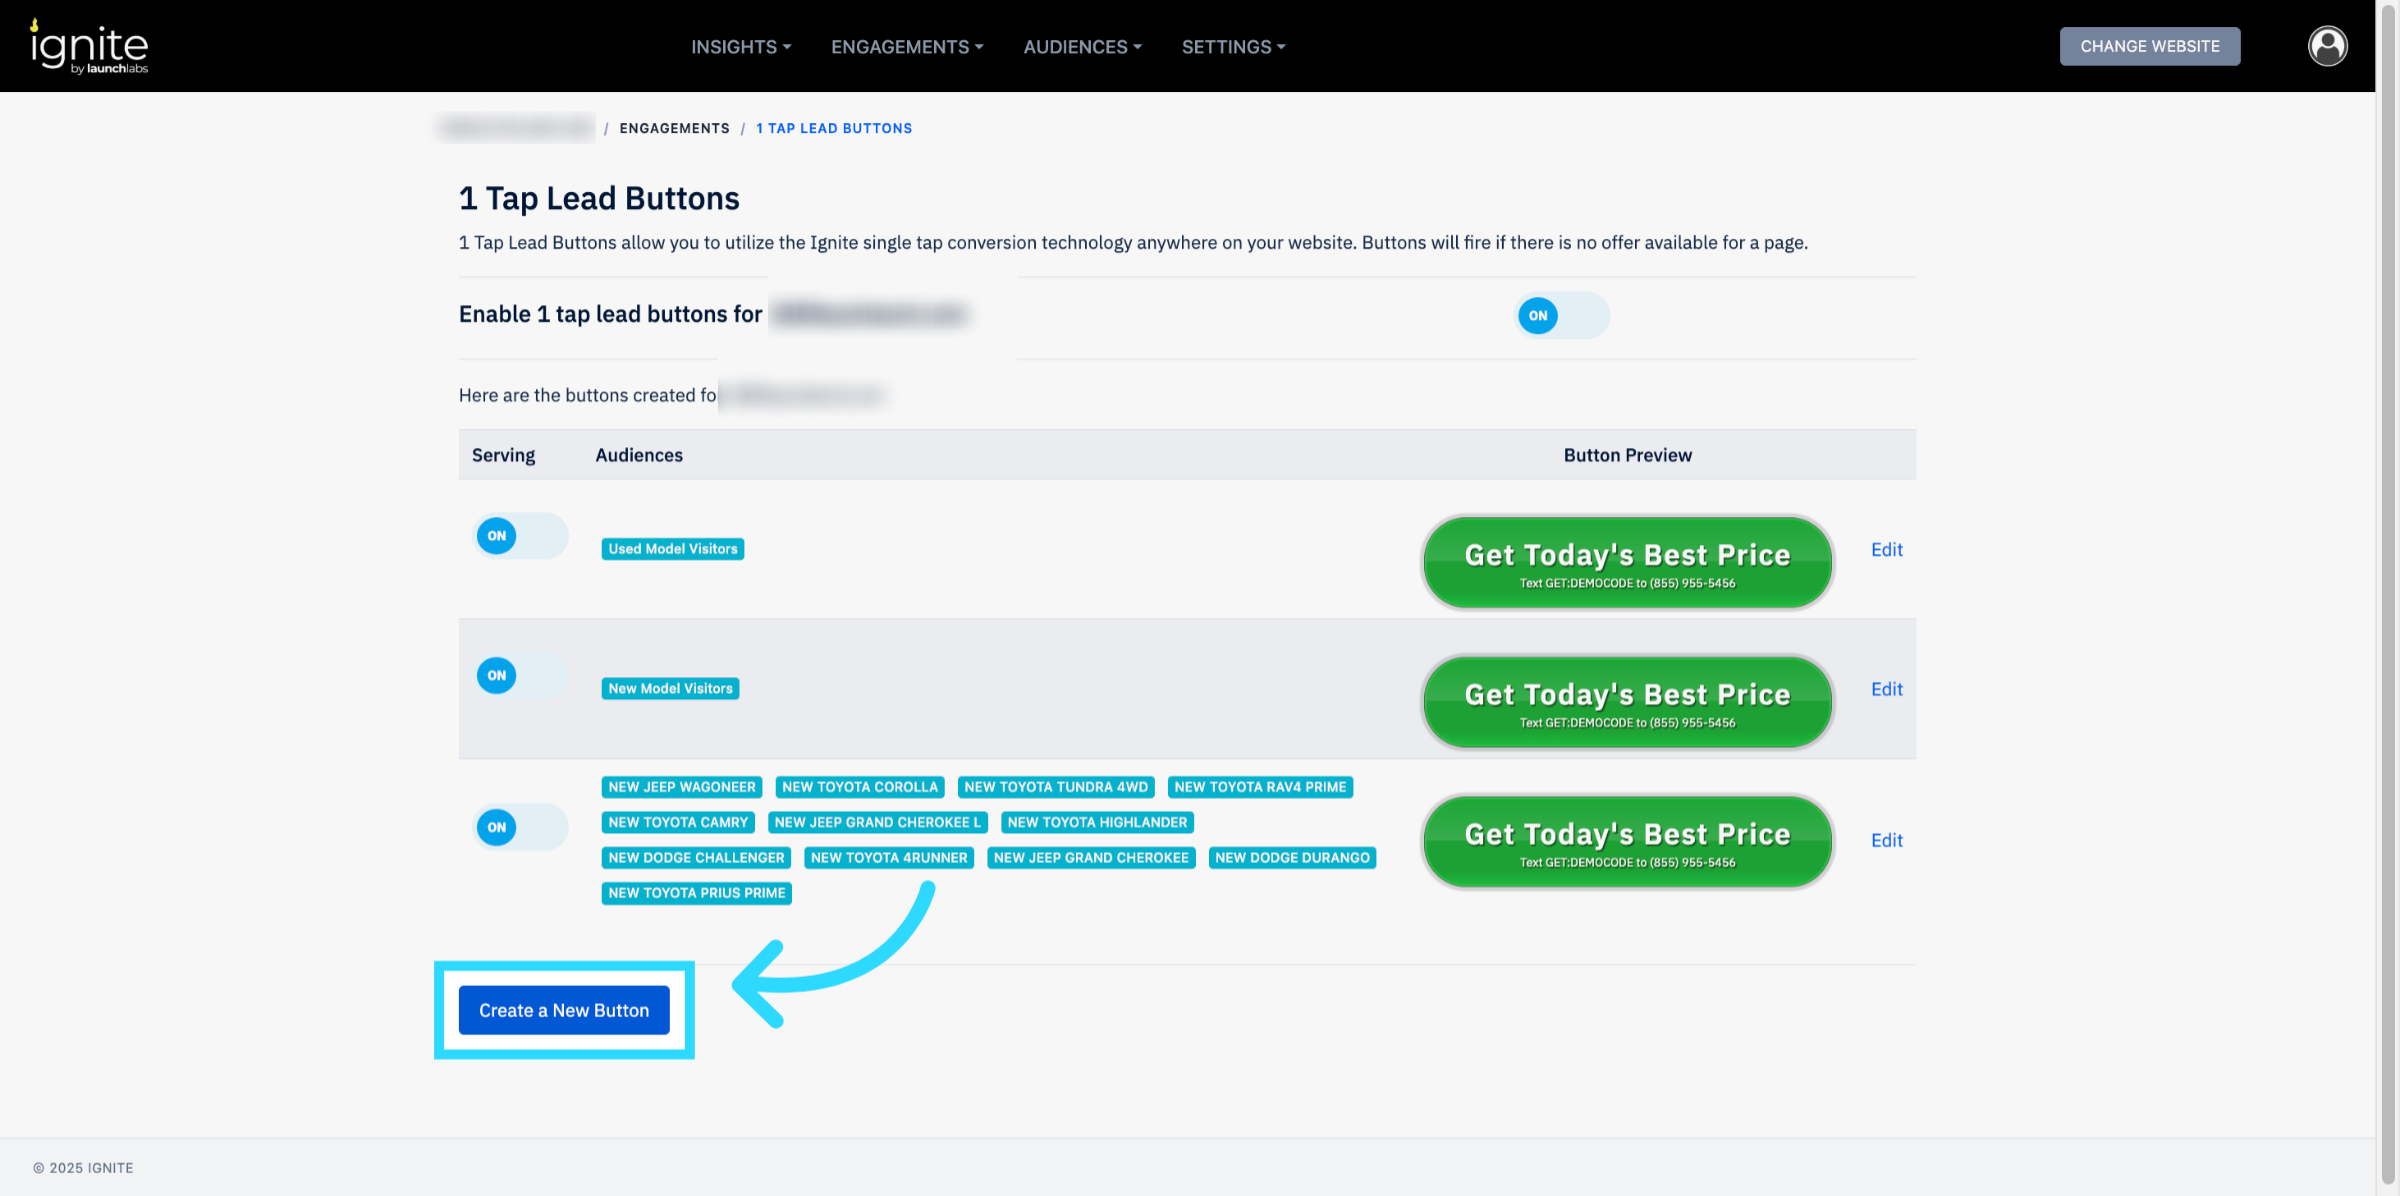
3. Create a New Button
Click Create a New Button to begin setup.
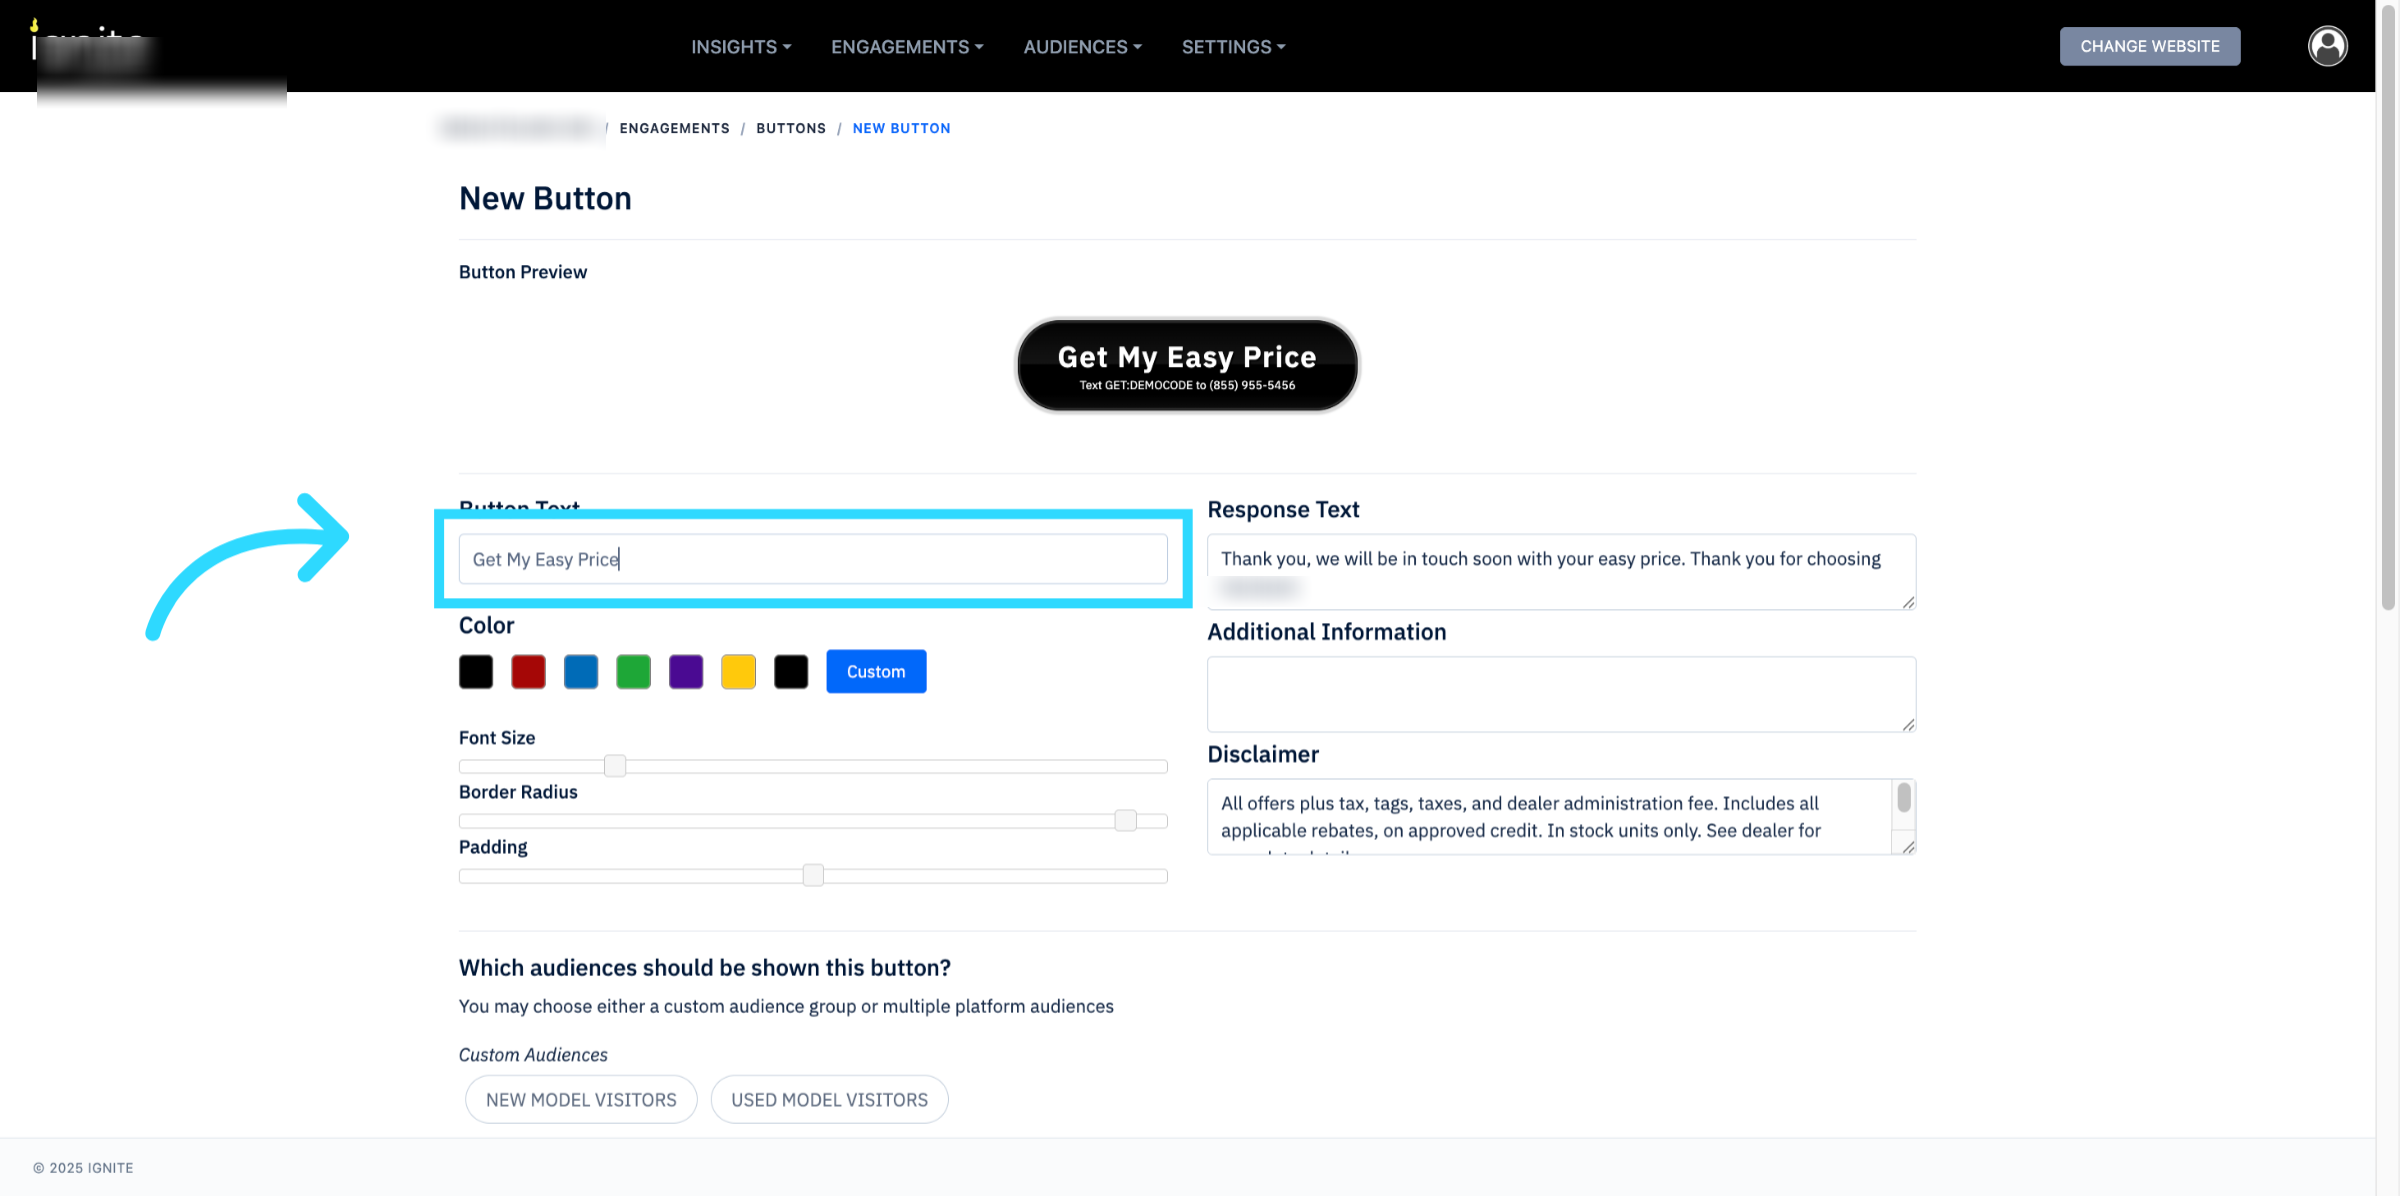
4. Set Button Text and Color
Enter the text that will appear inside the button, then choose a button color.
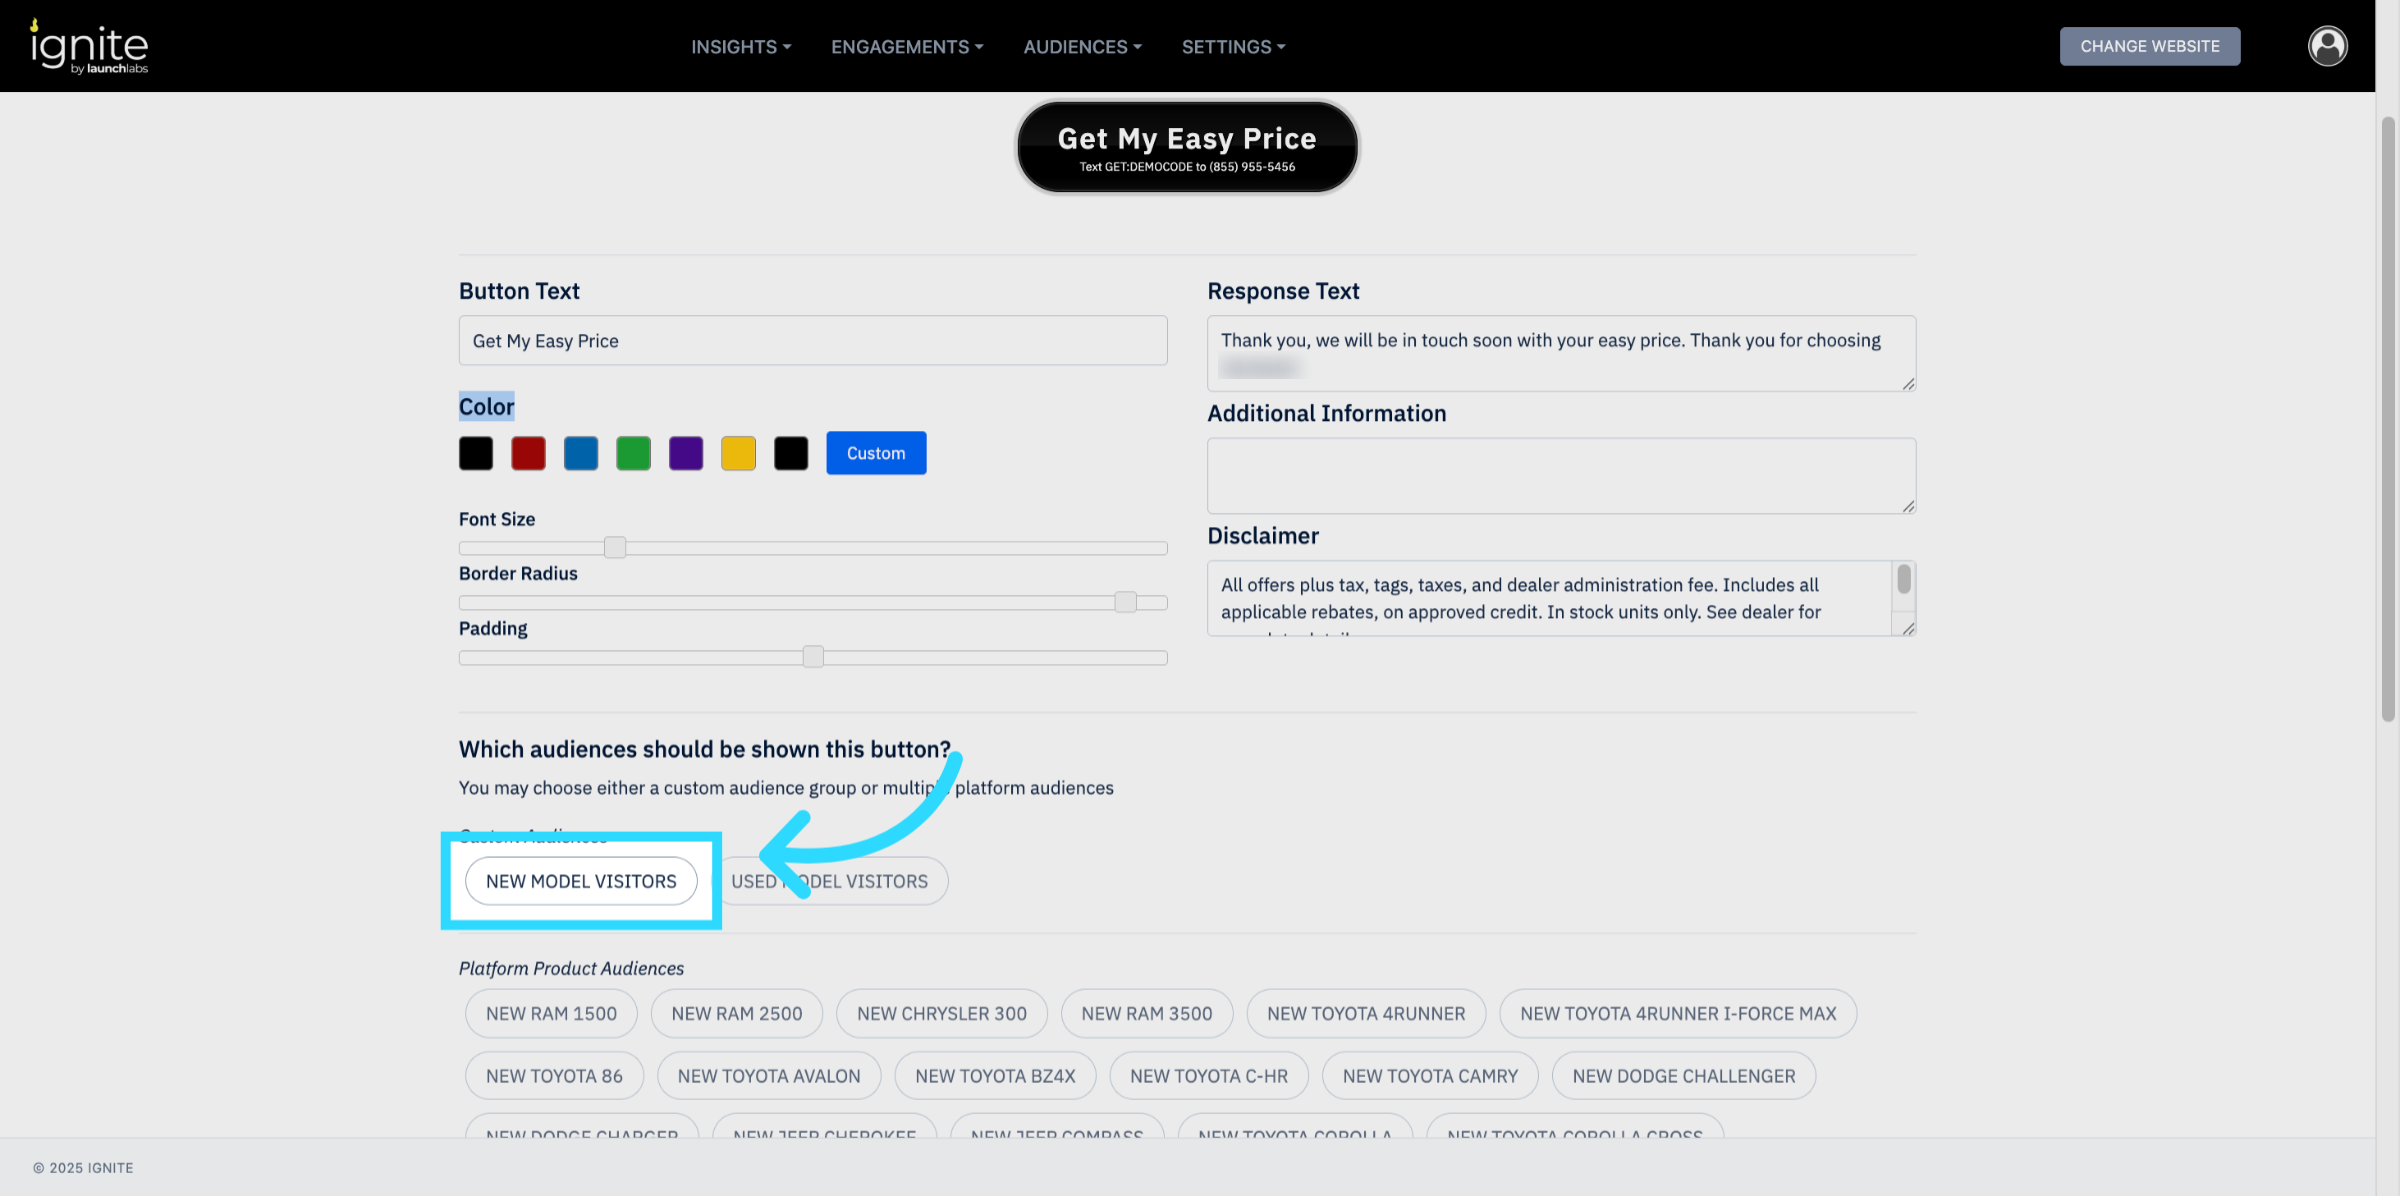
5. Select Audiences
Choose the audience segments that should see the button.
💡 Best Practice Recommendation: Create buttons for your largest segments, such as New Visitors and Used Model Visitors.
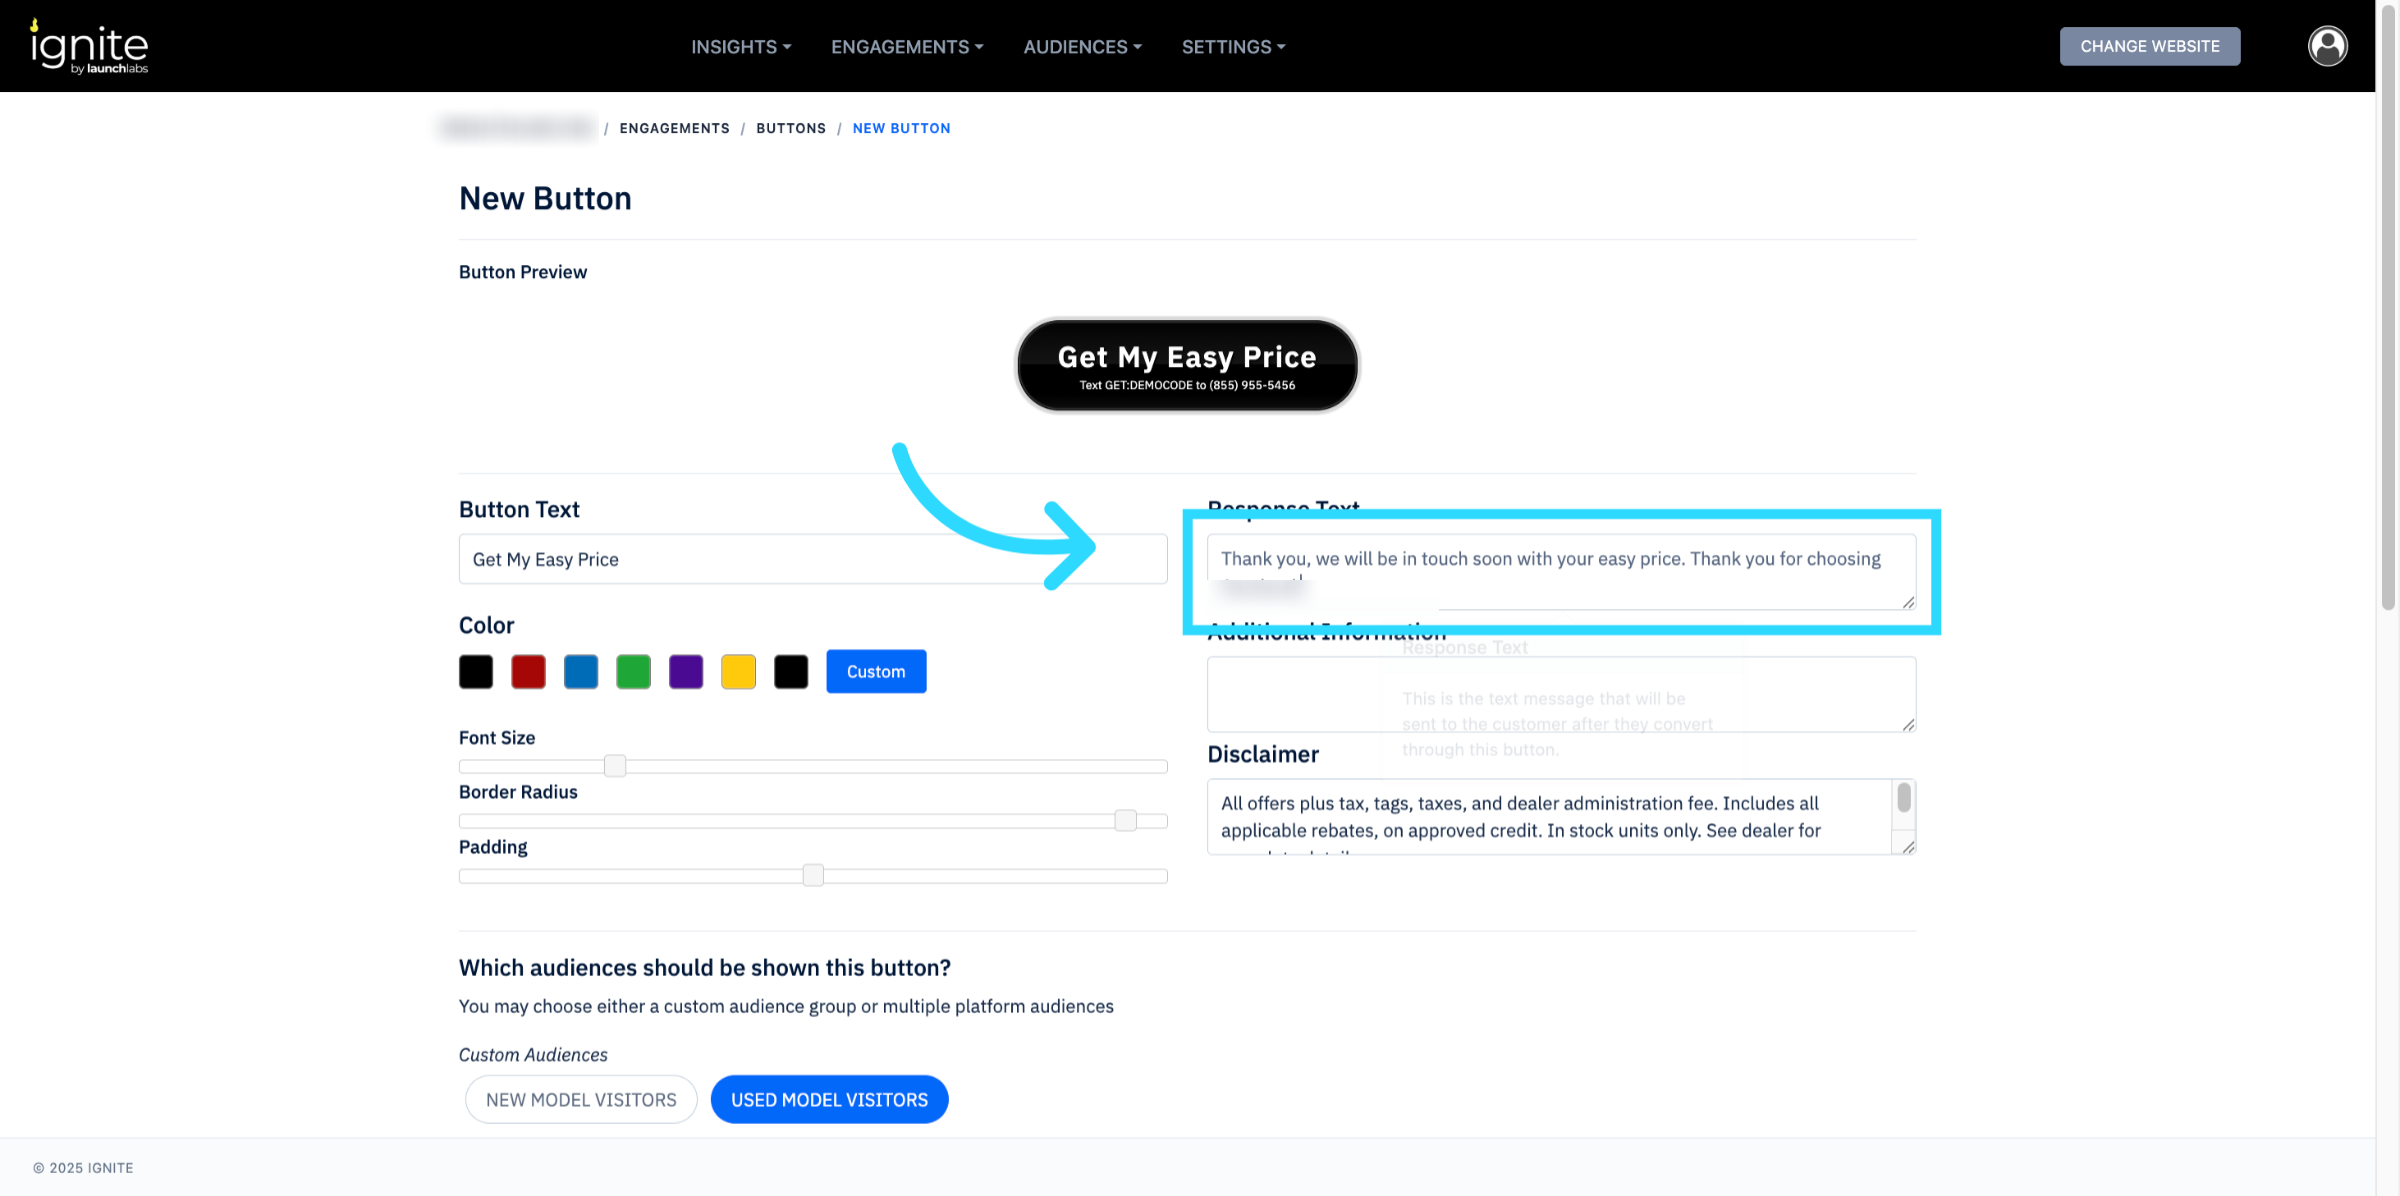
6. Add Response Text
Enter the text message that will be sent to customers once they convert through the button.
7. Provide Additional Information (Optional)
If needed, add supporting information. This will appear in a link next to the button.

8. Add Disclaimer (Optional)
If required, type in a disclaimer. This will also display in a link next to the button.
9. Create the Button
Click Create Button. Your 1-Tap Lead Button is now ready to use.

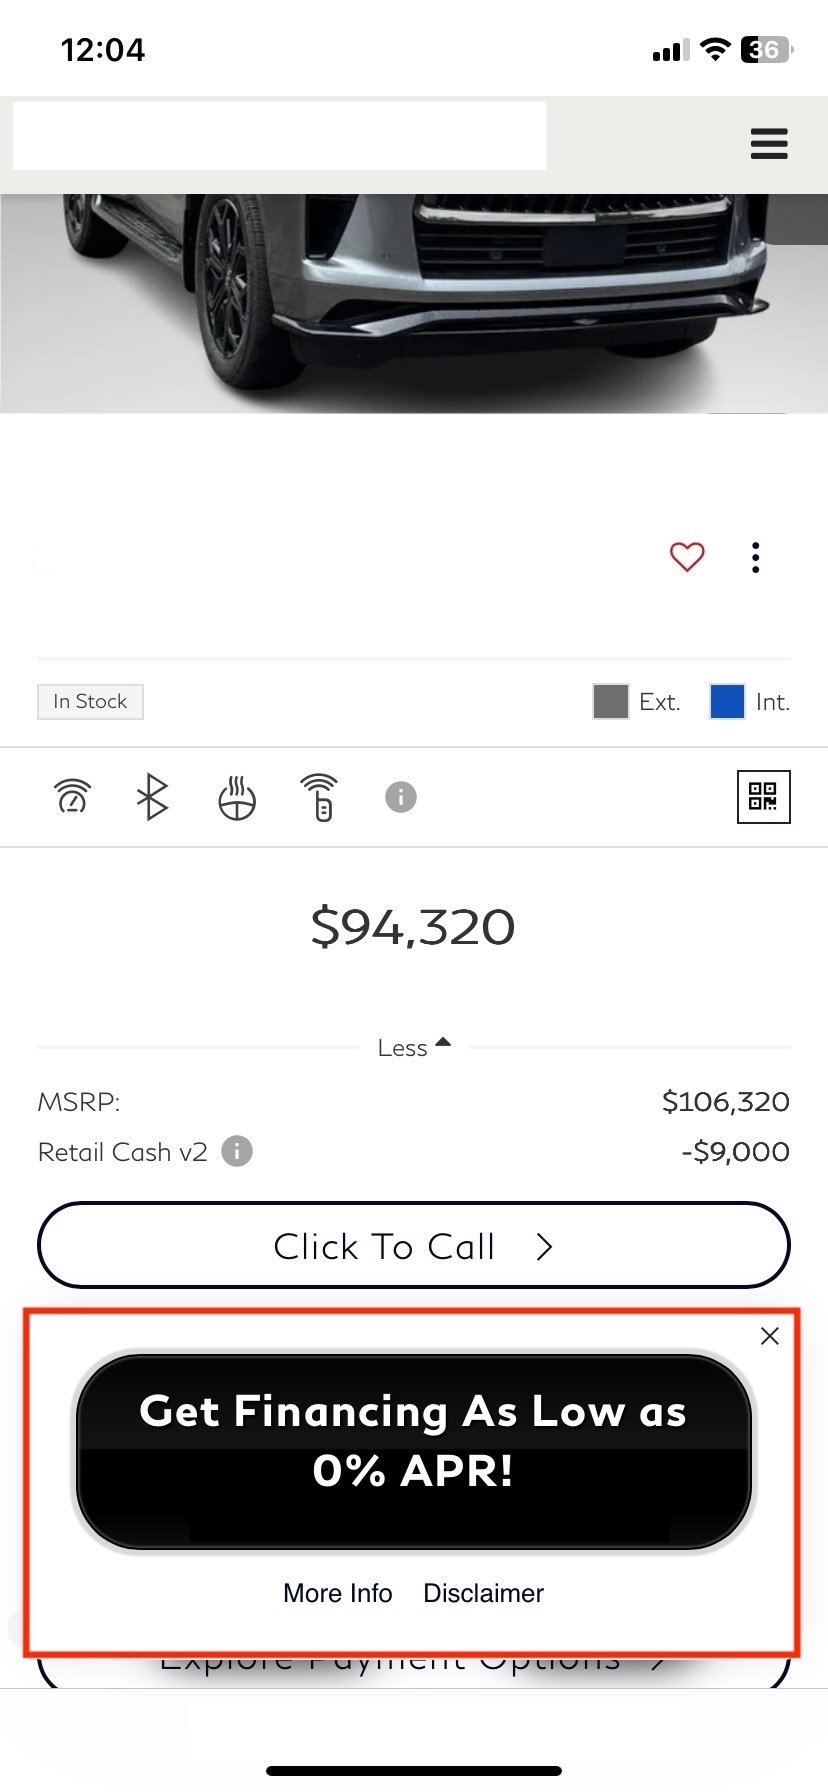
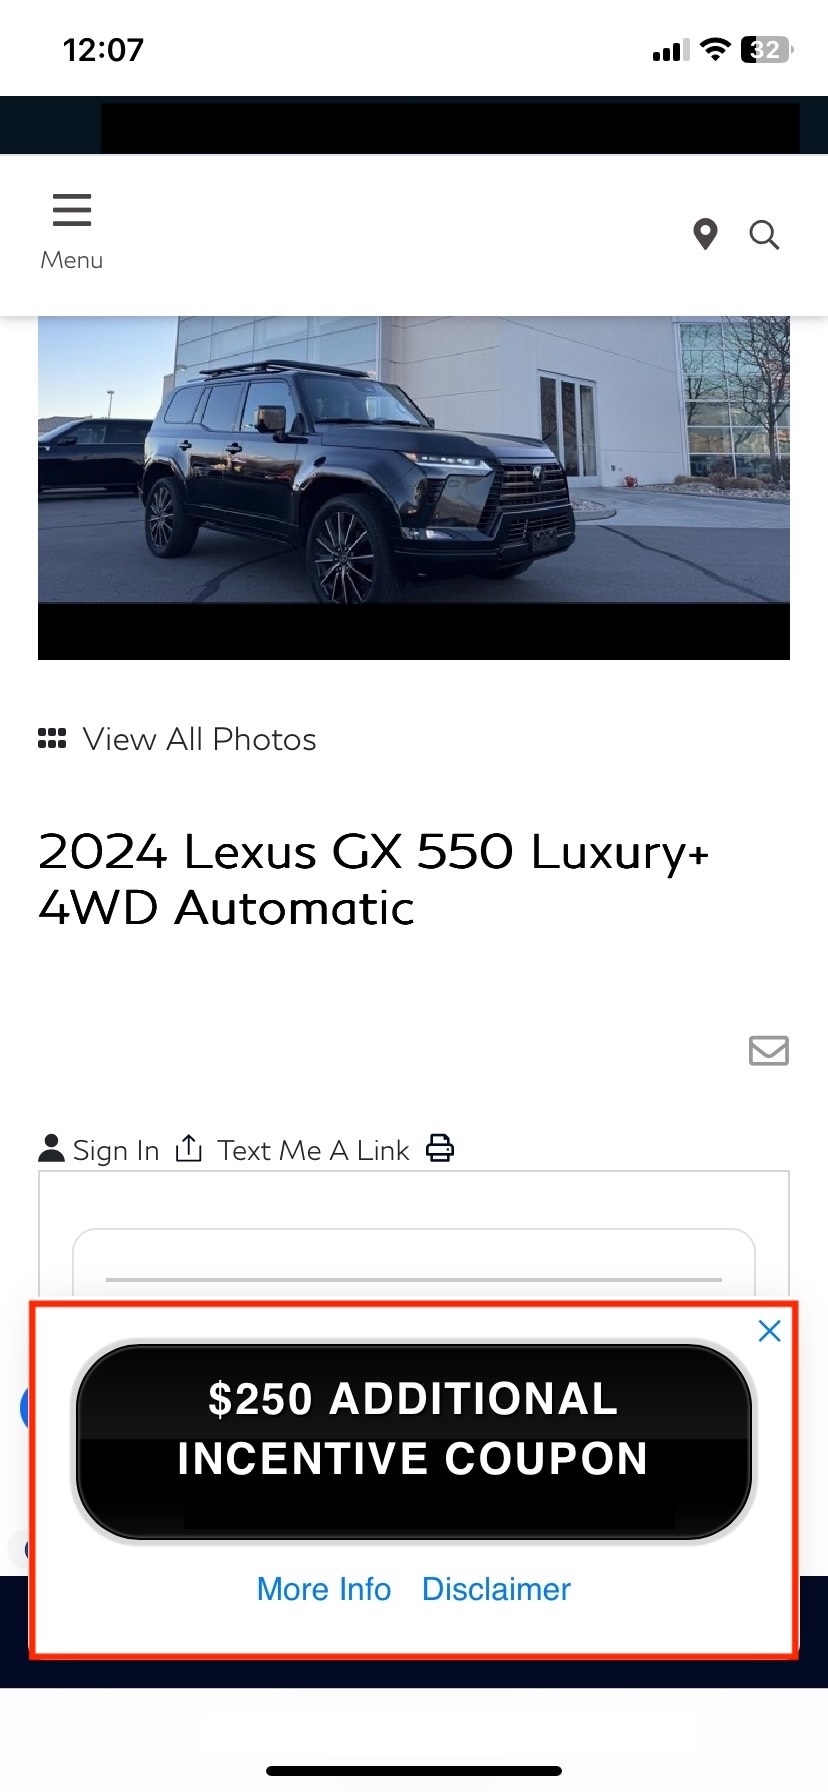
10. Once configured, your 1-Tap Lead Button will look like the below:
|
|
|
|
|
|
|
|
|