How Does Lead Routing Work?
This article explains how lead routing is handled when a visitor submits a form or claims an offer on your website. Understanding this flow helps ensure your leads are delivered to the correct destination and format based on your setup.
Step-by-Step Explanation
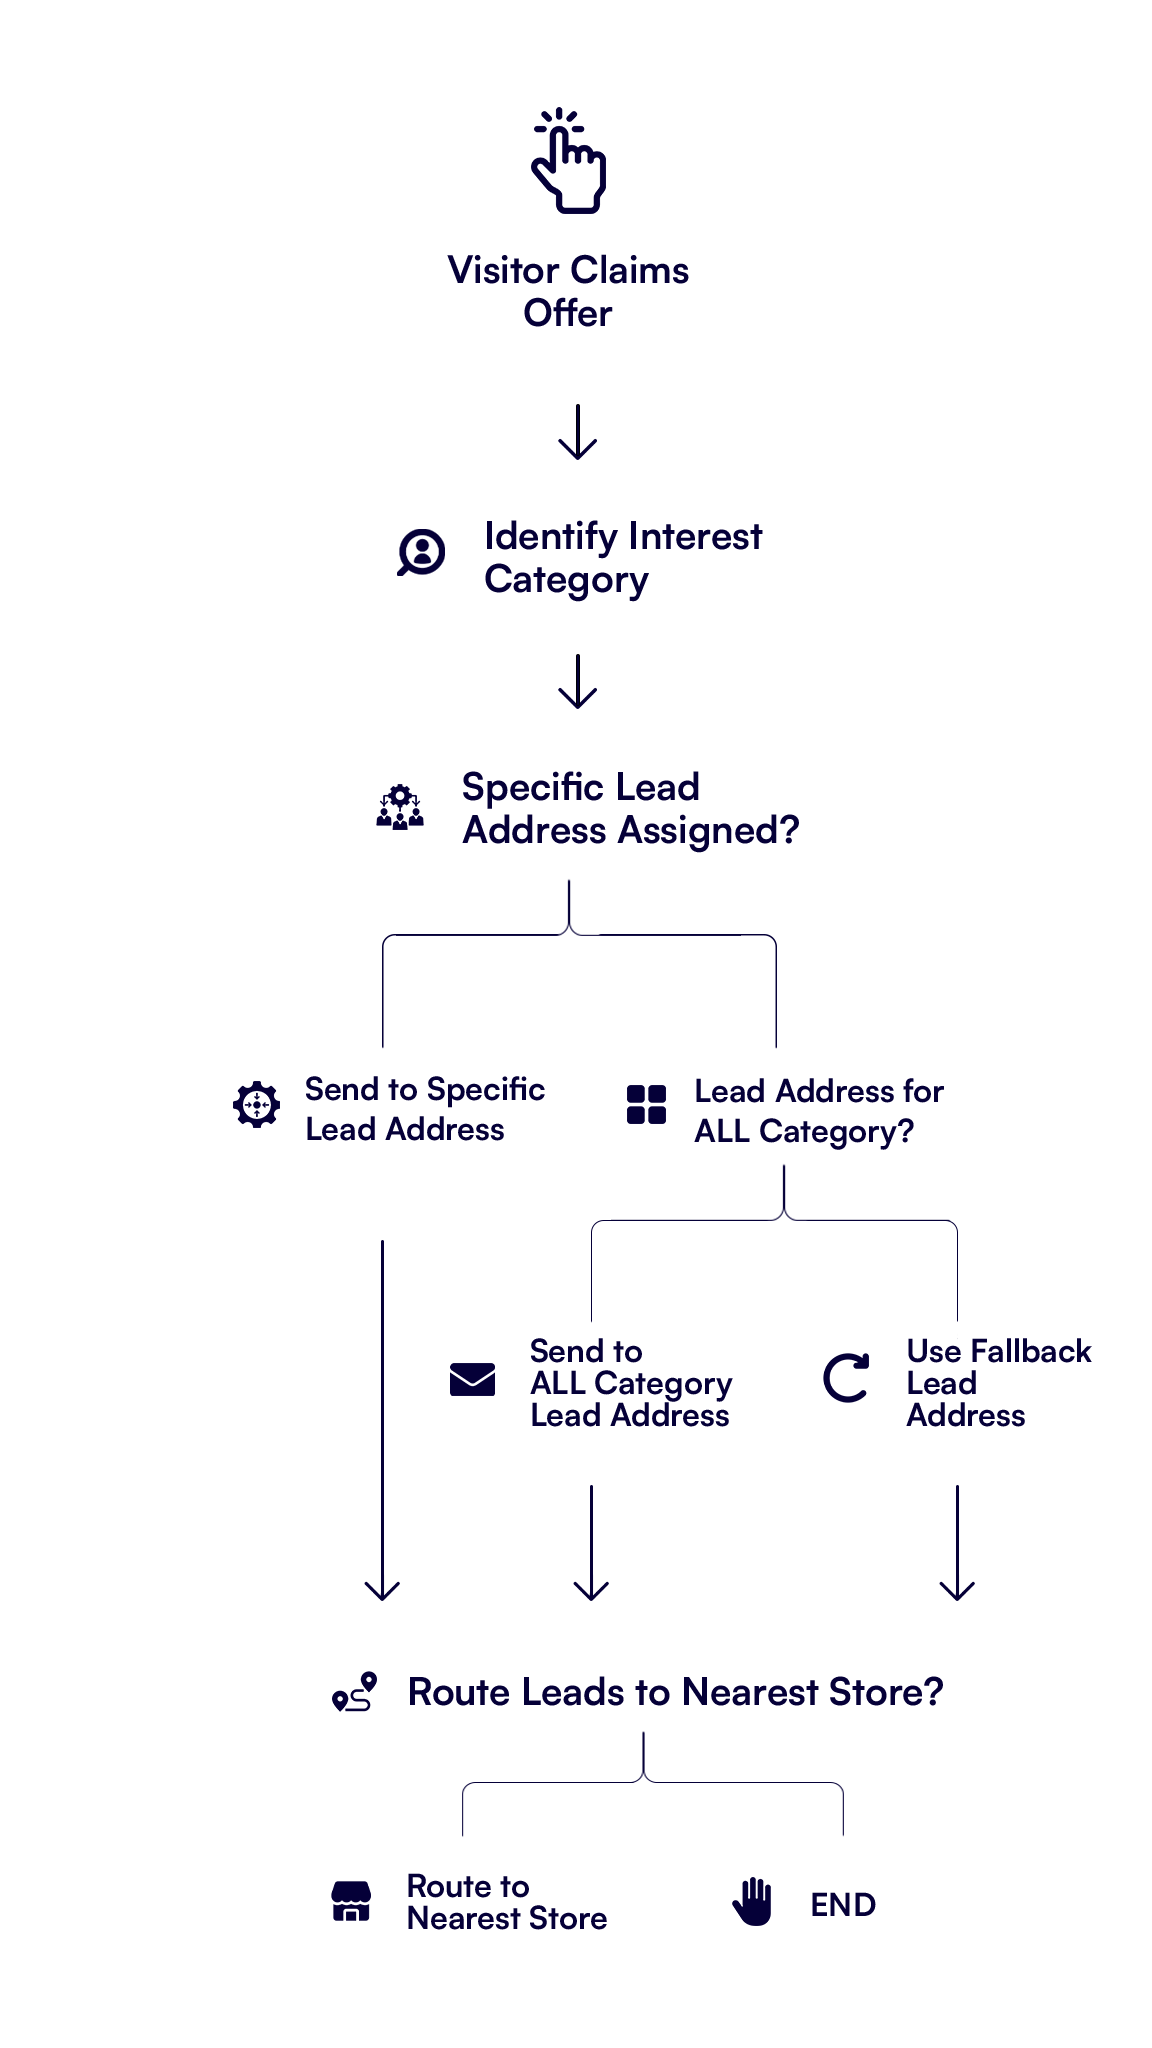
1. Determine the Visitor’s Interest Category
When a visitor claims an offer or submits a form, the platform first determines which Interest Category the offer belongs to (e.g., New Models, Service, Used Vehicles).
2. Check for Interest-Specific Lead Addresses
Next, the system checks whether the selected Interest Category has a lead address (or multiple addresses) assigned to it. If it does, the lead is immediately routed to that address.
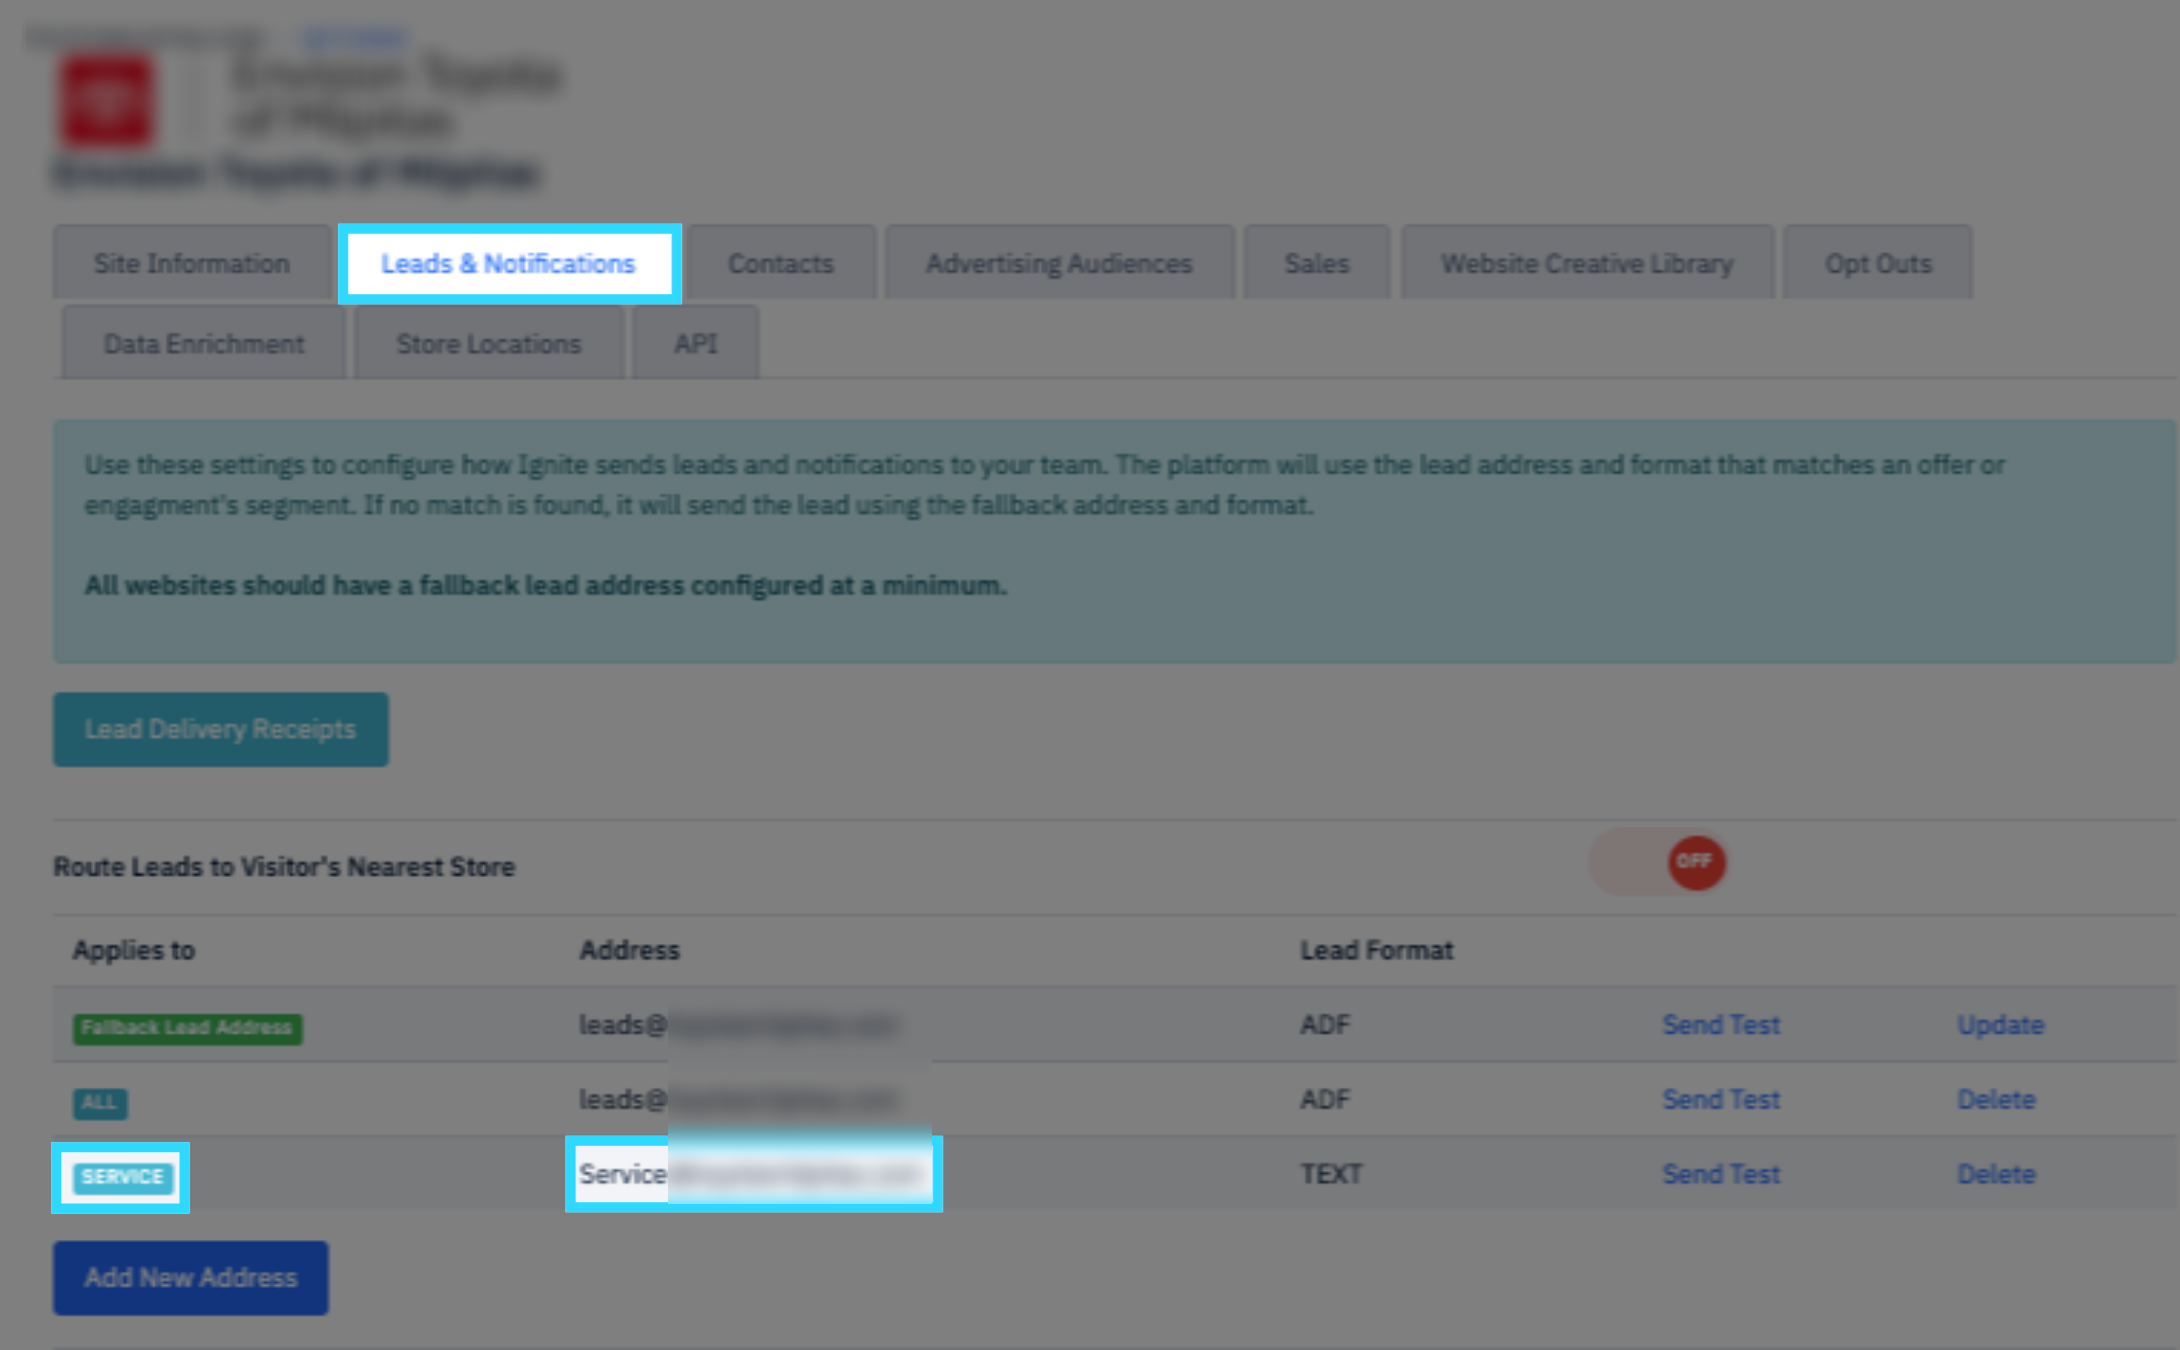
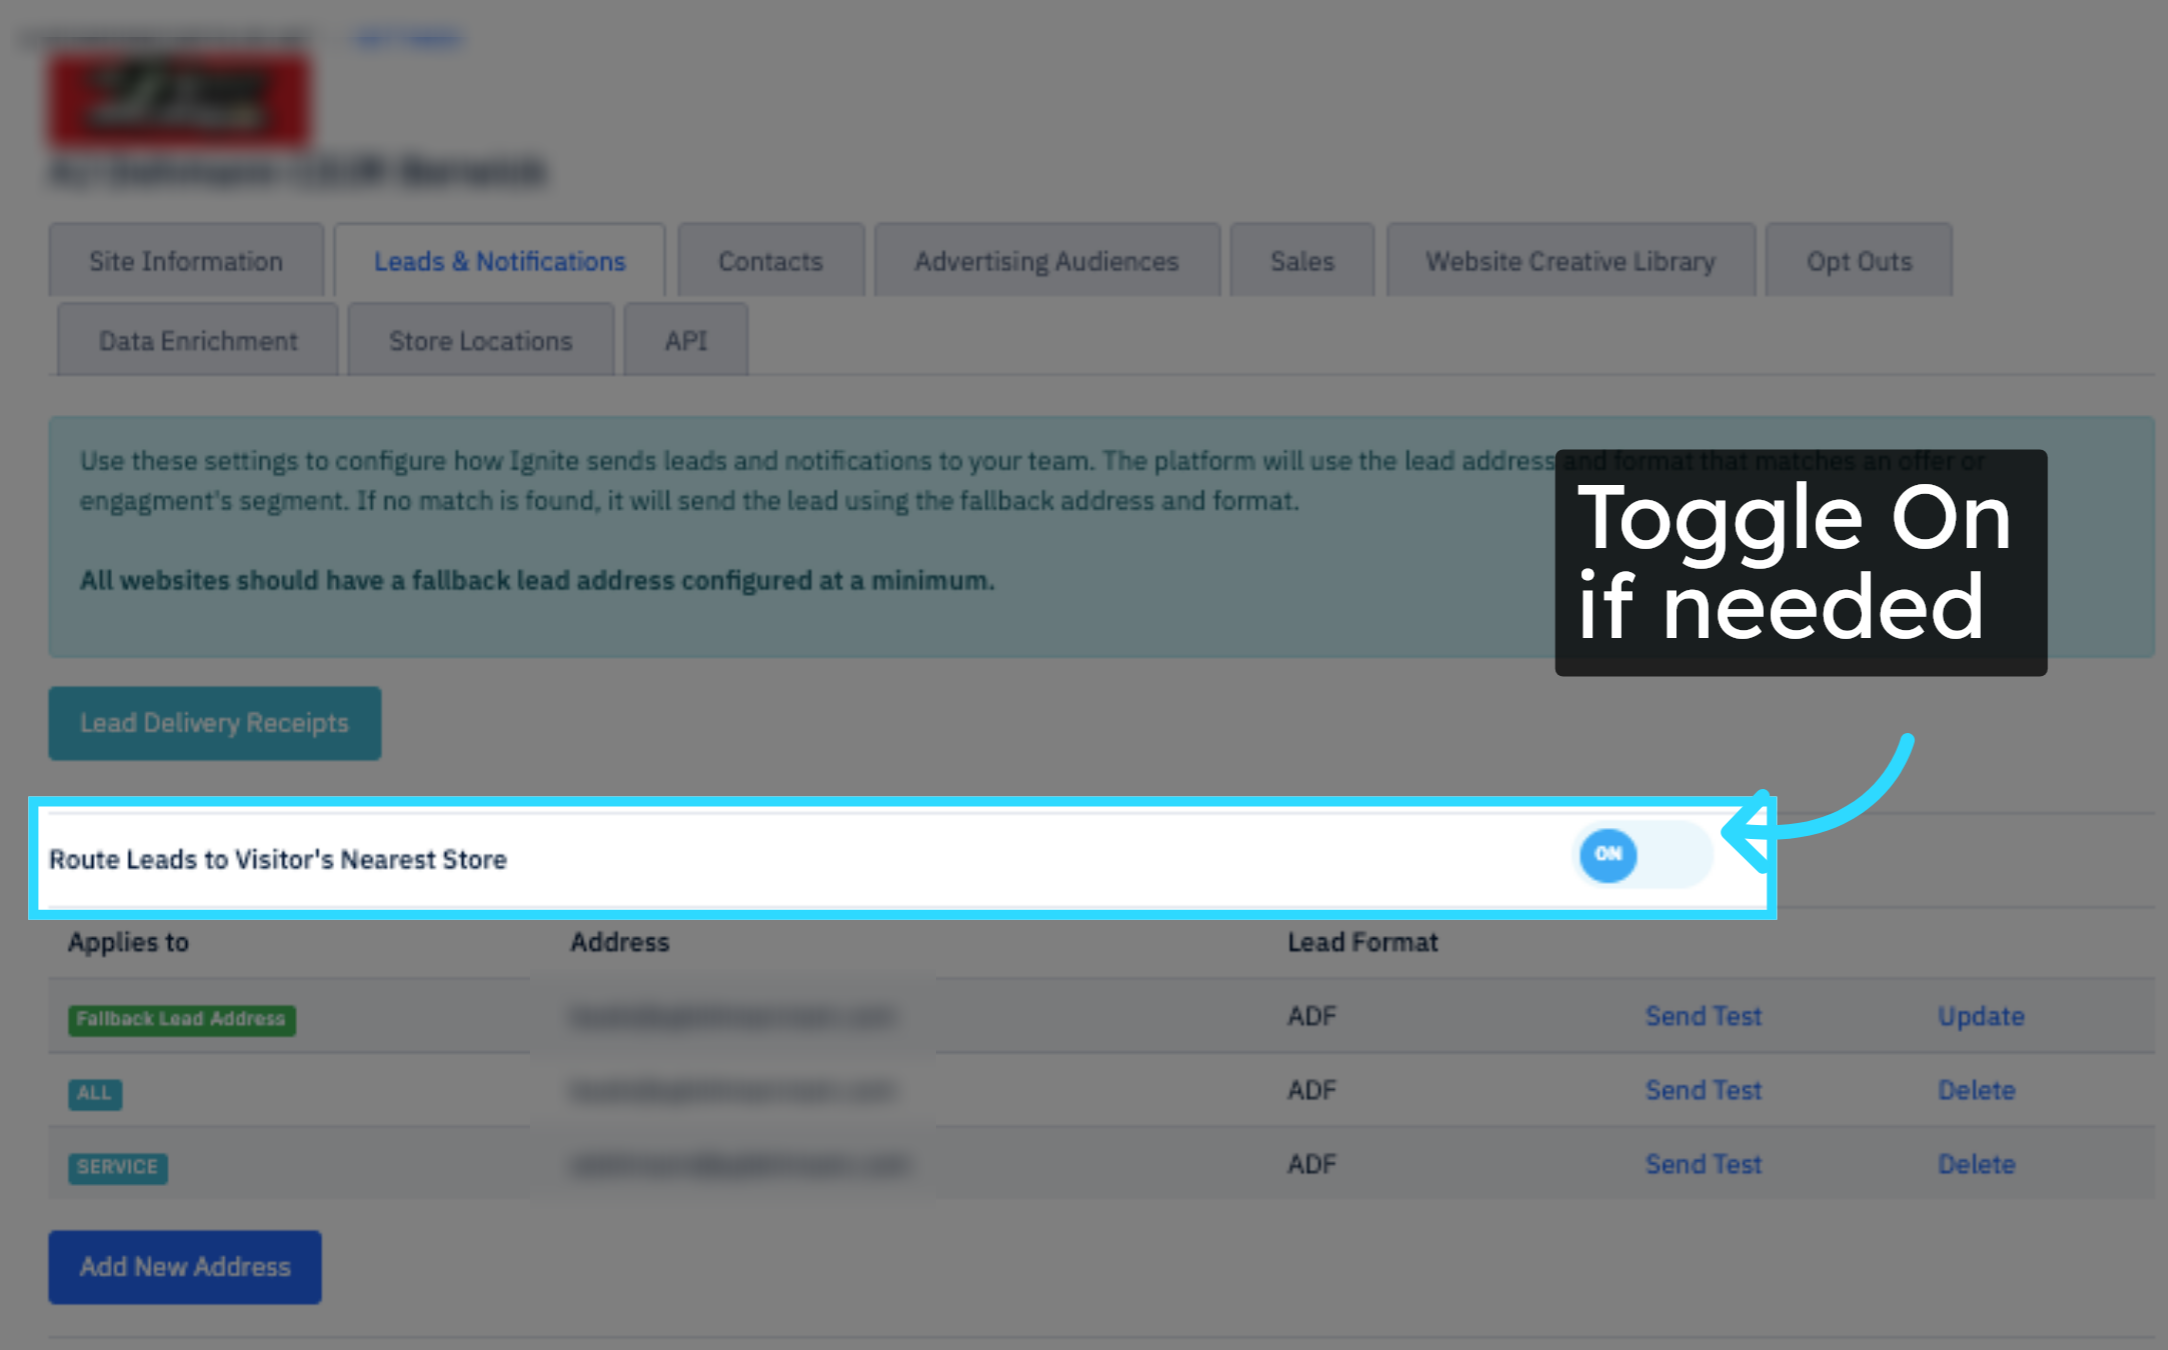
When the ALL category is used, all leads are sent to that address, even if they're also routed to another category-specific address.
3. Setting Up Category-Specific Lead Routing
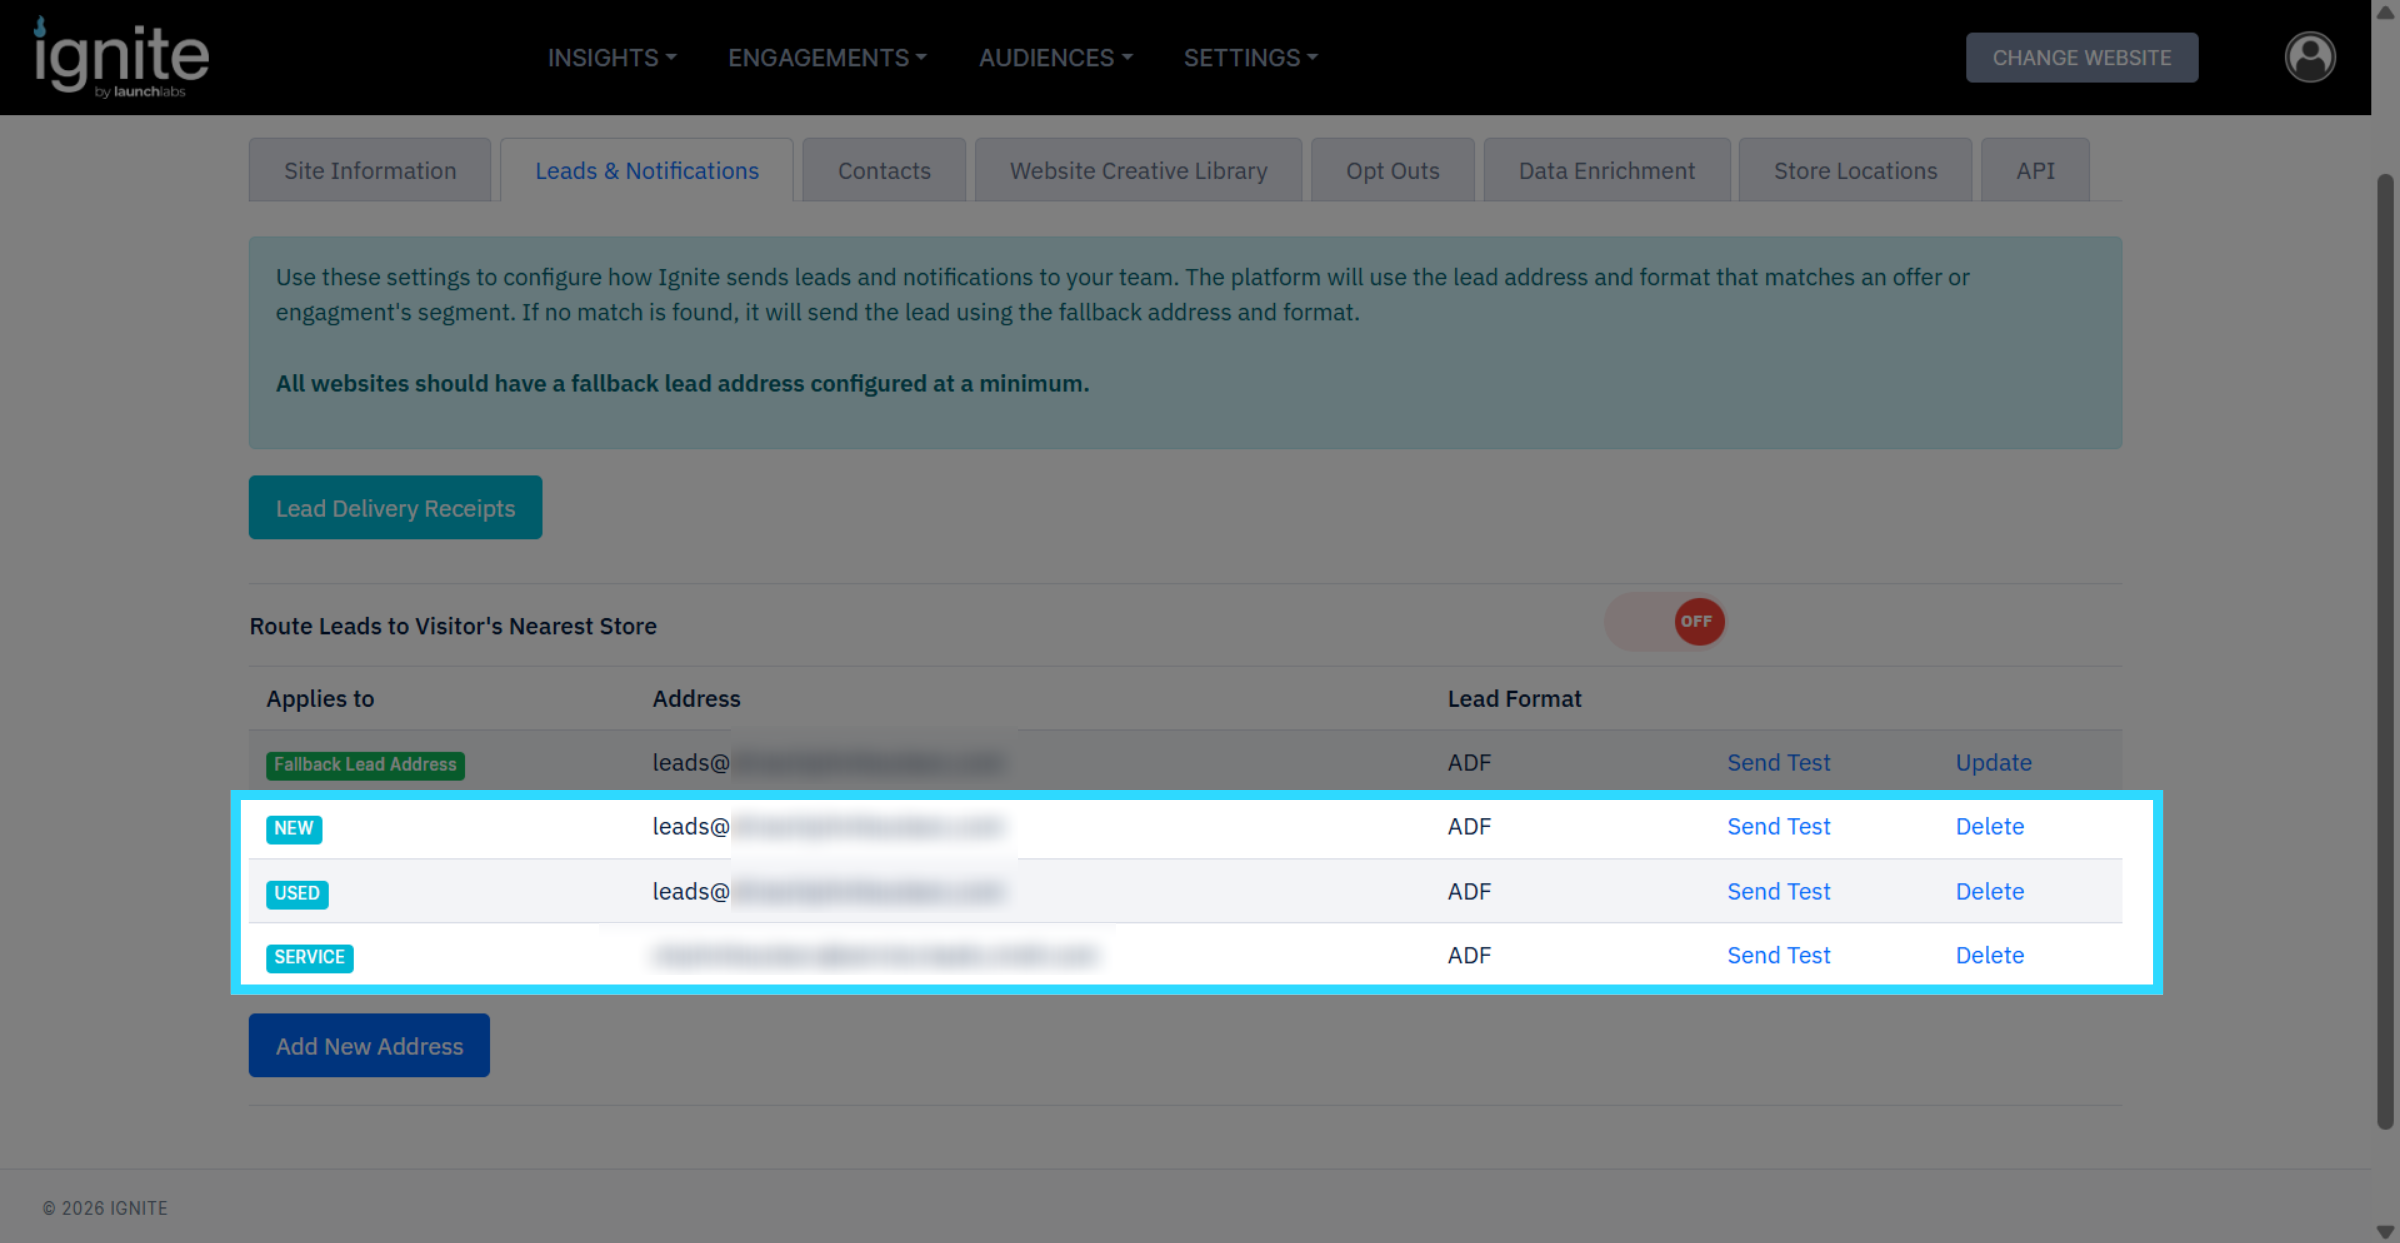
If an address is assigned to the ALL category, every lead will be sent to that address, even if the lead also matches another category. For example, in the image below, SERVICE leads will be sent to both the ALL and SERVICE email addresses.
To route only specific leads to certain addresses, assign those addresses to their respective categories, then use the Fallback Lead Address for your more encompassing or fallback lead email.
For example, if you want your Sales address to receive all leads except Service leads:
- Assign NEW and USED to your Sales address
- Assign SERVICE to your Service address
- Add your Sales address to the Fallback Lead Address
This configuration sends all non-Service leads to your Sales address, while SERVICE leads go only to your Service address.
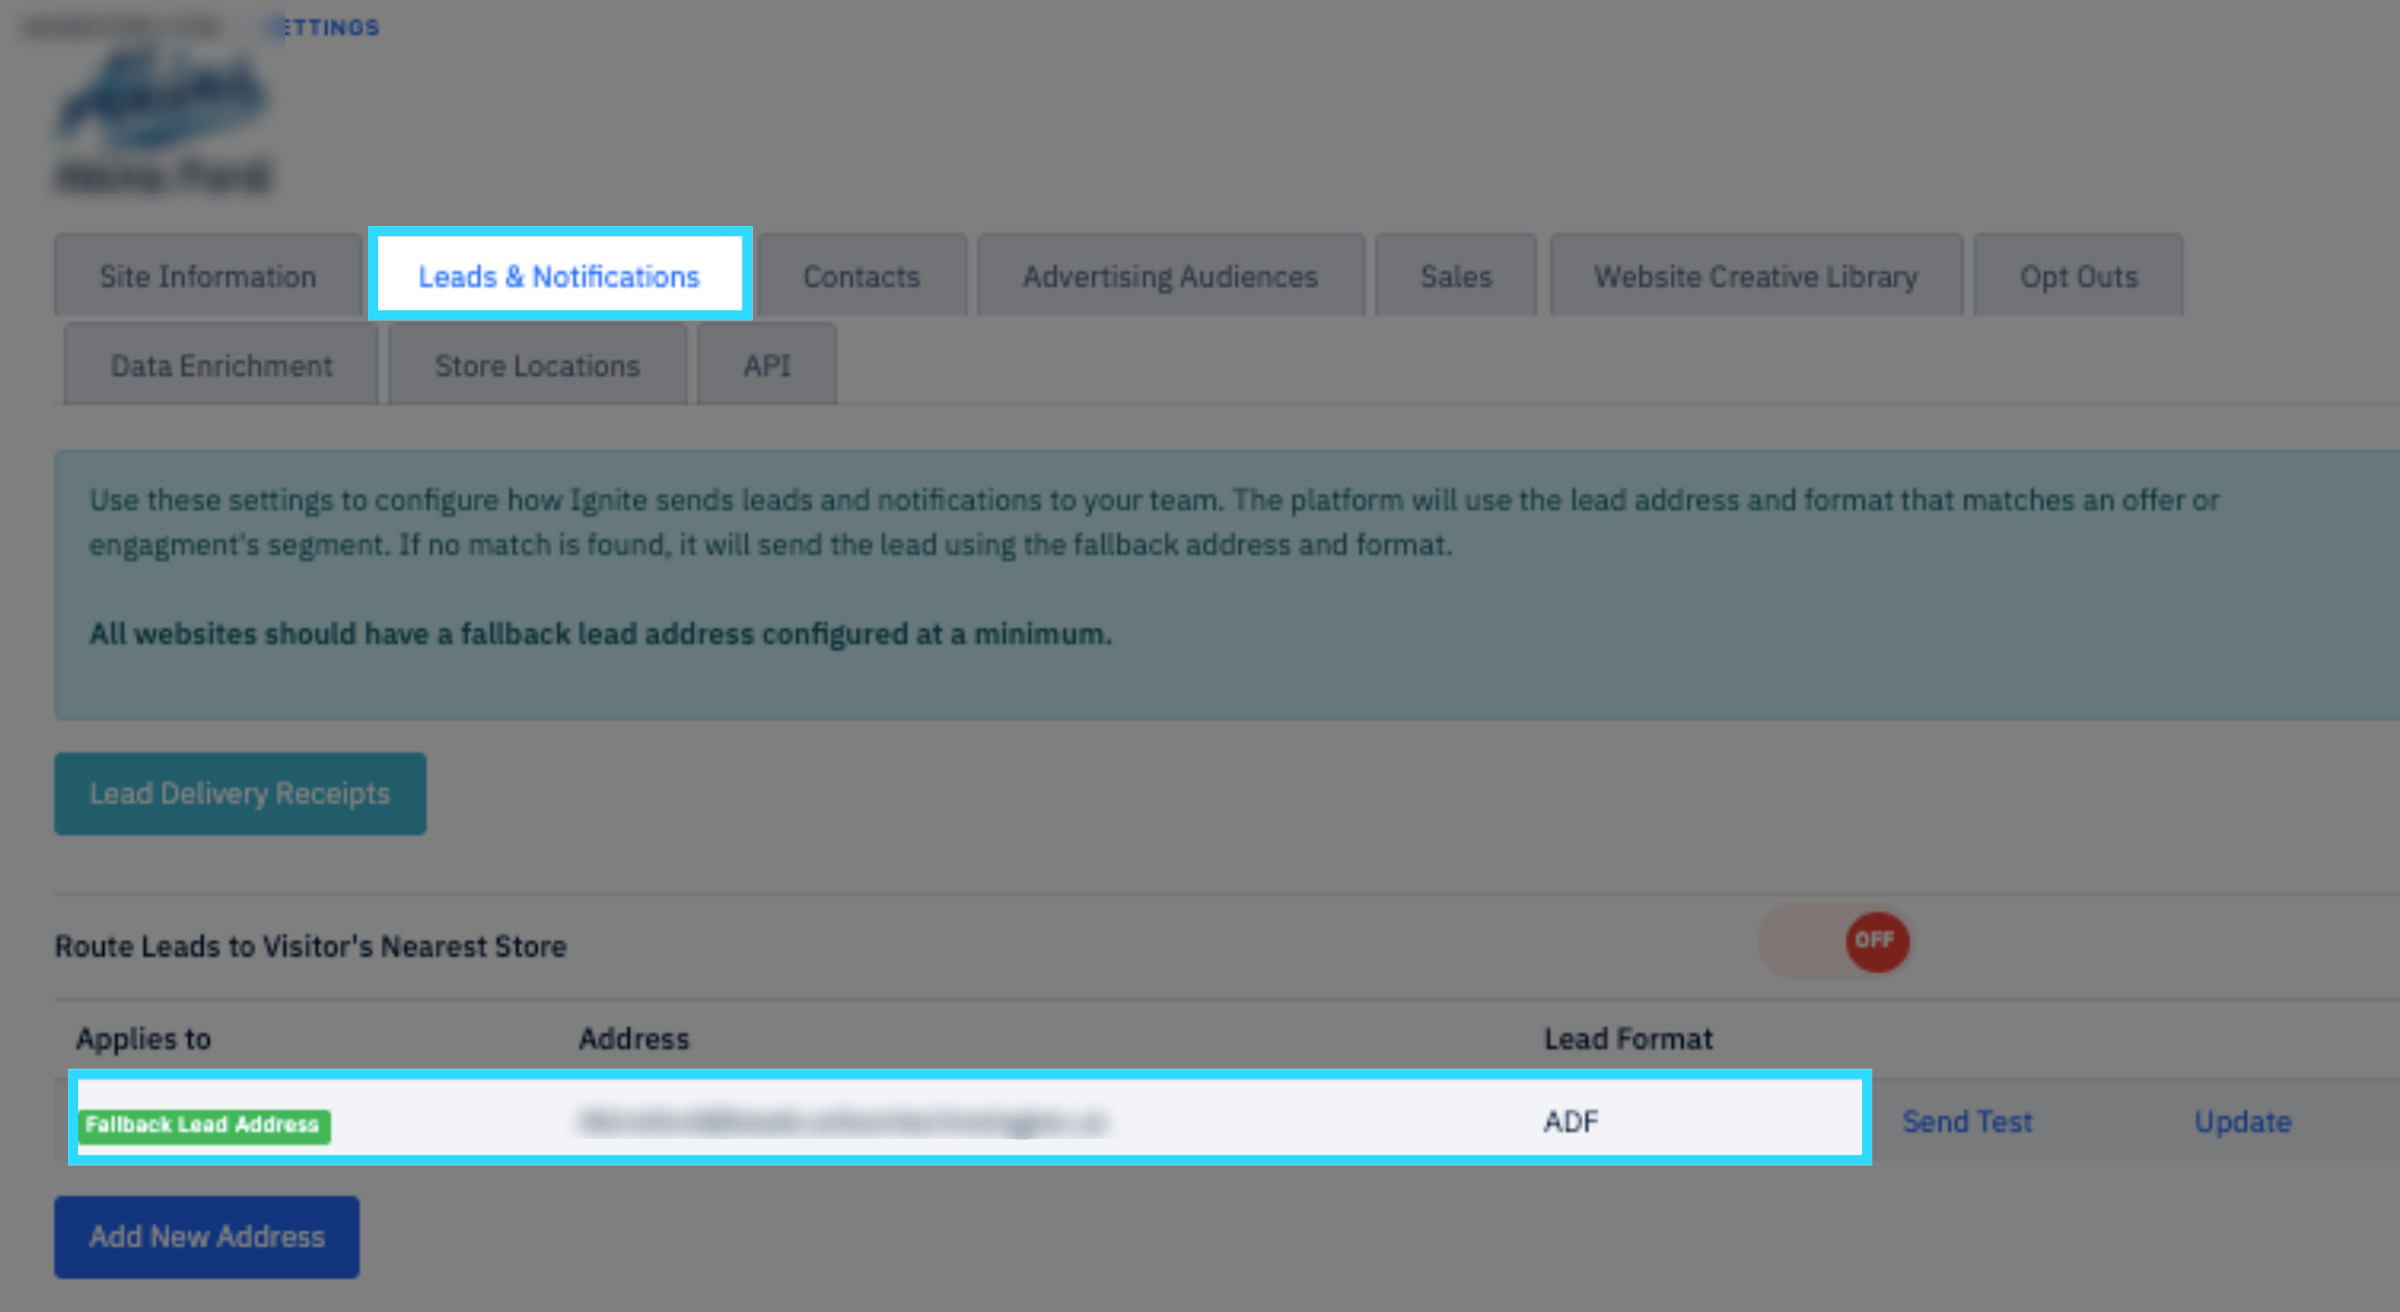
4. Default to Fallback Lead Address
If neither the Interest Category nor the ALL category has an assigned lead address, the system uses the Fallback Lead Address as the final routing option. This ensures no lead is dropped.
Make sure you select the correct format based on the system receiving the lead.
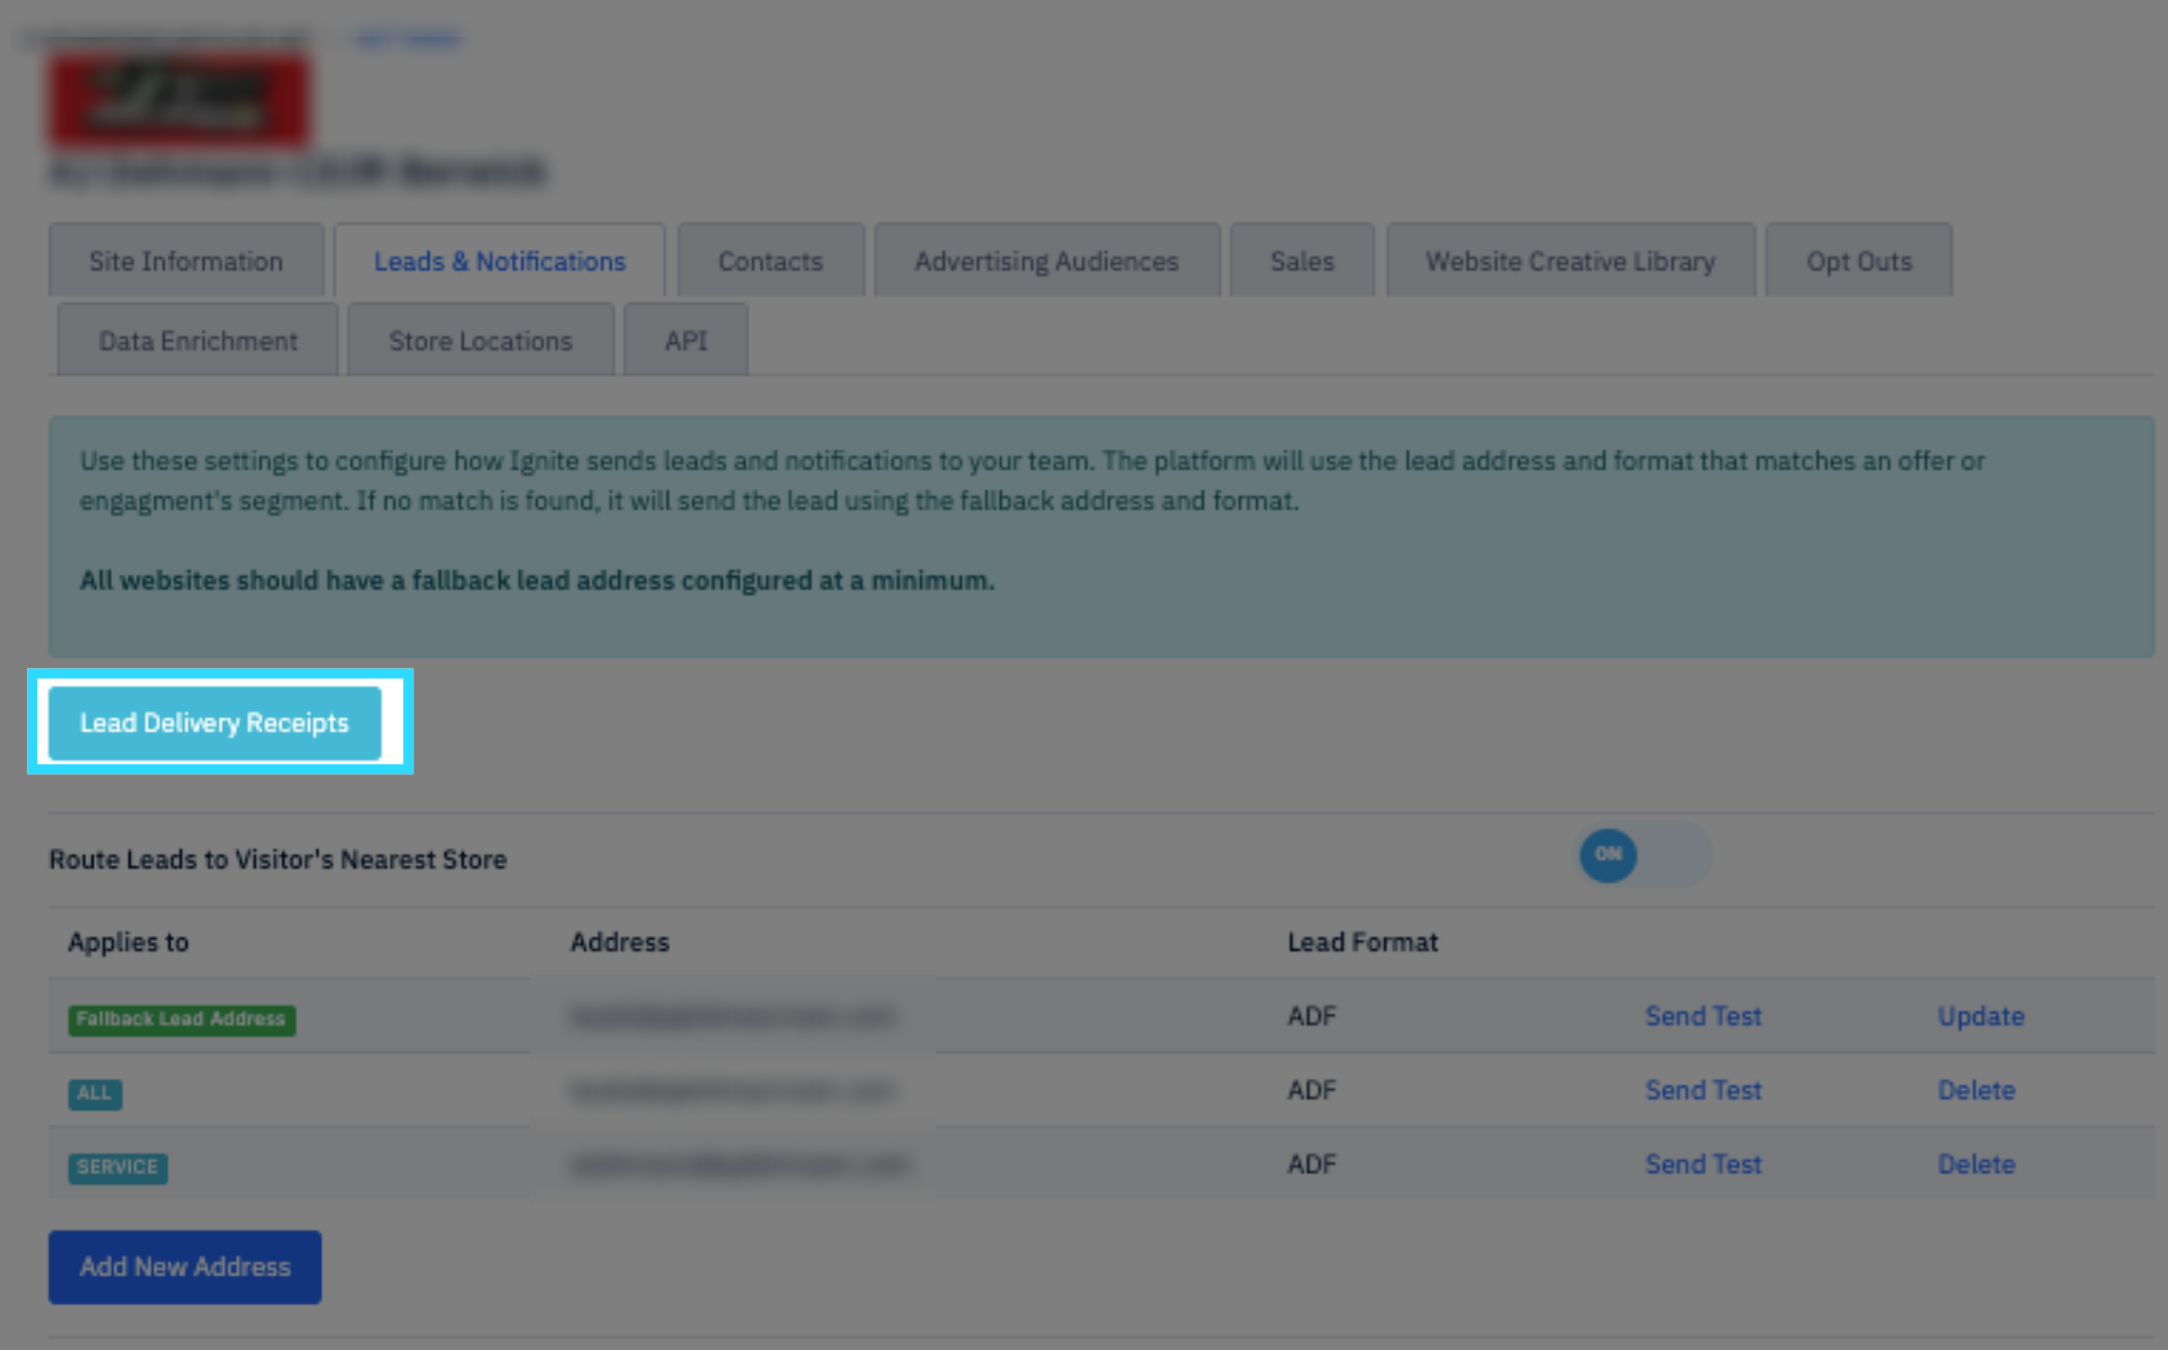
5. Routing by Location (Optional)
If your site has multiple physical locations under the same business entity, you can enable “Route Leads to Visitor’s Nearest Store.” This feature uses geolocation to automatically route leads to the closest store or location tied to your dealership or business.
Before enabling this option, ensure that store locations are properly configured in your account settings. These locations are essential for routing to function correctly and are also used for group sites or stores that share a single website. Proper setup allows the system to accurately match visitors to their nearest store and deliver leads to the right team.
Read Managing Multiple Store Locations for information on how to configure your store locations properly.
6. View Delivered Leads Anytime
You can click the Lead Delivery Receipts button at any time to view all leads that have been successfully delivered through the platform.